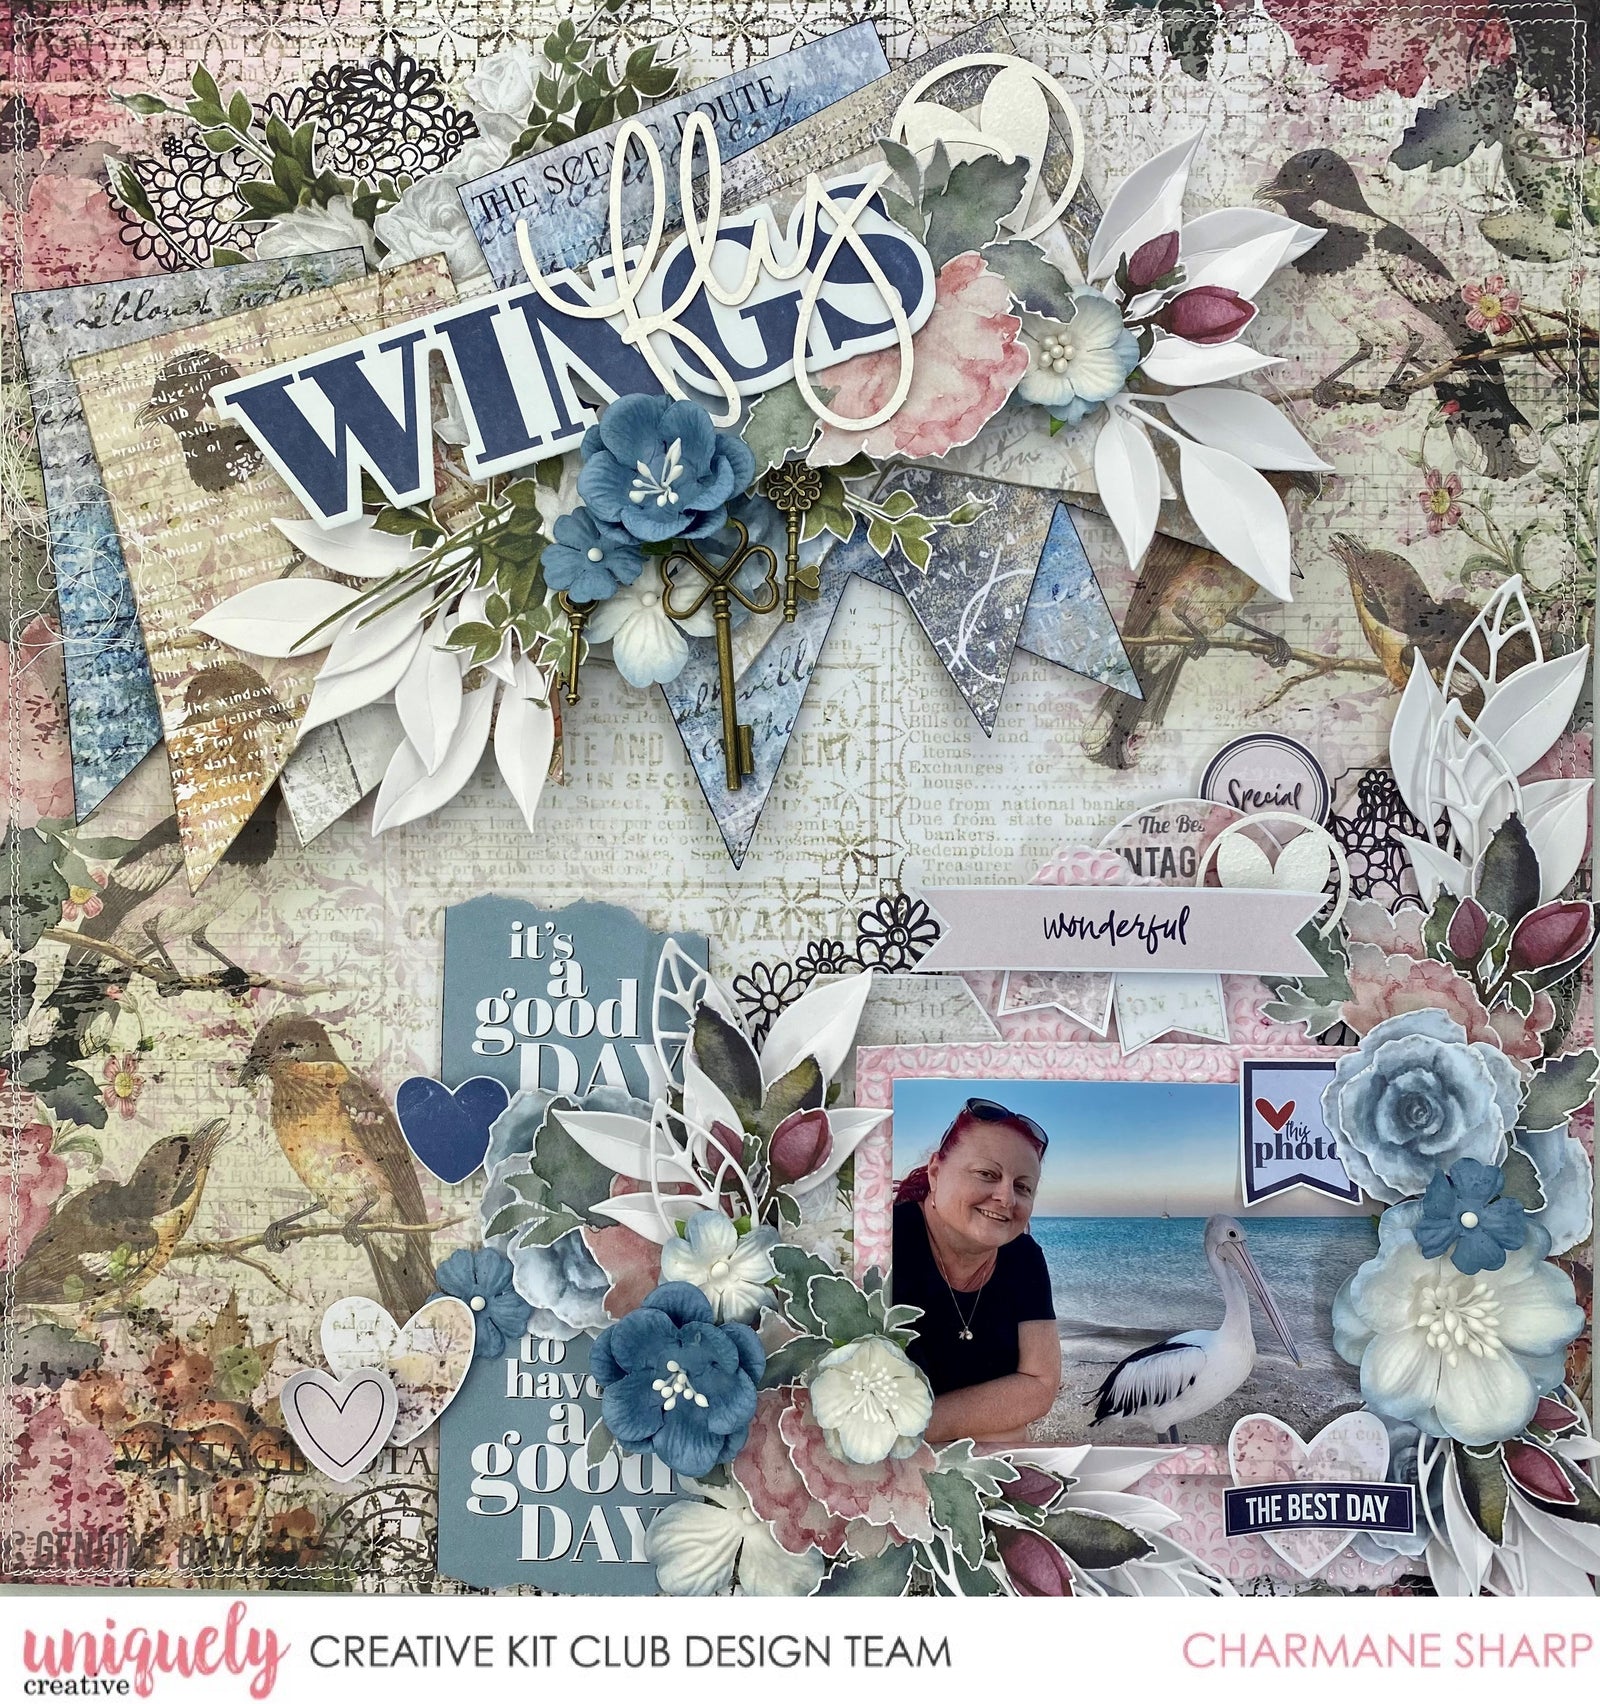
Wings Layout - Charmane Fly

Uniquely Creative Products Used
UCP2181 Roots & Wings Bloom And Grow, UCP2182 Roots & Wings Home Is Where The Heart Is, UCP2179 Spread Your Wings, UCP2177 A Life Well Lived, UCP2178 Welcome Home, UCE1815 Dusty Blue Flowers, UCE1827 Mixed Keys, UCD1968 Mixed Leaves Die, UCEF2004 Daisy Embossing Folder, UCE1775 Watercolour Cardstock, UCP2184 Roots & Wings Creative Cuts, Roots & Wings Cut-A-Part-Sheet, UC1827 Posey Stamp, UCE1804 Foam Mounts Circles, UCE1803 Foam Mounts Squares & Strips
Other Products Used
Sewing Machine, Die Cut Machine, Glue, Trimmer, Scissors, Watercolours
Instructions
1. Cut out some banners of various sizes from multiple papers as per the above list. Set them together to sit in the corner of the layout. See the outside border of the background paper. If you don’t see, then use a pen to draw border and double sided tape to join banners together.

2. Stamp the posey stamp with black ink in the top left corner of background. Also in the bottom right corner around where your photo will sit. Cut out two pieces of watercolour cardstock to fit the embossing folder. Apply watercolour in pink to one side of the folder and run through your machine. Then repeat with the watercolour on the other side of folder and you will get two different looks. Wipe folder clean each time.

3. Adhere banners with foam strips to the top right corner. Using foam squares mount the photo on a piece of embossed card and cut a 5mm border all the way round. Tear two pieces from the other embossed card and poke out the bottom and top of photo with foam squares for definition.

4. Tuck a tag in between layers to the left of your photo. From the paper Home Is Where The Heart Is, fussy cut flowers, hearts, and also from the cut-a-part sheet.

5. Using foam squares adhere fussy cut elements as per photos 4 and 5. Raise flowers as required to make layers. Also add in other cut outs or creative cuts like the Wings word and the quote. I cut from the paper and split in two pieces. I tore the top and bottom edges and left a gap for flowers so you can still see the printed bird. Bend some of the edges up on flowers and bottom of banners to add some dimension.

6. Glue dusty blue flowers to the layout as per photo and gesso the laser cut fly word, along with Hearts in Circles gluing into place also.

7. Attach 3 Gold Keys coming down from the flowers under the title on the banners.
8. Finishing touches are added with die cut mixed leaves cut from the watercolour card. These are placed out from the floral clusters as the finished photo shows. Then add some fussy cut leaves and pink flower buds.