30 day change of mind returns available
30 day change of mind returns available
Add description, images, menus and links to your mega menu
A column with no settings can be used as a spacer
Link to your collections, sales and even external links
Add up to five columns
Add description, images, menus and links to your mega menu
A column with no settings can be used as a spacer
Link to your collections, sales and even external links
Add up to five columns
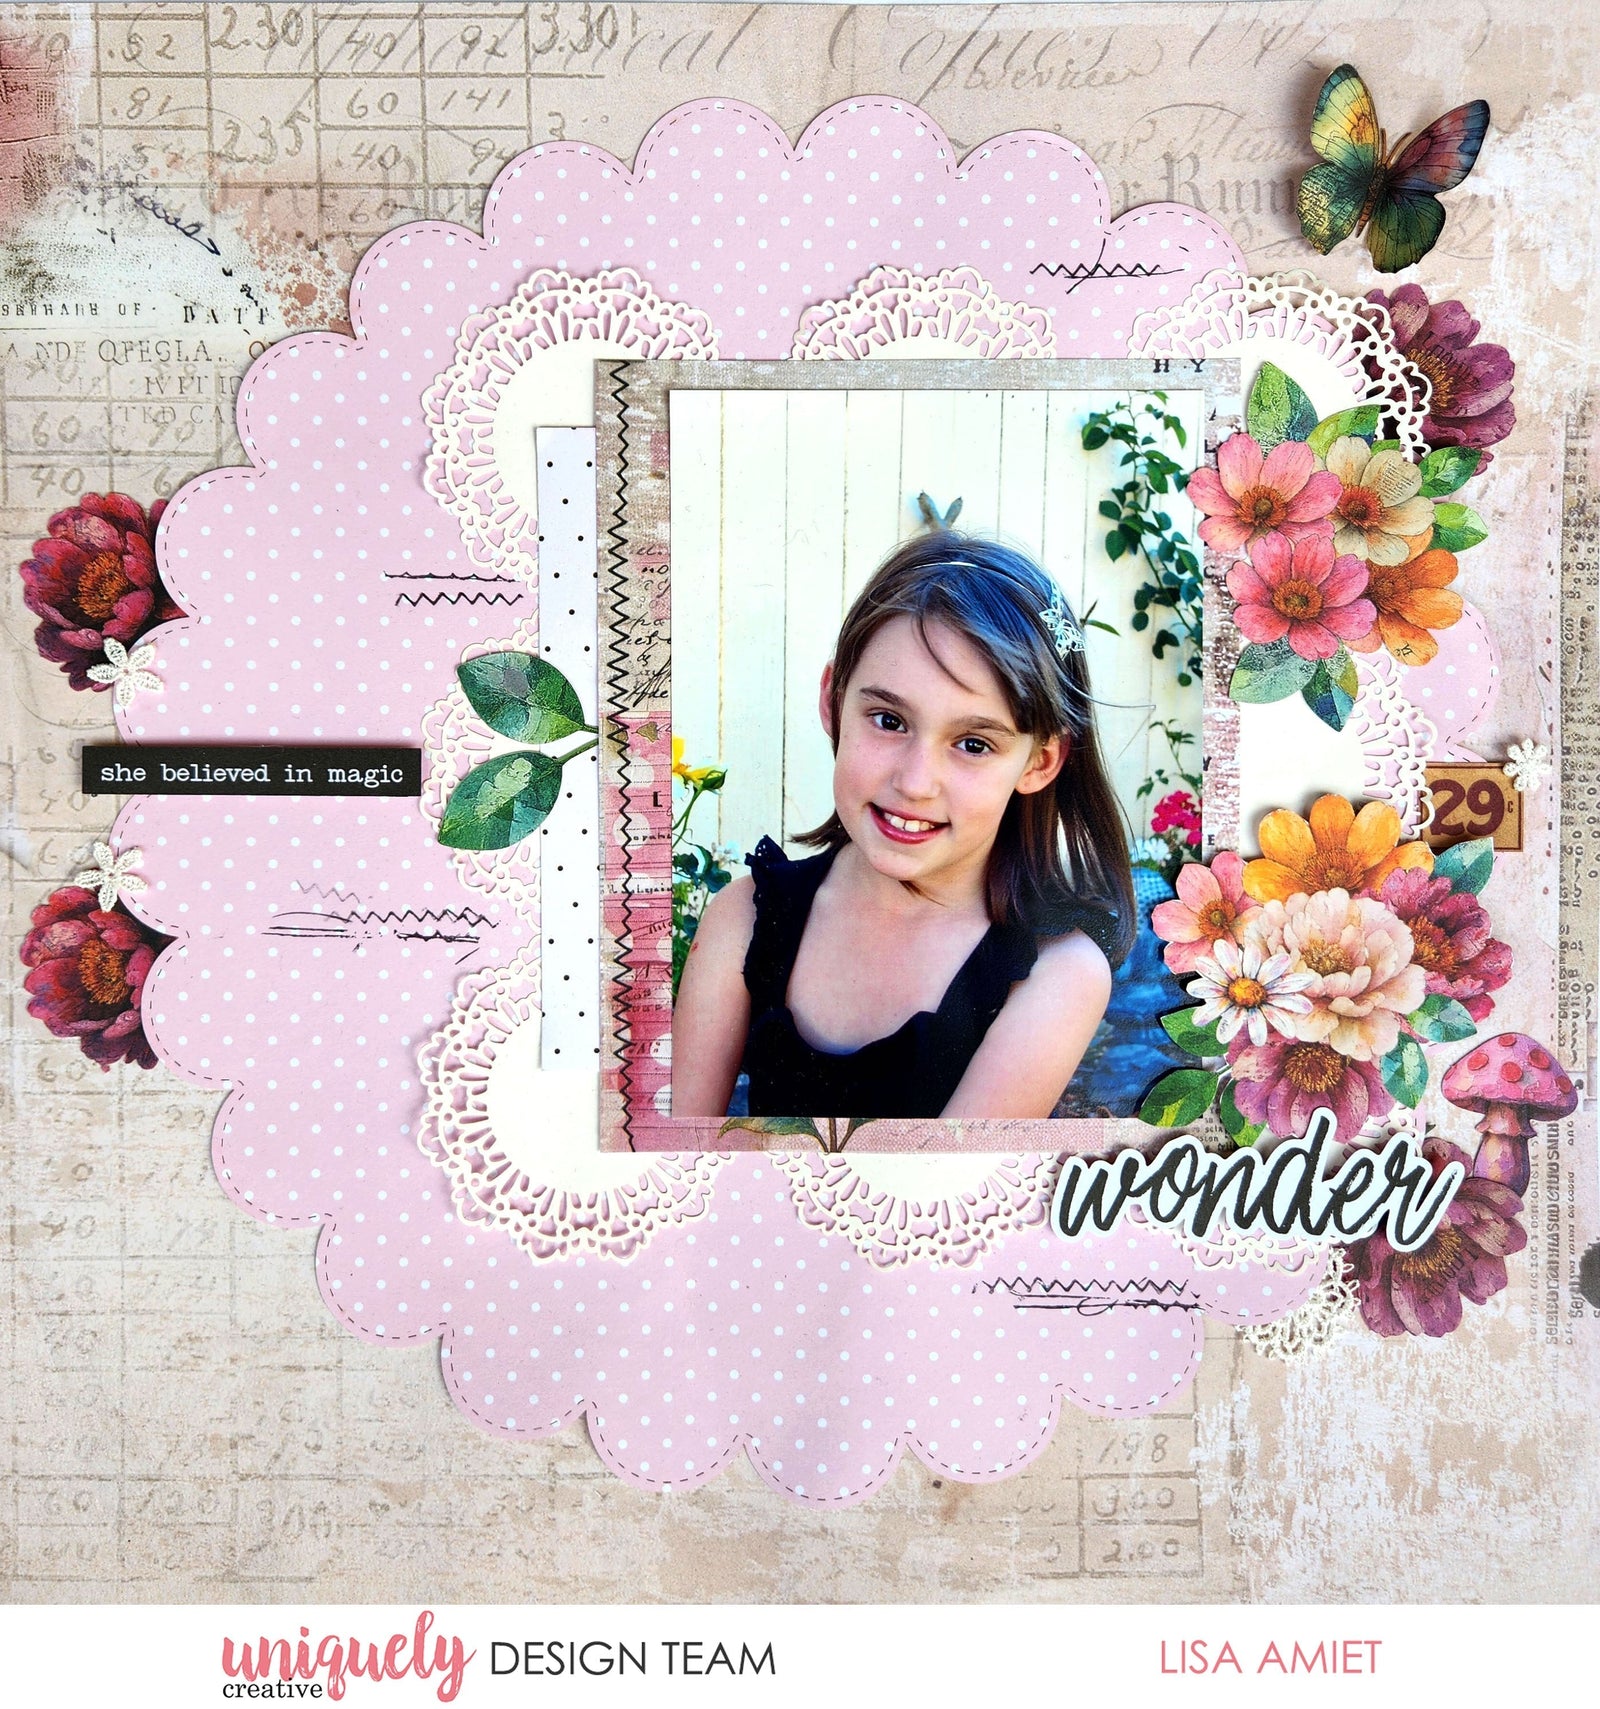
WONDER LAYOUT TUTORIAL - LISA AMIET
November 08, 2025

To recreate this beautiful layout created by Design Team member Lisa Amiet you can follow the steps below:
Uniquely Creative Products Used:
· UCP3023 Notes of Grace Paper
· UCP3025 Dream Street Paper
· UCP3027 Kind of Lovely Paper
· UCP3030 Little Curiosities PAper
· UCE2156 Scalloped Decorative Base Layer
· UCp3033 Dressed In Daydreams Creative Cuts
· UCE2041 White Layering Doilies
· UCE1955 Lace Daisies
· Cut-a-part Sheet
· UCE1933 Ripped & Stitched Stamp
Other Products Used:
· Black Soot Distress Ink
· Glue, double-sided tape, foam mounts
Photo size: 4" x 6"
Step 1:
Use Dream Street (reverse) as your base paper. Adhere the Scallop Decorative Base Layer to the centre of your base paper, ensuring not to glue right to the edge. Tuck and adhere florals from the Creative Cuts to the right and left sides of your page. In the bottom right corner adhere one of the Lace Daisies and a mushroom Creative Cut with floral. Use the Ripped & Stitched Stamp and black ink to stamp on the Scallop Decorative Base Layer – See image 1
Step 2:
Lay out and adhere nine doilies to your page, with them off centre to the scallop piece, more to the right side of the page – See image 2
Step 3:
Cut a 12.5 x 15cm piece of Kind of Lovely. Adhere your photo to this, again more to the right side than centre. Cut a 3 x 12.5cm piece of Notes of Grace paper (reverse). Adhere these pieces to your page, with the strip of spotted paper to the left side of your photo matt - See image 3
Step 4:
Fussy cut ticket from Little Curiosities paper and adhere to right side of photo, slightly tucked under the edge of one of the doilies. Fussy cut floral cluster from the Cut-a-part Sheer and adhere, using Foam Mounts, to the bottom right corner overlapping previous piece. Adhere floral Creative Cut to the top right side overlapping doily. Adhere and tuck Creative Cuts leaves under photo matt in the centre of the left side of your photo – See image 4
Step 5:
Using Foam Mounts adhere the title from the Creative Cuts, overlapping previous floral piece. Use Foam Mounts to adhere the Creative Cuts sentiment to the centre of the left side – See image 5
Step 6:
To finish, adhere Creative Cuts butterfly by the body with wings folded up to the top right corner of your page. Adhere two small flowers, from the Lace Daisies to the edge of your scallop piece on the left side. Adhere another small flower from the Lace Daisies to the right side, overlapping ticket – See main image
Leave a comment
Newsletter
Join our mailing list and never miss an update …
