30 day change of mind returns available
30 day change of mind returns available
Add description, images, menus and links to your mega menu
A column with no settings can be used as a spacer
Link to your collections, sales and even external links
Add up to five columns
Add description, images, menus and links to your mega menu
A column with no settings can be used as a spacer
Link to your collections, sales and even external links
Add up to five columns
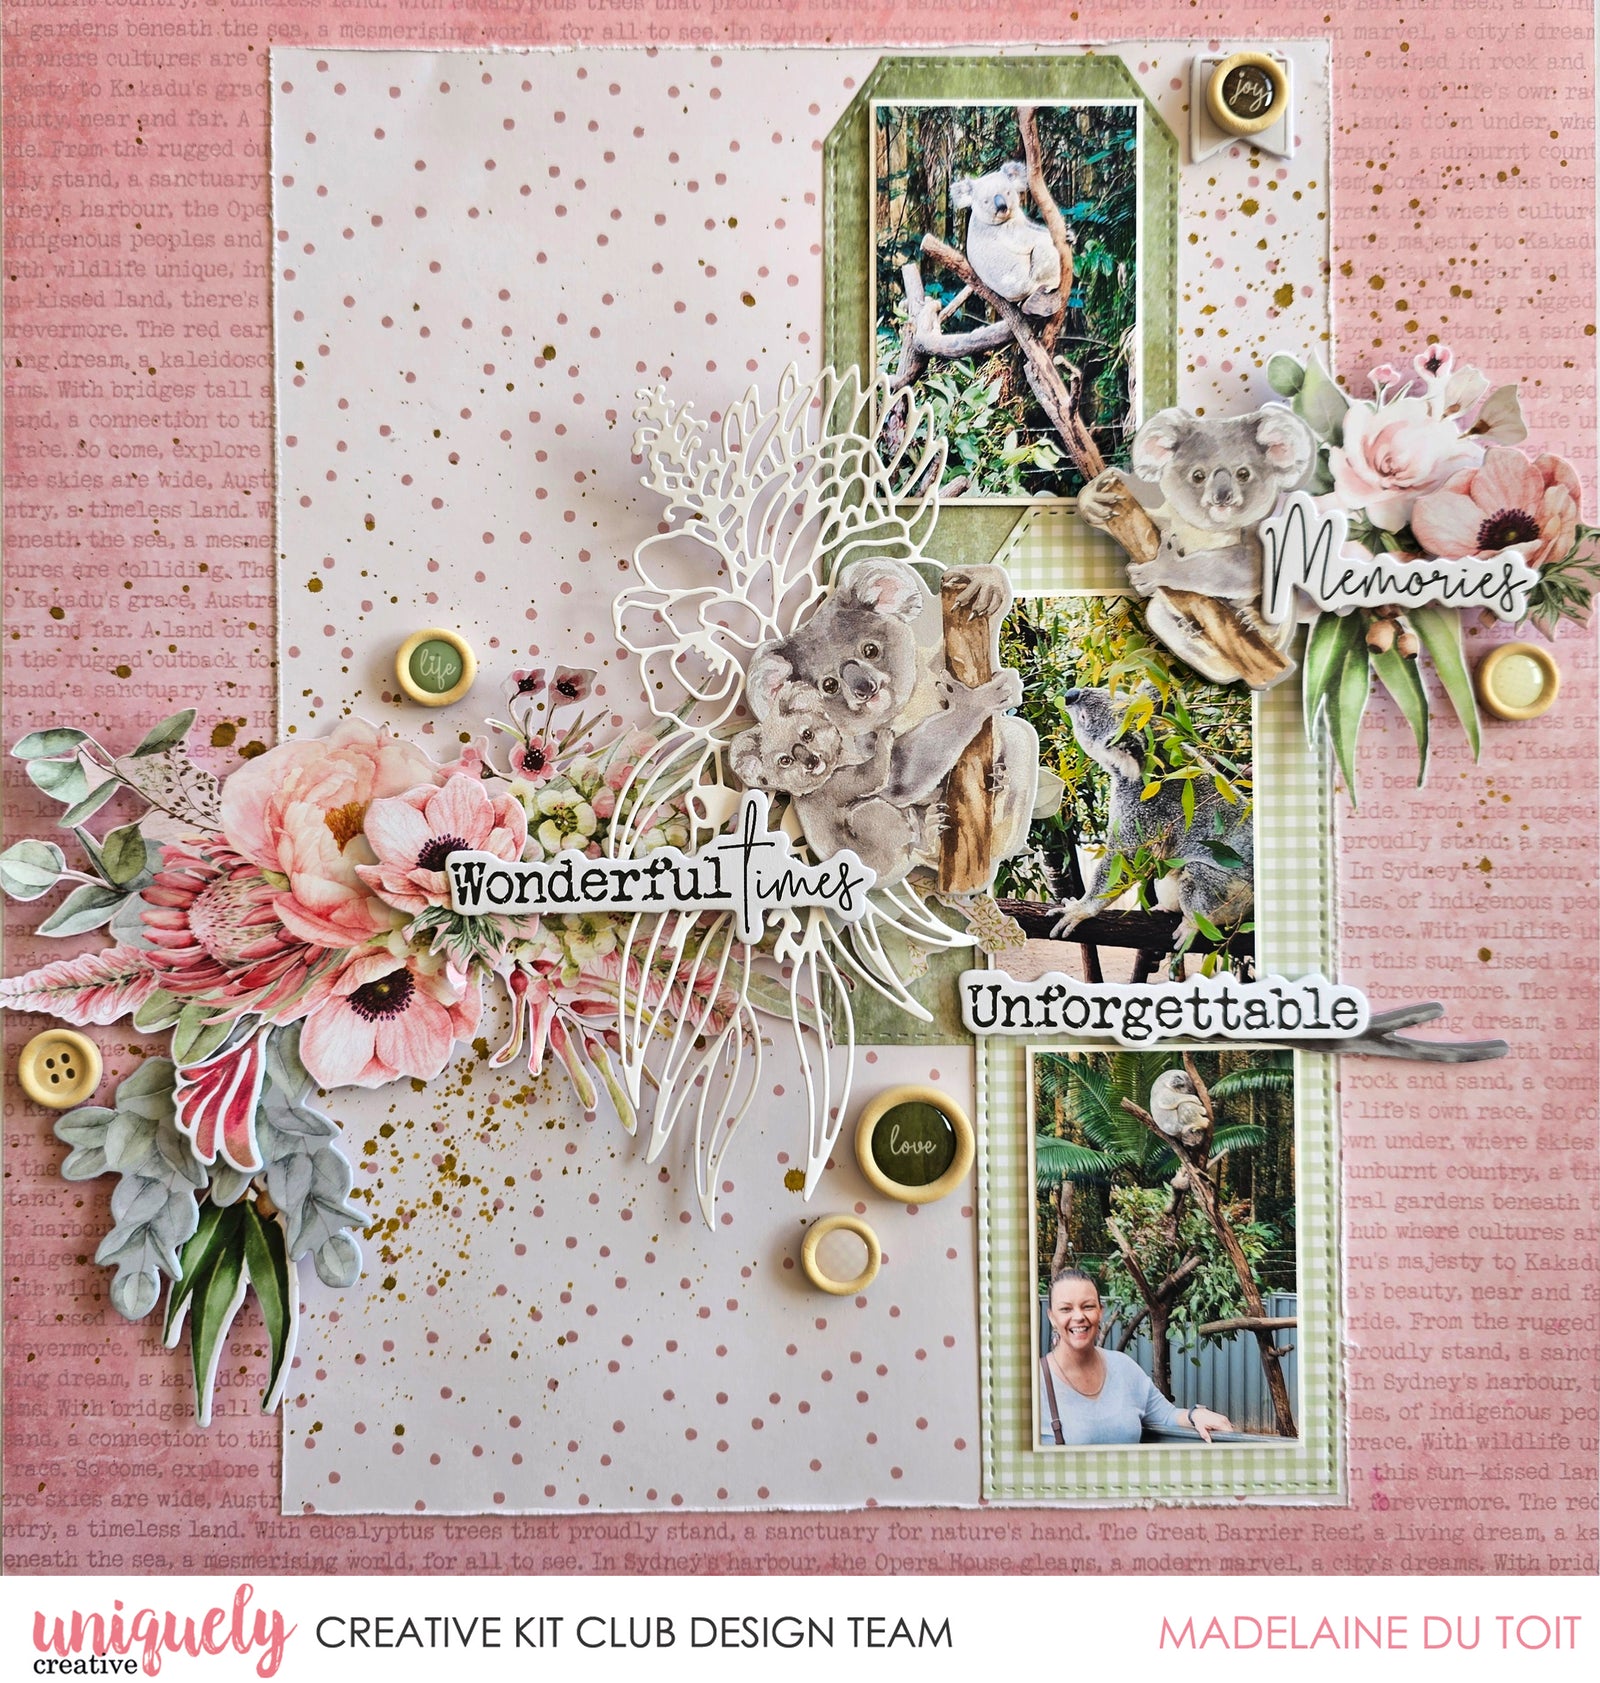
Wonderful Times - Madelaine du Toit
March 31, 2024

Photo size is x3 2” x 3” portrait
Uniquely Creative Products Used:
- UCP2699 Golden Wonders
- UCP2693 Resplendence
- UCP2695 Native Passion
- UCP2701 Creative Cuts
- UCE1812 Slimline Cards
- UCD2130 Protea Bouquet Die
- UCD2134 Slim Stitch Nesting Die
- UCE2005 Wooden Buttons
Other Products Used:
- Fussy cutting scissors
- UC foam mounts, double-sided tape
- Trimmer, scissors, glue
- Small Paint brush
- Distress Oxide Forest Moss
Instructions:
1. Using the reverse side of Golden Wonders as the background sheet. Cut Resplendence 8” x 11”, saving the protea bouquet on the main side. Distress the edges and adhere the dotty side up, of Resplendence, using double-sided tape on-top of the Golden Wonders sheet, leaving ½” at the top and 2” on each side.

2. Using a slimline card, cut it in half on the fold line. Place the Protea Bouquet die face down onto the slimline card, and run through the die cutting machine twice.

3. Place the slim stitched nesting tag die face down onto the the Native Passion slim green tags and cut them one at a time, running them through the die cutting machine twice. (use washi tape to hold the die in place)

4. Press your Distress Oxide pad on a craft mat, gently sprits with water and mix with your paintbrush. Gently splatter towards the top right hand corner of your sheet and down towards the bottom left corner. Let air dry completely.

5. Fussy cut the rose and gum leaf cluster of flowers from the Native Passion sheet.
6. Adhere the green slimline tag card, using double sided tape, 1¼” from the right hand side of the Resplendence sheet and 4” from the bottom of the layout. Adhere the green check slimline tag card, using double sided tape, 2⅛” from the right hand margin and ¾” from the bottom.

7. Matt the photos individually to the other side of the slimline card. Adhere the matted photos to the page with foam squares, 1” from the top and 3½” from the right hand side. 4½” from the top and 2½” from the right hand side and 1” from the bottom and 2¼” from the right hand side.
PRO TIP: When you are building clusters and are not sure where they will go, do not adhere the corners of your photos yet, only adhere the centre parts of the card. That way you can slide clusters under the sides and corners of your photo until you are happy with the placement and then adhere the corners.
8. Fussy cut the protea bouquet saved from the cut-off Resplendence sheet and adhere horizontally on the left side of the centre photo using foam squares. Use clear drying glue of choice secure some leaves.

9. Adhere the die cut protea bouquet using clear drying glue of choice, over the cluster of flowers and adhere the two koalas from the creative cuts, using foam dots.
10. Create a small cluster of embellishments on the right side towards the bottom of the 1st photo, using foam squares to adhere them in place.
11. To complete the page, adhere little titles of your choice to match the photo. I used “Wonderful Times”, “Unforgettable and Memories”. Add some of the wooden buttons to finish the layout - refer to main image
Leave a comment
Newsletter
Join our mailing list and never miss an update …
