You Are Fintastic Tutorial - Stephanie Donnini

Uniquely Creative Products Used:
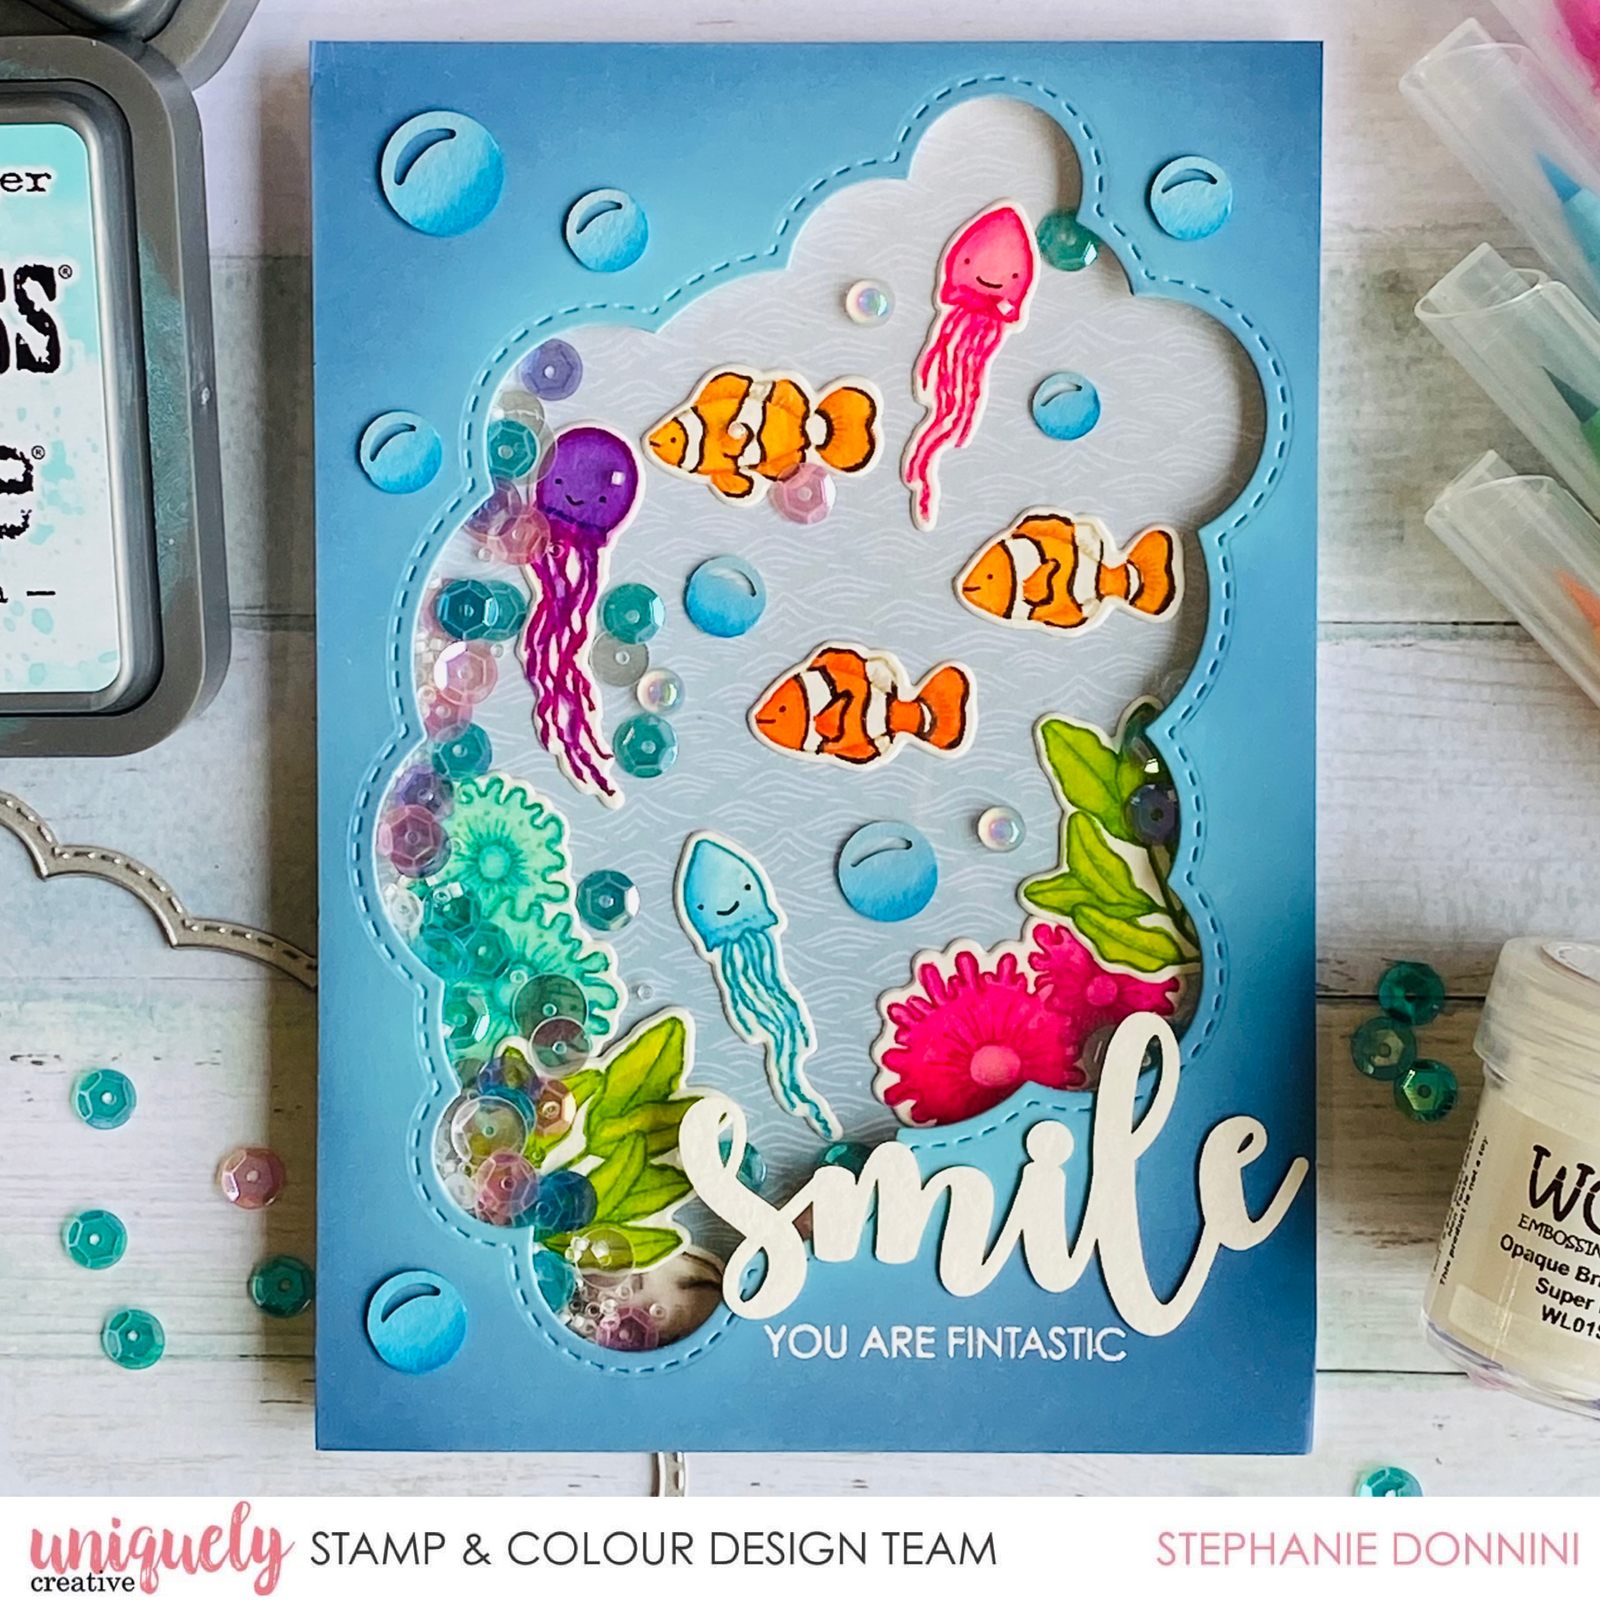
UC1845 Under the Sea Stamp Set, UCD1996 Under the Sea Die, UCD1999 Scene Builder #1 Die, UCL1718 Under the sea laser cut, Under the sea patterned paper, Foam squares and strips.
Other Products Used:
Watercolour paper, smooth white cardstock, water brush markers, white gel pen, acetate, iridescent sequins, mermaid mix sequins, stamping Platform, die-cutting machine, Glue, Glossy accents, white embossing powder, versa mark ink, heat tool.
Instructions:
1.Using Antique linen Distress ink, stamp multiple ‘Under the sea’ images on watercolour paper. Colour the sea images with your preferred colouring medium, here I have used water brush markers. Die cut images out with the co-ordinating dies.

2. Die cut the largest cloud from the Scene Builder #1 Die from smooth white cardstock, then blend blue shades of distress oxide inks to create an underwater effect.

3. Colour in the bubbles from the Under the Sea laser cut. Use these bubbles in your underwater scene and to embellish the front of the card.

4. To create the shaker card, attach clear acetate to the cloud panel using double sided tape. Then generously back with foam squares and strips.

5. Adhere pattered paper to the card base, then arrange Under the sea images. Once you are happy with the scene, secure images with glue and scatter sequin mix in the centre of the card. Before I attached the front panel I white heat embossed the ‘You are fintastic’ sentiment, then glued on the ‘Smile’ laser cut.

