You Brighten My Day Tutorial + Bonus - Thanks So Much - Ashlee McGregor


Uniquely Creative Products Used:
UC1853 Summer Stamp Set, UCD2025 Summer Die Set, Summer Cut-A-Part Sheet, Pattern Paper, UCL1729 Laser Cut Set, UCD1958 Cut-A-Part Essentials Die #5, UC Sequins, UCD1974 Stitched Nesting Rectangles, UCD1975 Scalloped Nesting Rectangles
Other Products Used:
Distress Ink Shaded Lilac
Spectrum Noir Tri-Blend Markers :
Giraffe - Earth Brown, Gold Brown, Pale Pink, Lavender
Ice Cream Truck - Lavender, Coral, Tan, Gold Yellow, Brown Grey
Ice cream - Tan, Fair Skin
Squirrel - Earth Brown
Instructions:
1. Cut a piece of pattern paper for the card base, one scalloped rectangle from white card and one stitched rectangle from white card.

2. Adhere all pieces to the card base layering as shown. Use different levels of foam tape to add dimension.

3. Die cut the cut-a-part sheet using essential die #5 and choose a sentiment to add to the card.

4. Colour the "hello" laser cut with distress oxide ink shaded lilac.

5. Stamp, colour and die cut all the images

6. Adhere all the images to the card base using foam tape for added dimension and then add the laser cut on top with a bit of liquid glue.
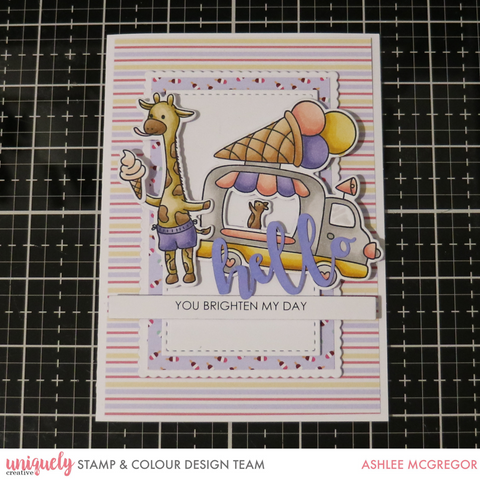
7. Add some UC sequins for a touch of bling and the card is complete.
Bonus Card - Thanks So Much
Uniquely Creative Products Used:
UC1853 Summer Stamp Set, UCD2025 Summer Die Set, UCD1958 Essential Cut-A-Part #5, Cut-A-Part Sheet, Pattern Paper, UCD1985 Cut-A-Part Essential Die #6, UC sequins, UC1854 Enjoy The Fun Stamp, UCD2026 Enjoy The Fun Die Set
Other Products Used:
Spectrum Noir Tri-Blend Markers :
Pale Pink, Magenta, Earth Brown, Light Green, Ice Grey, Brown Grey, Gold Yellow
