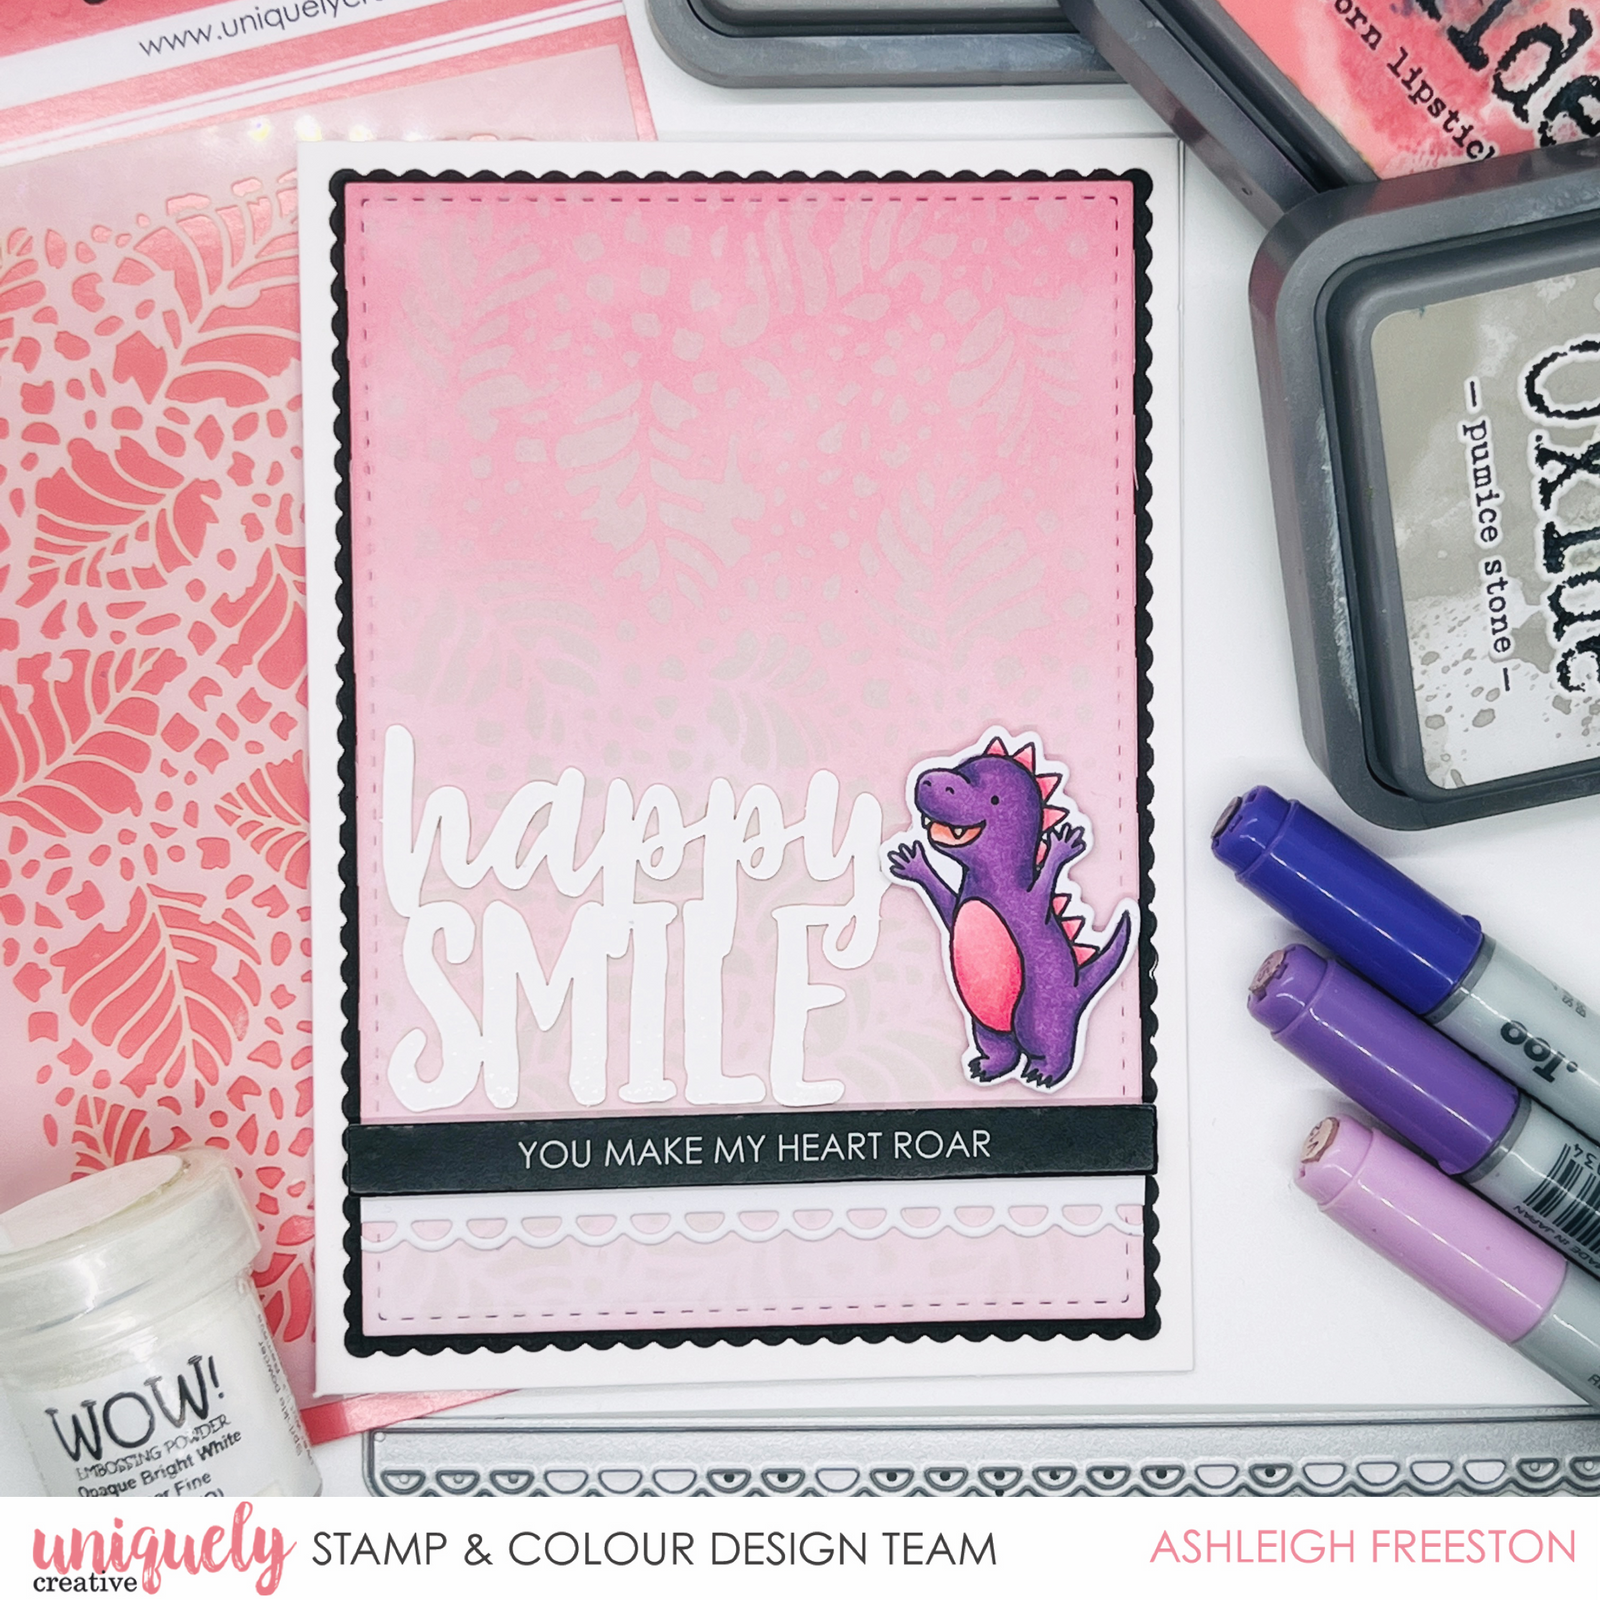
You Make My Heart Roar Tutorial - Ashleigh Freeston

Uniquely Creative Products Used:
- UC1862 Roarsome Stamp Set
- UCD2050 Roarsome Die
- UCMM1770 Evergreen Stencil
- UCL1739 Dino Roar Laser Cut
- Dino Roar Cut-a-Part Sheet
- UCD1974 Stitched Nesting Rectangle Die
- UCD1975 Scalloped Nesting Rectangle Dies
- UCD2006 – Slim Lacy Borders Die
- Rectangle Cards & Envelopes
- Foam Mounts
- UC Blending Brush
- UCD1958 Cut-a-Part Essentials #5 Die
Other Products Used:
- Smooth white cardstock
- Black cardstock
- Distress Oxide: Worn Lipstick, Spun Sugar & Pumice Stone
- Versamark Embossing Ink
- White embossing powder
- Adhesives
-
Copic Colours: Dinosaur – V12, V15, V17 (purple); RV21, RV23, RV25 (pink); R21, R22, R24 (mouth)
Instructions:
1. Die cut stitched rectangle die from white cardstock. Using blending tool, ink Worn Lipstick Distress Oxide on top half, switching to Spun Sugar Distress Oxide on the bottom. Repeat until there are no harsh lines.

2. Ink directly over the top with Pumice Stone Distress Oxide through Evergreen Stencil.

3. Heat emboss ‘Happy Smile’ Laser Cut with Versamark Embossing Ink and white embossing powder. Die cut lace border from white cardstock.

4. Stamp and colour the images with the colouring medium of your choice – I used Copic markers. Die cut or fussy cut the images once complete.

5. Assemble the card by adhering the blended background piece to black scallop rectangle, and then onto your card base. Adhere the lace border with double sided tape and use foam mounts to adhere the sentiment. Finish the card by foam mounting the stamped image.