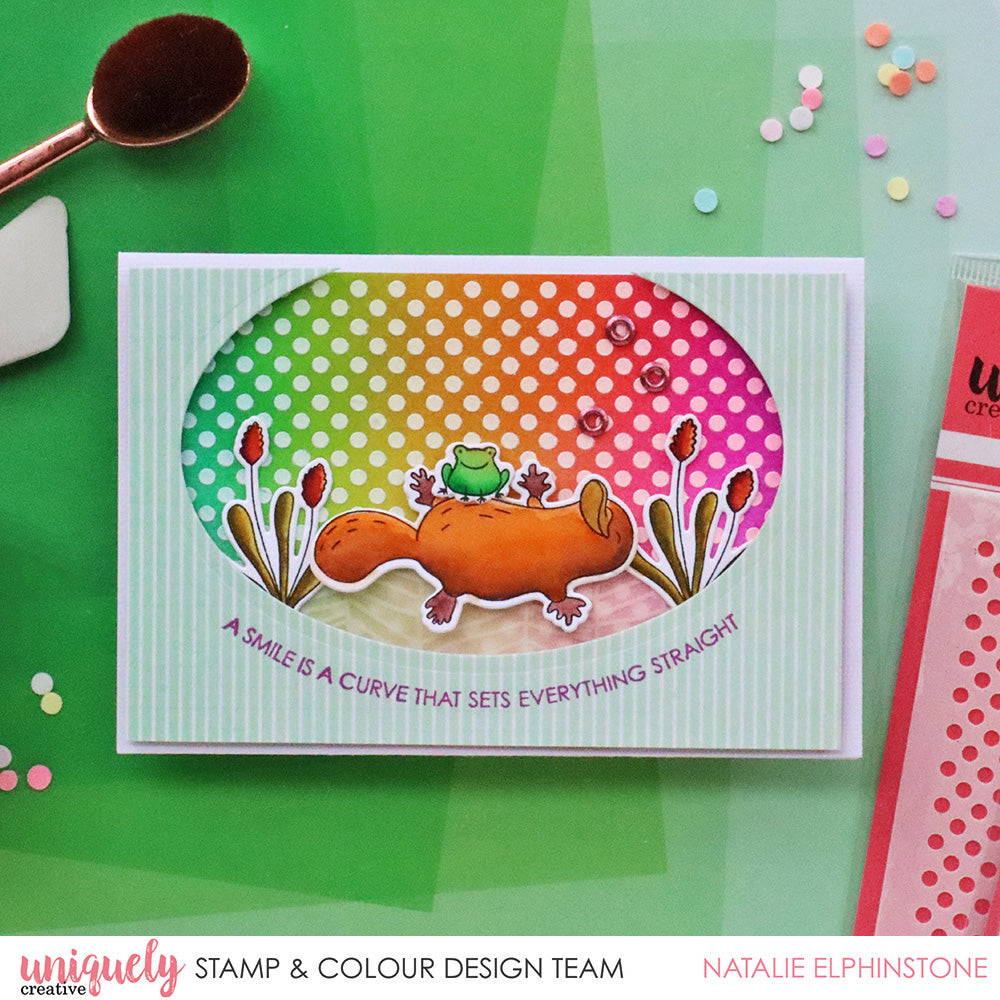
A Smile - Natalie Elphinstone

Card Size 6" x 4"
Uniquely Creative Products Used
One of a Kind Stamp Set, One of a Kind Dies, Tiny Dots stencil, UNIQOLOUR Markers, Watercolour Paper
Other Products Used
Oval Dies, Patterned Paper, Catherine Pooler inks, Gesso, Vellum, Queen and Co glitter studs, Foam Adhesive
Colours Used
UNIQOLOUR Markers
Instructions:
1. Trim down a piece of white blending paper, and a piece of green patterned paper to slightly less than your 6"x4” white card base. Using a rainbow of inks, blend them across to cover your entire piece of white blending paper.

2.Lay the Tiny Dots stencil over the top of your background and secure it with a bit of tape around the edges. Scrape some gesso through the stencil, and then carefully remove and wash your stencil.

3. Whilst waiting for it to dry (better leaving it to air dry rather than using a heat gun because it will tend to warp the paper) stamp and colour your chosen images from the ‘One of a Kind’ stamp set. I use watercolour paper and the UNIQOLOUR Markers. When these are dry, diecut them out.

4. Now here’s the slightly tricky bit! First, take the green patterned paper we trimmed down earlier and diecut a large oval in the centre of it (but extending to the top edge). Now place the paper in your stamp positioner, place the oval die back into its hole and then temporarily adhere it to the top cover. Now you can take the long sentiment from the ‘One of a Kind’ stamp set and stick it to the stamp positioner, bending it around the oval die as a guide. Now you can remove the die, and stamp the sentiment onto the patterned paper – it should look like a smile!

5. Lastly, it’s time to bring it all together. First, adhere the rainbow spotty paper to the front of your white card. Then stick down the green patterned paper piece over the top – I used foam tape to give it more dimension. I then adhered a strip of patterned vellum to the lower edge of the cut-out oval to represent water. I then used foam tape to also adhere my platypus, frog and reed images. I finished it off with some glitter studs for a bit of bling!


2 Responses

JPxYWIGvaFVsBiTA
September 28, 2020
KtJAPClngfRST