Aussie Tradies Stamp & Colour Wrap Up

With the release of the new Stamp & Colour Mini Kit fast approaching, we have a special blog post, wrapping another month of our Stamp & Colour Collection.
We hope you enjoy this post of project ideas and inspiration, which were created by our fabulous Stamp & Colour Design Team.
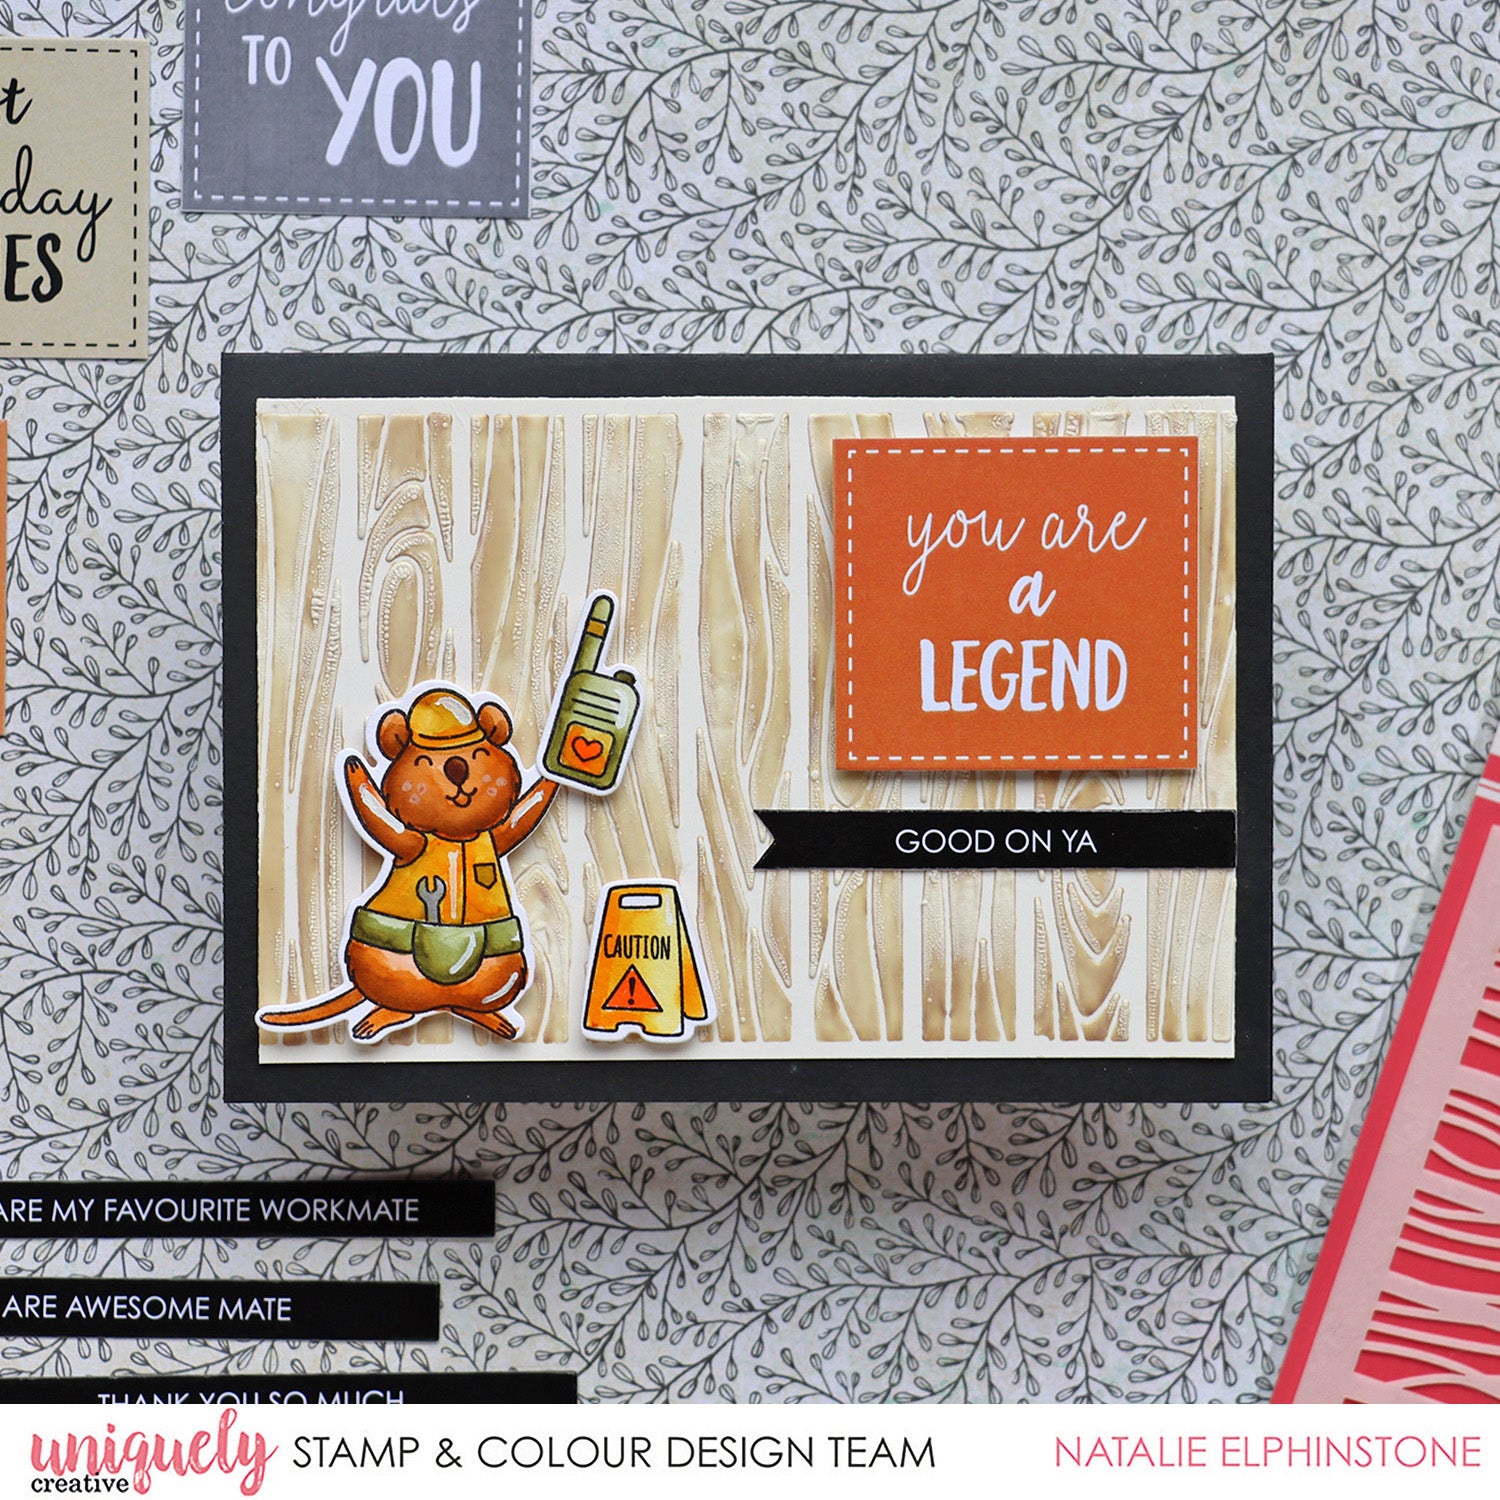
You Are A Legend Tutorial - Natalie Elphinstone
Uniquely Creative Products Used:
- UC1878 Aussie Tradies Stamp
- UCD2060 Aussie Tradies Die
- UCMM1771 Wood Panelling Stencil
- Mini Cut-Apart Sheet
- Uniqolour Markers
- Watercolour Paper
- UCD1956 Cut-A-Part Essentials #4 Die
- UCD1958 Cut-A-Part Essentials #5 Die
- Foam Tape
Other Products Used:
- Black Cardstock
- Sizzix Expand Paste
- Trimmer
- Scissors
- Ink Blending Brush
Instructions:
1. Ink up the Wood panelling stencil with a bit of brown ink. Spread some Sizzix Expand Paste through the stencil, onto some thick white cardstock.

2. Using a heat gun sparingly heat the embossing paste to create a raised texture. After cutting down this background panel to size and adhering it to a card base.

3. Stamp, die cut and colour the images. Natalie used watercolour paper and the Uniqolour markers to colour. Stick these on using foam tape for extra dimension.

4. Finish off with two different sentiments from the cut-apart-sheets. And there you have it, all the pieces are done and can be adhered in place.


Thanks So Much - Kelly McCausland
Uniquely Creative Products Used:
- UCD1974 Stitched Rectangle Dies
- UCD2003 Stitched Circle Dies
- UCMM1771 Wood Paneling Stencil
- UCD1958 Cut A part Essentials #5 Die
- Aussie Tradies Cut Apart Sheet
- Kit Paper
- UCL1743 Aussie Tradies Laser Cut Sentiment
- Enamel Dots
Other Products Used:
- Silver Embossing Powder
- Lawn Fawn ink in Doe and Walnut (or similar)
- Brown and white paint for splattering
- White Gel Pen
-
Copics: Grey: C3, C5, C7, Orange: Y38, YR04, YR07, Yellow: Y15, Y35, Y38, Light Brown: E42, E43, E44, Dark Brown: E23, E27, E57, Quokka Nose: E44, E47, Cheeks and Mouth: R30

You Are A Legend Tutorial - Vicki Poulton

Uniquely Creative Products Used:
- UCD2059 Work Ute Die
- UCCA1732 Post Box Red Card
- Cut-a-part Sheet Included in Kit
- UCD1958 Cut-A-Part Essentials #5 Die
- UCD1974 Stitched Nesting Rectangle Die
- UCD1975 Scalloped Nesting Rectangle Die
- Uniquely Creative Watercolour Set
Other Products Used:
- Die Cut Machine
- Adhesive Tape
- Foam Dots
- Scissors
-
Copics: Reds: R24, R39, R20, R00, Browns: E40, E41, E42, E43, E50, E13, E44, E35, E31, Yellows: Y35, YR23, Y32, Blues: B45, B95, BV25, BV23, Greens: YG03, YG17, G82, G85
Instructions:
1. Start by getting all your products ready that needed. Using a white card for your base.

2. Die die cut your white card using the Stitched Nesting Rectangle . This is the piece you will be painting on so feel free to use watercolour card if you prefer.

3. Using your watercolour set, mix up the colours that you'd like to use, Vicki started with red paint.

4. Add your paint to the top of the card then hold the card up so the paint drips down.

5. Make a rainbow of colours with your paints and wait for this to dry. To speed up the process you can use a heat gun to dry your paints.

6. Using the Work Ute Stamp set, stamp out your image and using the above copics, colour the image in.

7. Stamp out some buckets and colour them in with your copics.

8. Using the coordinating dies, die cut all the paint pots.

9. Using a piece of post box red card and the scalloped nesting die, die cut a piece of card and then adhere to your card panel over the top.

10. Adhere all the paint pots at the bottom of the card and adhere the critter to your card holding his long paint brush.

11. Add your sentiment.

12. Adhere this onto your card base. Your card is now complete.
