Birthday Boy Tutorial - Jo Herbert
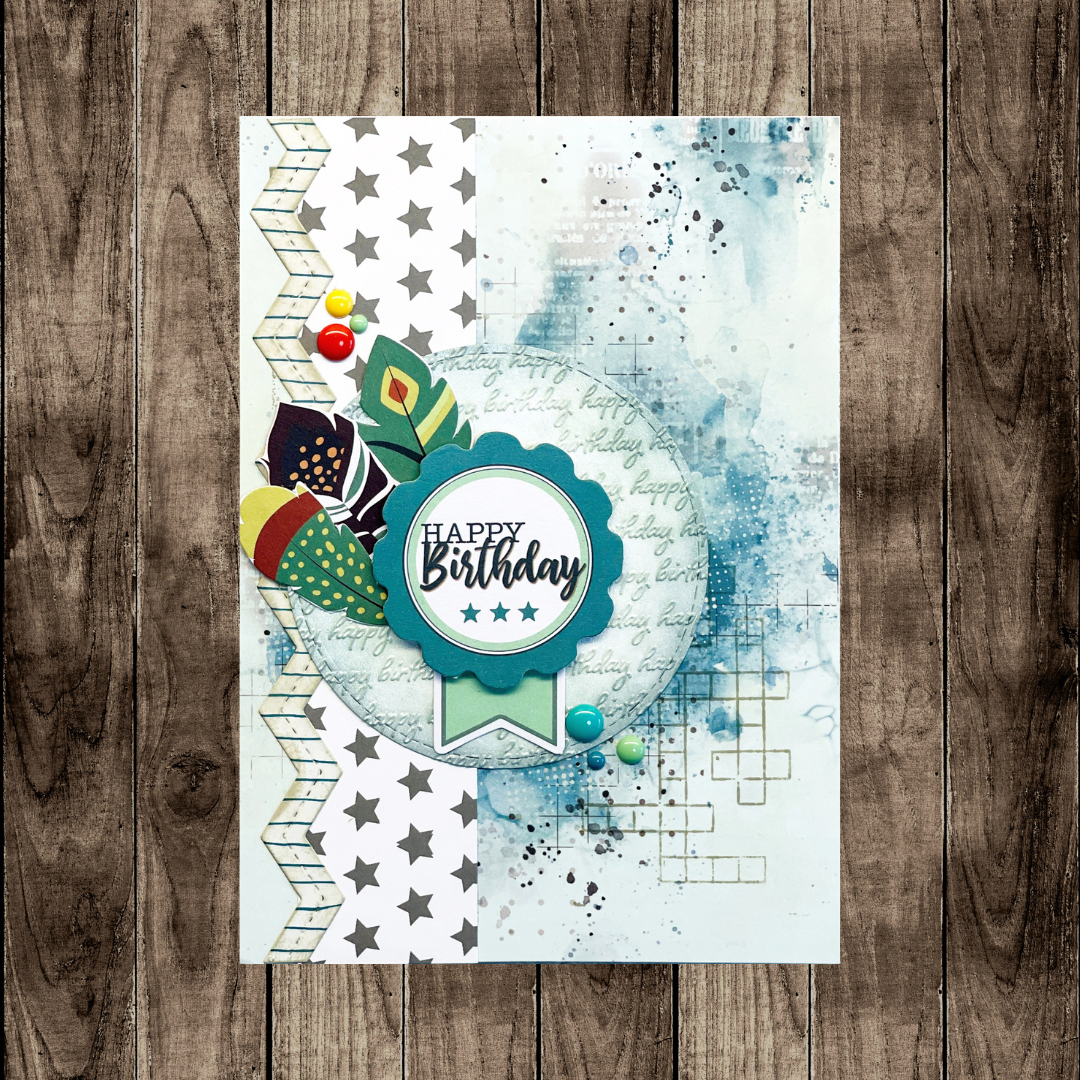

Card Size: 15cm x 15cm
Uniquely Creative Products Used:
UCP2187 READY?... GO!, UCD1984 Chevron Stripes Die, UCP2188 Find Your Way, UCP2195 Creative Cuts, UCEF2009 Happy Birthday Embossing Folder, UC1826 Crossword Texture Stamp, UCD1984 Chevron Stripes Die, UCE1821 Enamel Dots, UCD1854 Brick Texture Die, UCE1804 Foam Mount Circles,
Other Products Used:
Circle Dies, Distress Oxide Ink – Weathered Wood, All Purpose Ink Frost Paint, Hero Arts Wet Cement Ink
Instructions:
1. Die cut white cardstock with the circle dies. Add some ink to the happy birthday folder on the emboss raised side and run through die cutting machine.

2. Ink blend with UC blending tool around the edges.

3. Jo made her own mix of shimmer spray with all purpose frost ink and spritz over the top of the circle panel.

4. Randomly stamp the crossword stamp with wet cement ink randomly over a pattern paper panel (5” x 7” ) . Adhere down pattern paper panel on card base.

5. Cut down stars pattern paper to 1 ½” x 7” and adhere down.

6. Die cut with the chevron die pattern paper and ink blend and adhere down on card front towards the left of the panel.
7. Adhere down the circle panel and die cuts and adhere down.
8. Add some enamel dots to finish the card off.
