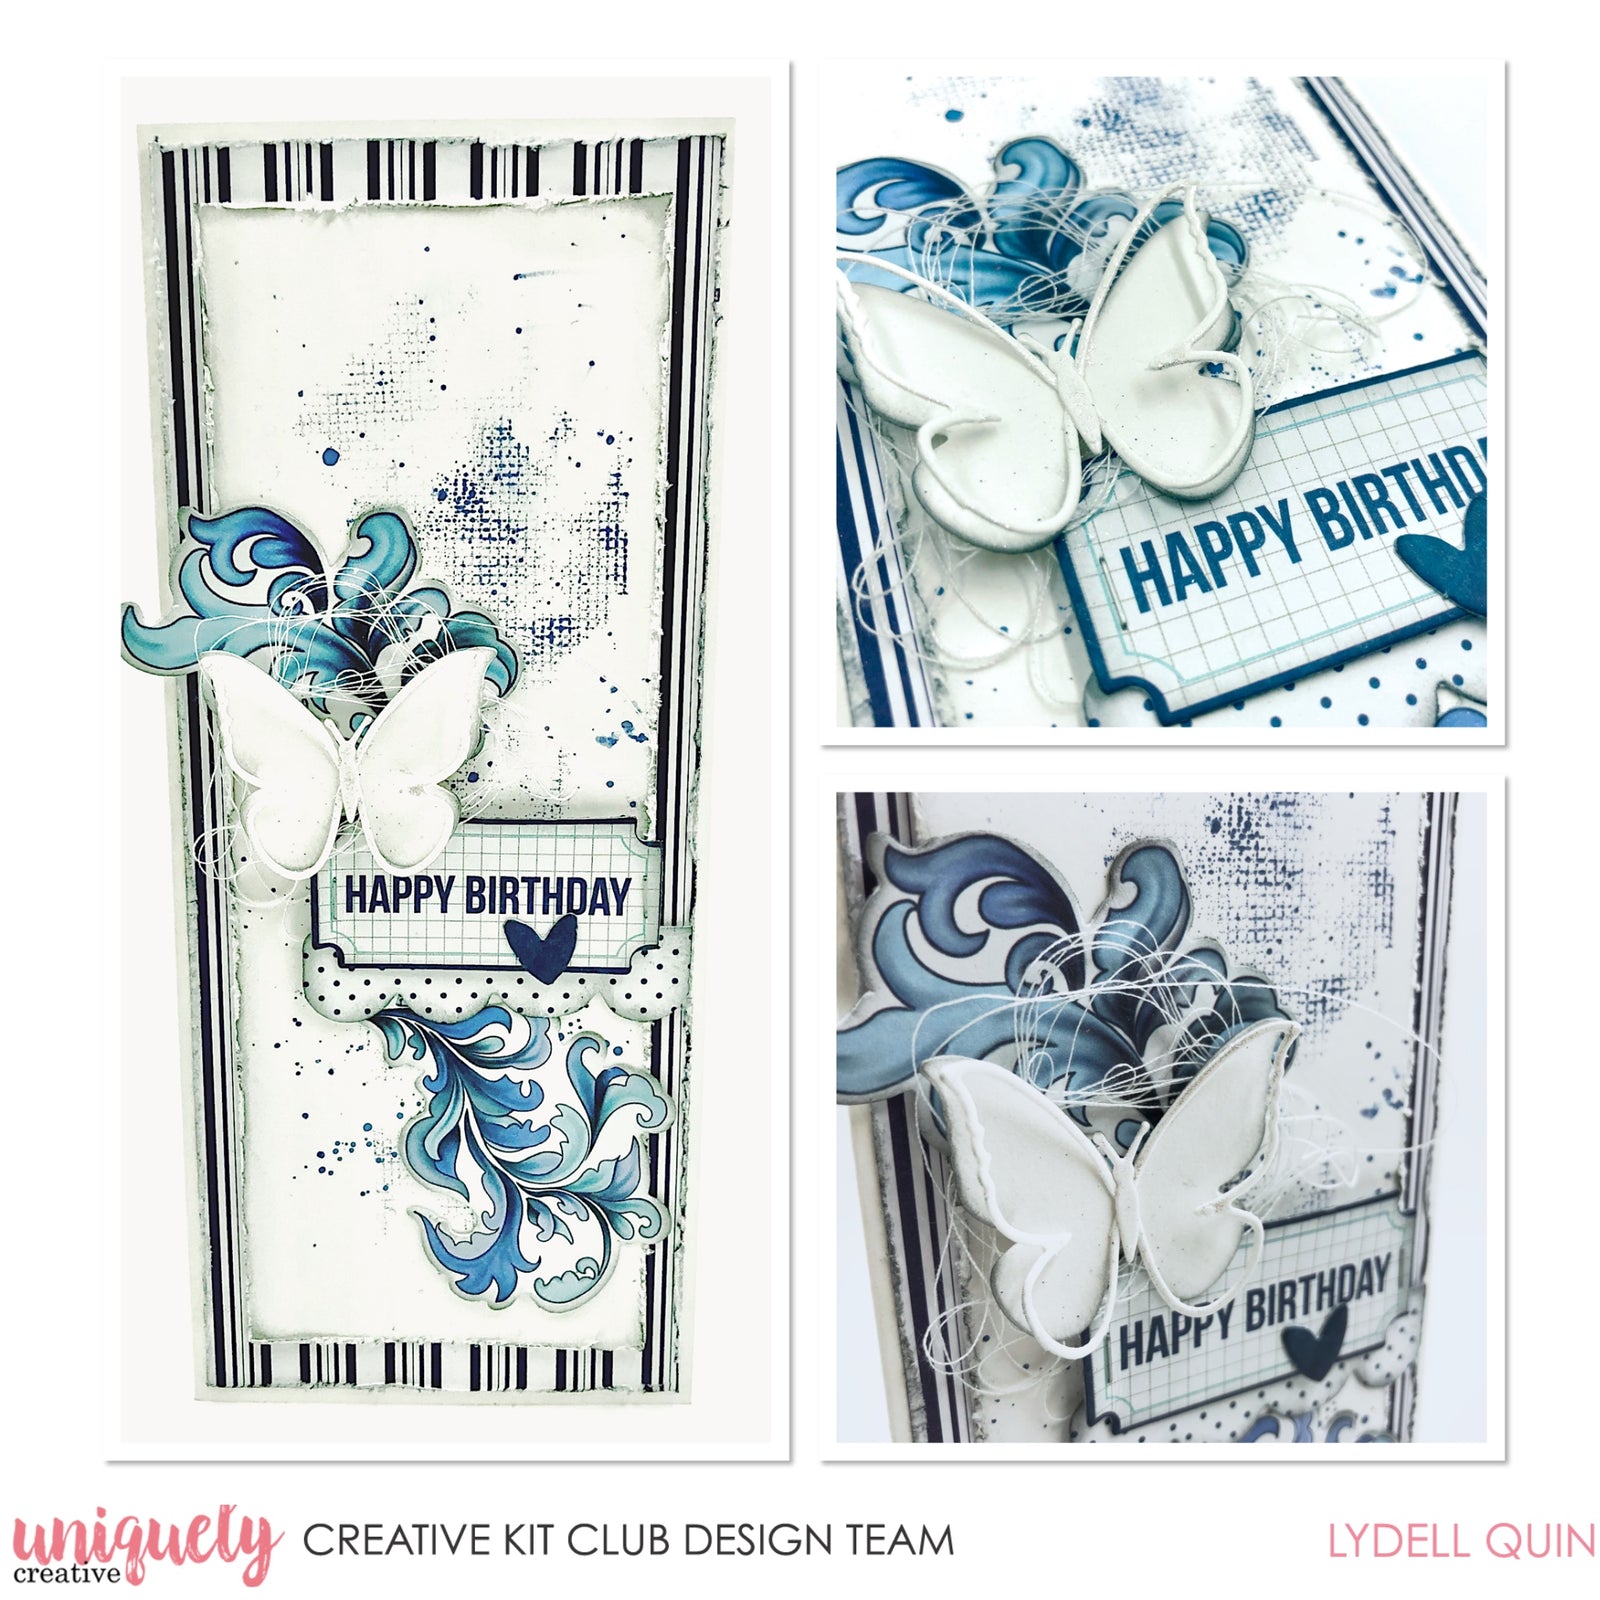
Birthday Slimline Card - Lydell Quin

Uniquely Creative Products Used
UCP2116 Something Blue Collection Pack, UCP2118 Something Blue Creative Cuts, UCD1955 Butterfly Builder Die, UC1824 Grungy Graph Mini Mark Making Stamp, Watercolour Cardstock, Blending Block
Other Products Used
Tim Holtz Distress Oxide: Faded Jeans, Paintbrush, Cotton, Helmar 450 Glue, Distressing Tool
Instructions
1. To make the slimline card base: Cut card stock measuring 8.5 x 7” and fold in half on the 7” side (score at 3.5")
2. Using paper UCP2109 trim to fit the front of the card - 8.25“ x 3.25"
3. Scruff up the edges with a distress tool and adhere to the front of your card base with double-sided tape.
4. Now cut another mat from a piece of watercolour cardstock measuring 8"x 3" and distress the edges
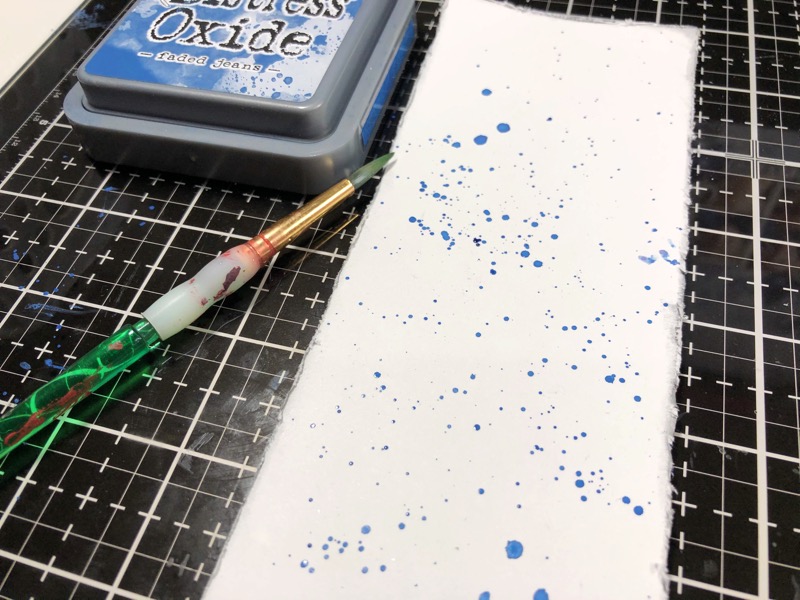
5. Using Distress Oxide (or ink) press some ink onto an Acrylic Blending Block and spritz slightly with water. Use a paintbrush to splatter ink over your piece of watercolour paper.

6. Randomly stamp the Grungy Graph Stamp over the splattering to create some texture. Use your fingers to stamp rather than an acrylic block so the stamping is not too even.
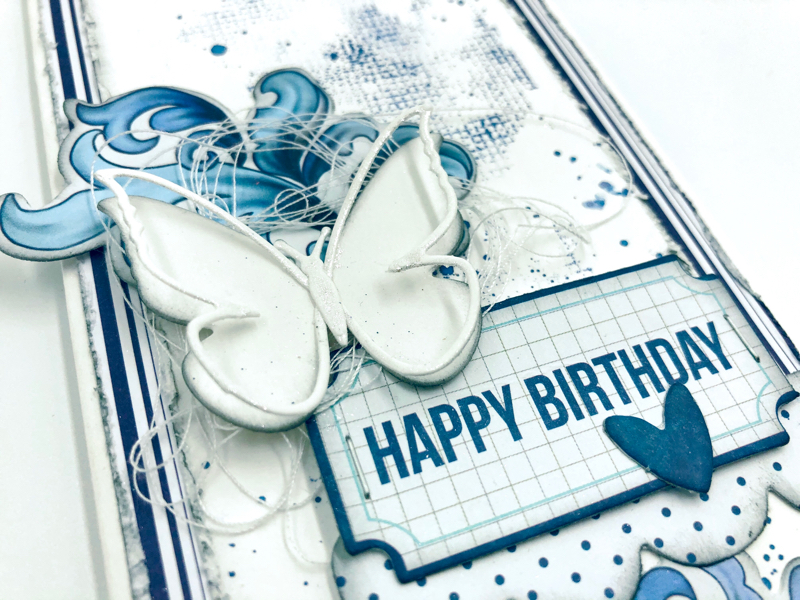
7. Locate elements similar to those in the photo above and ink each one ready to arrange on the card front.
8. Add a staple each end of the happy birthday label and mount with mounting tape.
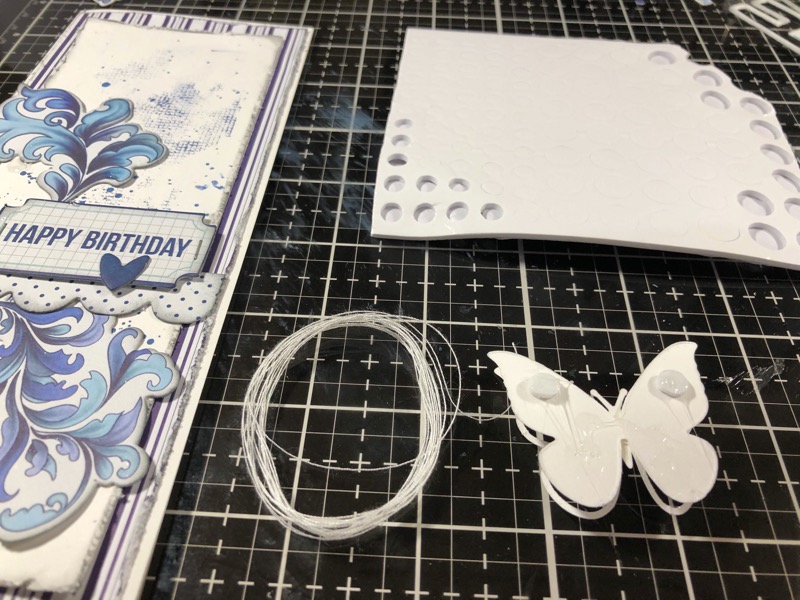
9. Adhere all 1st layer elements down.
10. Wind some cotton around your fingers into a circle and spread out a little bit to make it visible underneath the butterfly die cut. Add wet glue to the foam tape and secure down the cotton with the butterfly.
