Birthday Wishes - Ashleigh Freeston
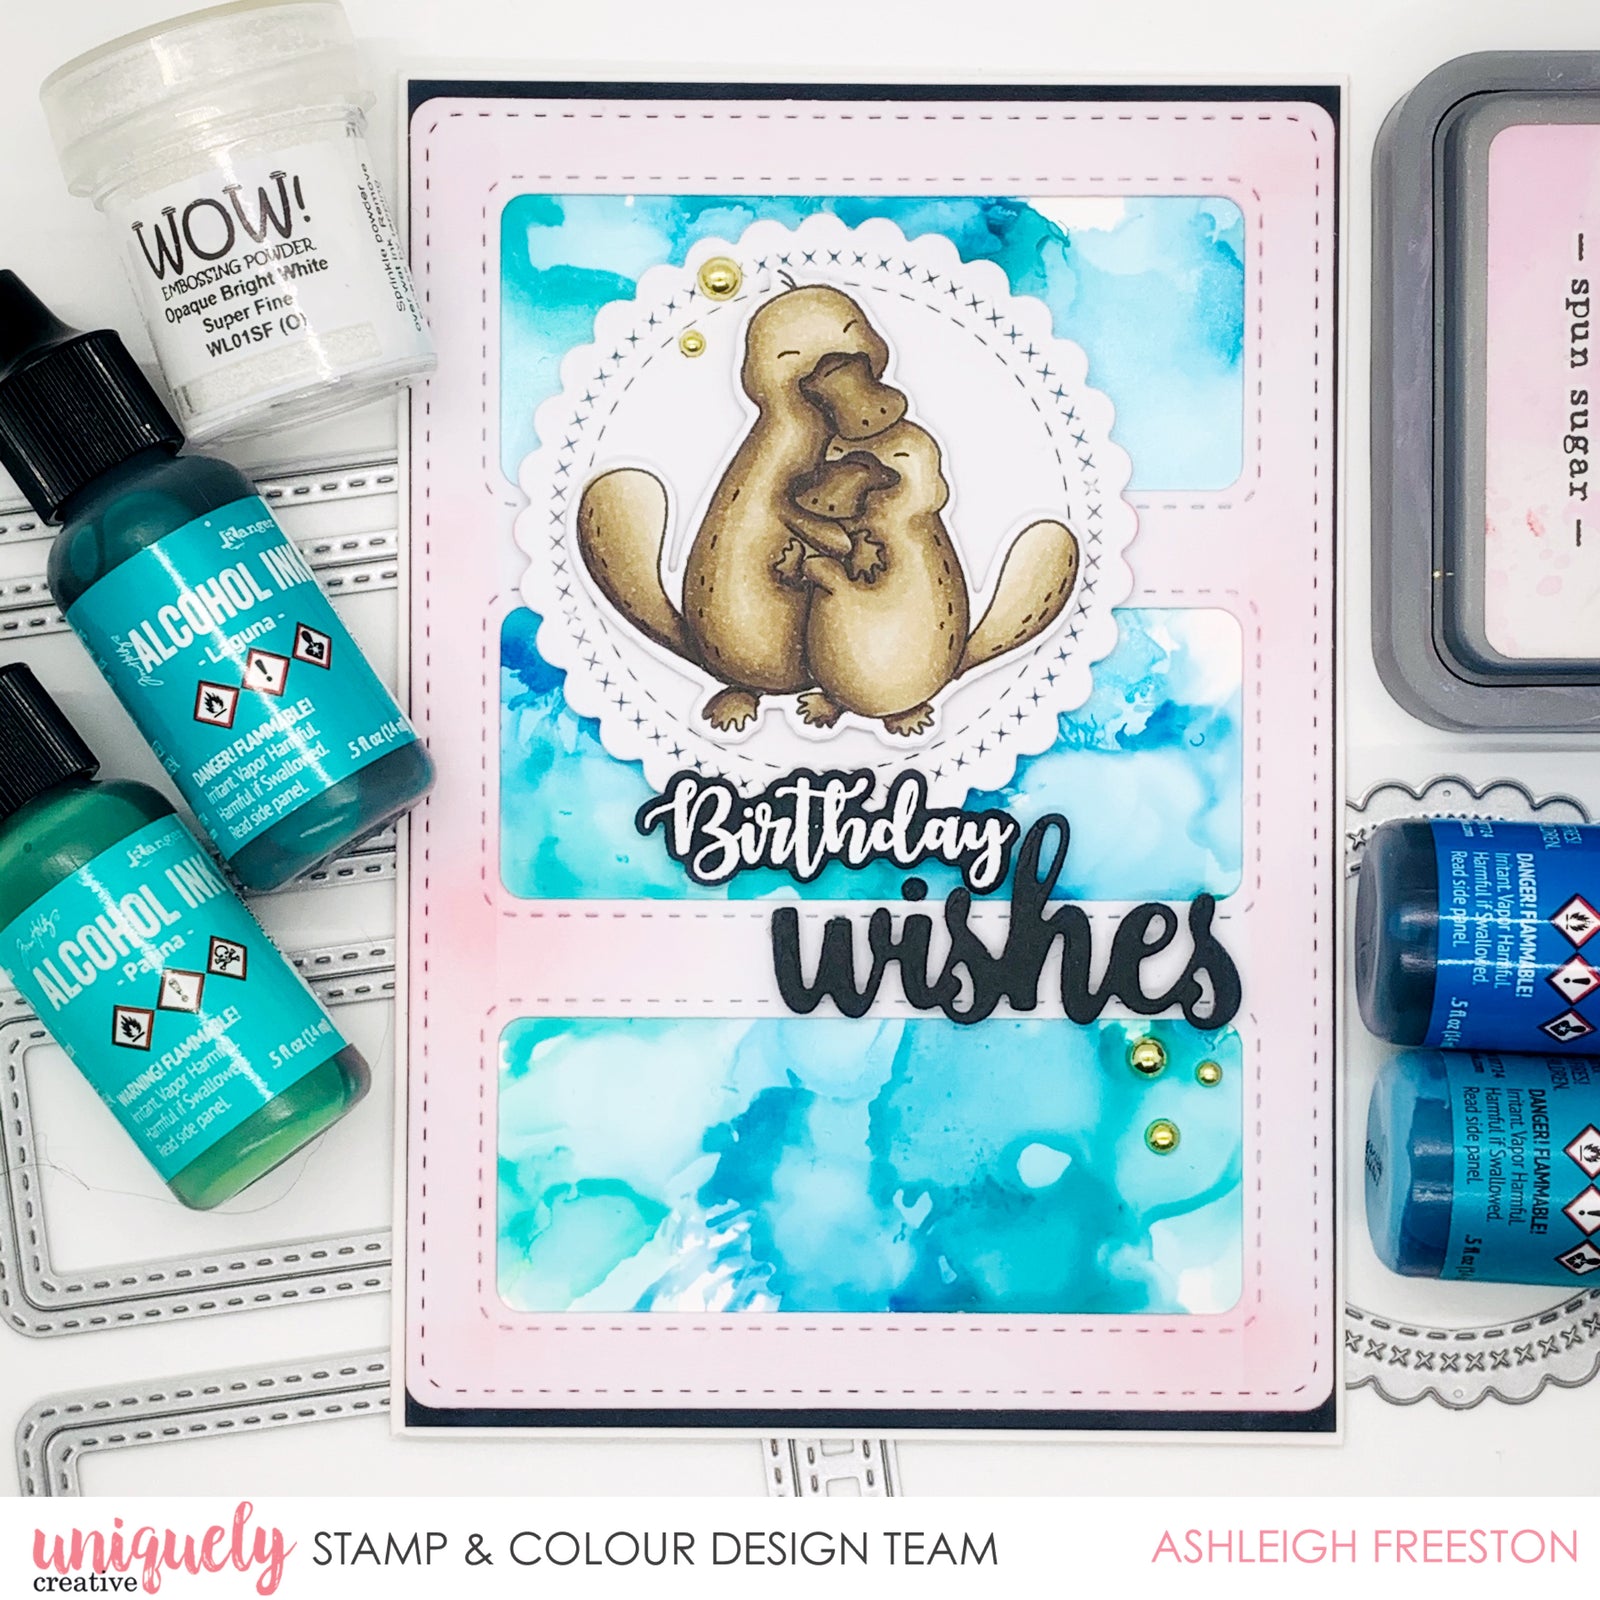

Card Size 4 ¼” x 6”
Uniquely Creative Products Used
UC1807 My Platypus stamp, UCD1918 My Platypus dies, Gold Pearls, Stitched 3 Window Frame Die, Stitched Scallop Circles Die, Brush Script Sentiments Die
Other Products Used
Smooth white cardstock, black cardstock, Yupo paper, white card base, blending card, Versamark ink, white embossing powder, Alcohol Inks: Patina, Laguna, Glacier, Tranquil, alcohol ink blending solution, straw/air spritzer, Spun Sugar Distress Oxide, adhesives
Colours Used
Copic Markers:
Platypus – E40, E42, E43, E44, E47, E49 (body); E43, E44, E47, E49 (bill/feet)
Instructions:
1. Cut base card down to 6” high.
2. Cut black cardstock to 4” x 6”. Cut Yupo card to slightly less than 4” x 6”.
3. From white cardstock, die cut Stitched 3 Window Frame Die and Scallop Circle. From black cardstock, die cut ‘wishes’ from Brush Script Sentiments set

4. On Yupo paper, drop colours of alcohol ink and add ink blending solution. Work with one or two colours at a time, so they don’t mix together. Use a straw or air spritzer to move the ink around. Repeat until you are happy with the background you have created. Leave to dry (ensure not to use a heat tool, as this will melt the paper)

5. Adhere the background to black cardstock. On Stitched 3 Window Frame die cut, blend Spun Sugar Distress Oxide to add a little colour. Adhere this to the card base. Foam mount the white scallop circle on top
6. Colour your images with the colouring medium of your choice (I used Copic Markers). Adhere to the centre of the scallop circle

7. Heat emboss the ‘Birthday Hugs’ sentiment on black cardstock, with white embossing powder. Use My Platypus die to die cut the sentiment. Use a pair of scissors to carefully remove the word ‘hugs’. Adhere to the card, along with the ‘wishes’ die cut from earlier

8. To finish off the card, add some gold pearl embellies.
