Blessed - Kylie Kingham
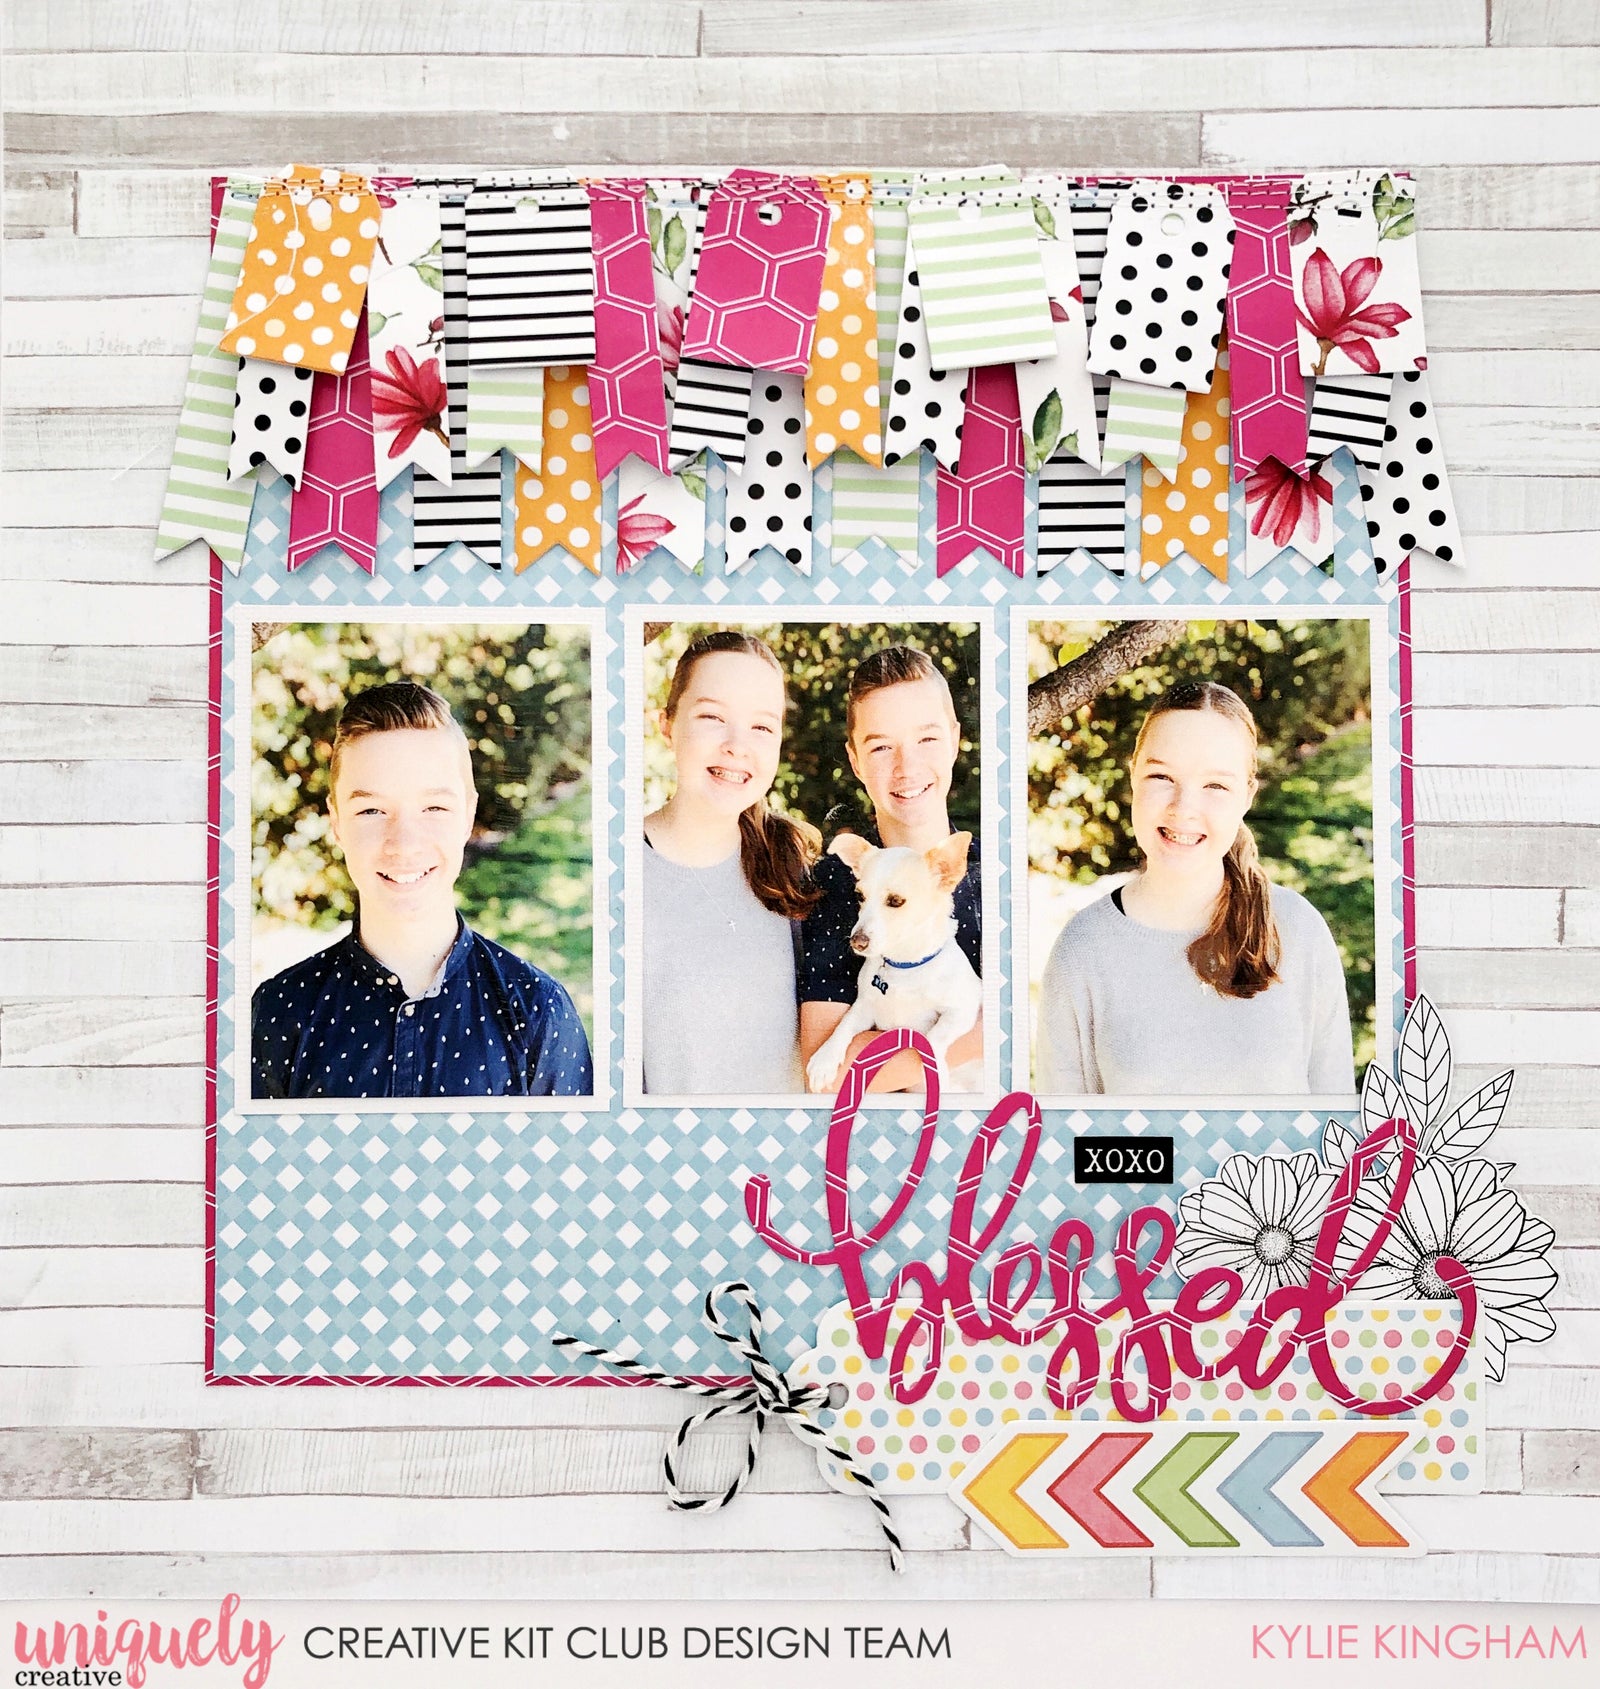

Photo Size 2.5”x 3.5” each
Uniquely Creative Products Used
UCP2032 Totally Devoted, UCO2033 Ever Selfless, UCP2034 Proud Mama, UCP2035 Strong, UCP2037 Fussy Cuts Florals, UCP2038 Protective, UCP2039 Creative Cuts, Mother Nature Cut-a-part sheet, UCD1905 Blessed die, UCD1910 Cut-a-Part Essentials #1 die
Other Products Used
Scissors, trimming board, adhesive tape, glue, foam tape, sewing machine (optional)
Instructions
1. Trim the bar code strip from the Proud Mama paper. Cut a 22cm square of the Protective paper and layer over a 22.5cm square of Ever Selfless paper so that a very small border of contrasting colour can be seen. Adhere this layered square into the middle of the Proud Mama paper.

2. From the Cut-a-Part Essential dies, take out the two banner dies as well as the small tag die. Choose a variety of different colours and patterns from your papers for your banners. I have used- Totally Devoted, Ever Selfless, Strong (reverse side), Fussy Cut Florals (reverse side) Adhere the larger size banners across the top of the smaller square. Alternate each paper.

3. Next, adhere the slightly smaller banner overlapping the first layer. Do this by adding a small piece of foam tape towards the bottom of the banner, so that they will sit up from the first layer. Next add in several of the small tags over the top with glue or adhesive tape until you are happy with the balance. OPTIONAL: Machine stitch across the top of the banners several times. This is why the foam tape was added on the small banner at the bottom so that the machine needle will go through the tags easily. If you don’t have a sewing machine an alternative would be to add a contrasting thin strip of paper horizontally over the top edge for effect.

4. Each photo was printed 2.5” x 3.5” and added to white card stock cut slightly larger to act as a frame. Alternatively, photos can be printed with a white border. Adhere each evenly, just below the banners.

5. Take the colourful polka dot tag and arrow die cuts from the Creative Cuts packet and add to the lower right hand corner of the layout. Fussy cut some blooms from the Protective paper and tuck in behind. Add a string bow to the tag.

6. Using the large Blessed die, cut from the Ever Selfless paper and adhere over the tag cluster. Finish by adding a fussy cut ‘XOXO’ phrase from the cut apart sheet.
