Blue Heaven Tutorial - Ashleigh Newton-Spence

Uniquely Creative Products Used:
UC1809 Pretty Amazing Stamp, UCD1985 Cut-A-Part Essentials #6, Pretty Amazing Cut-A-Part Sheet, UCD1971 Slim Fancy Borders, Blue Patterned Paper (included in the kit)
Other Products Used:
Misti Stamping Tool, X-Press It Blending Card, Hero Arts Intense Black Ink, J Burrows Full Adhesive Notes, Ruler, Pencil, Eraser, Copic Markers (B97, B95, B32, B93, E53, E21, E55, Y21, Y23, E35), Scissors, Paper Trimmer, Glass Media Mat, Minc Machine or a Laminator, Minc Blue Reactive Foil
Instructions:
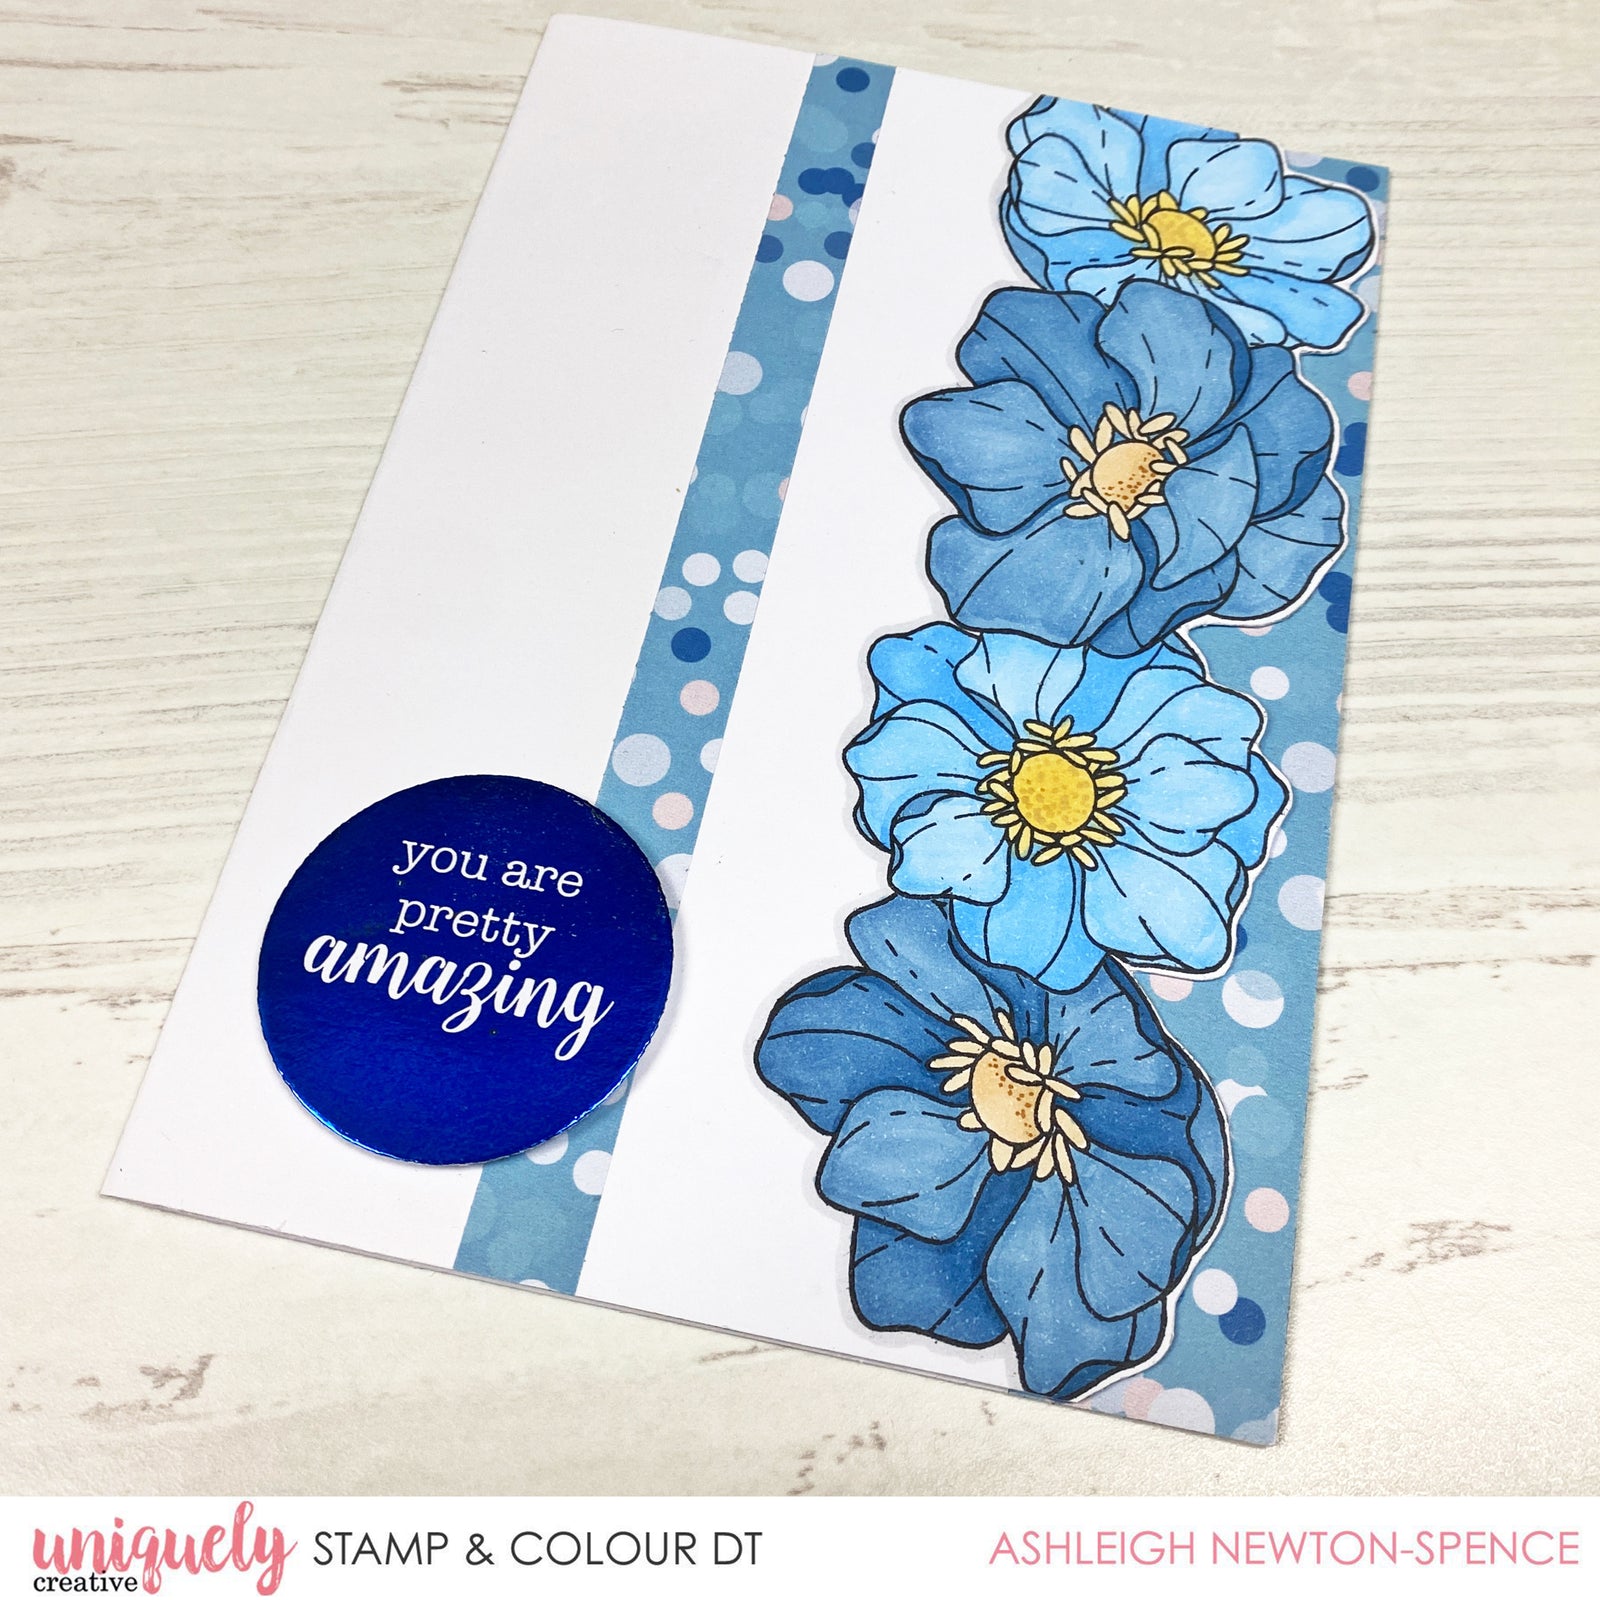
1. Stamp and fussy cut the three open flower images from the set onto a full adhesive note. This will be the masks that allow us to stamp down the side of the panel.

2. On a piece of blending card, rule a line across the page just a little higher than your card base. From this line, rule a line 4.5cm from the edge of your card. Stamp the largest of the flowers about a quarter of the way down the line. Then use the matching mask to cover this while you stamp out the remaining images down the line. I used the side facing flower twice, once at the top and once at the bottom to complete my border. When the ink is dry, remove the masks and using an eraser, erase the pencil lines on your card.

3. Using Copic markers, colour in the flowers. I used B97 and B95 for the darker flowers and B32 and B93 for the lighter ones. I then used the yellows and browns to colour in the centres.

4. Using a paper trimmer, trim off the excess on the top of the card to the top of the flower. Then, using scissors, fussy cut down the side of the flowers. You can choose to go right up against the edge or leave a small white border as I did here.

5. Using my glass media mat, I lined up my line of flowers near the open edge of a card base. Then use a pencil to trace out the shape and cut off the side. This cut does not have to be perfect as it will be hidden. The fussy cutting also helps to hide the backside of the flowers, so the inside of your card stays clean.

6. Cut a 1cm strip of the blue patterned paper and tack it down 3.3cm from the fold of the card. Then line up your flower border over the top of where you have just cut and mark where the overlap of the blending card is. Trim this off and attach both the strip and the flower border to the front of the card.
7. Cut a 4.5cm x 15cm strip of the same patterned paper and using a slim fancy border dies, cut the shape down. Stick that shape into the inside right-hand side of the card.

8. Cut out the circle sentiments using the Essentials #6 and then using reactive foil, send it through your laminator or minc machine. I didn’t know that the UC sheets would work with the foil – but it does and that’s amazing! Using foam tape, stick the sentiment down in the bottom left-hand corner.

9. Lastly, use a grey Copic marker to add a shadow down the left-hand side of the florals to add some depth.
