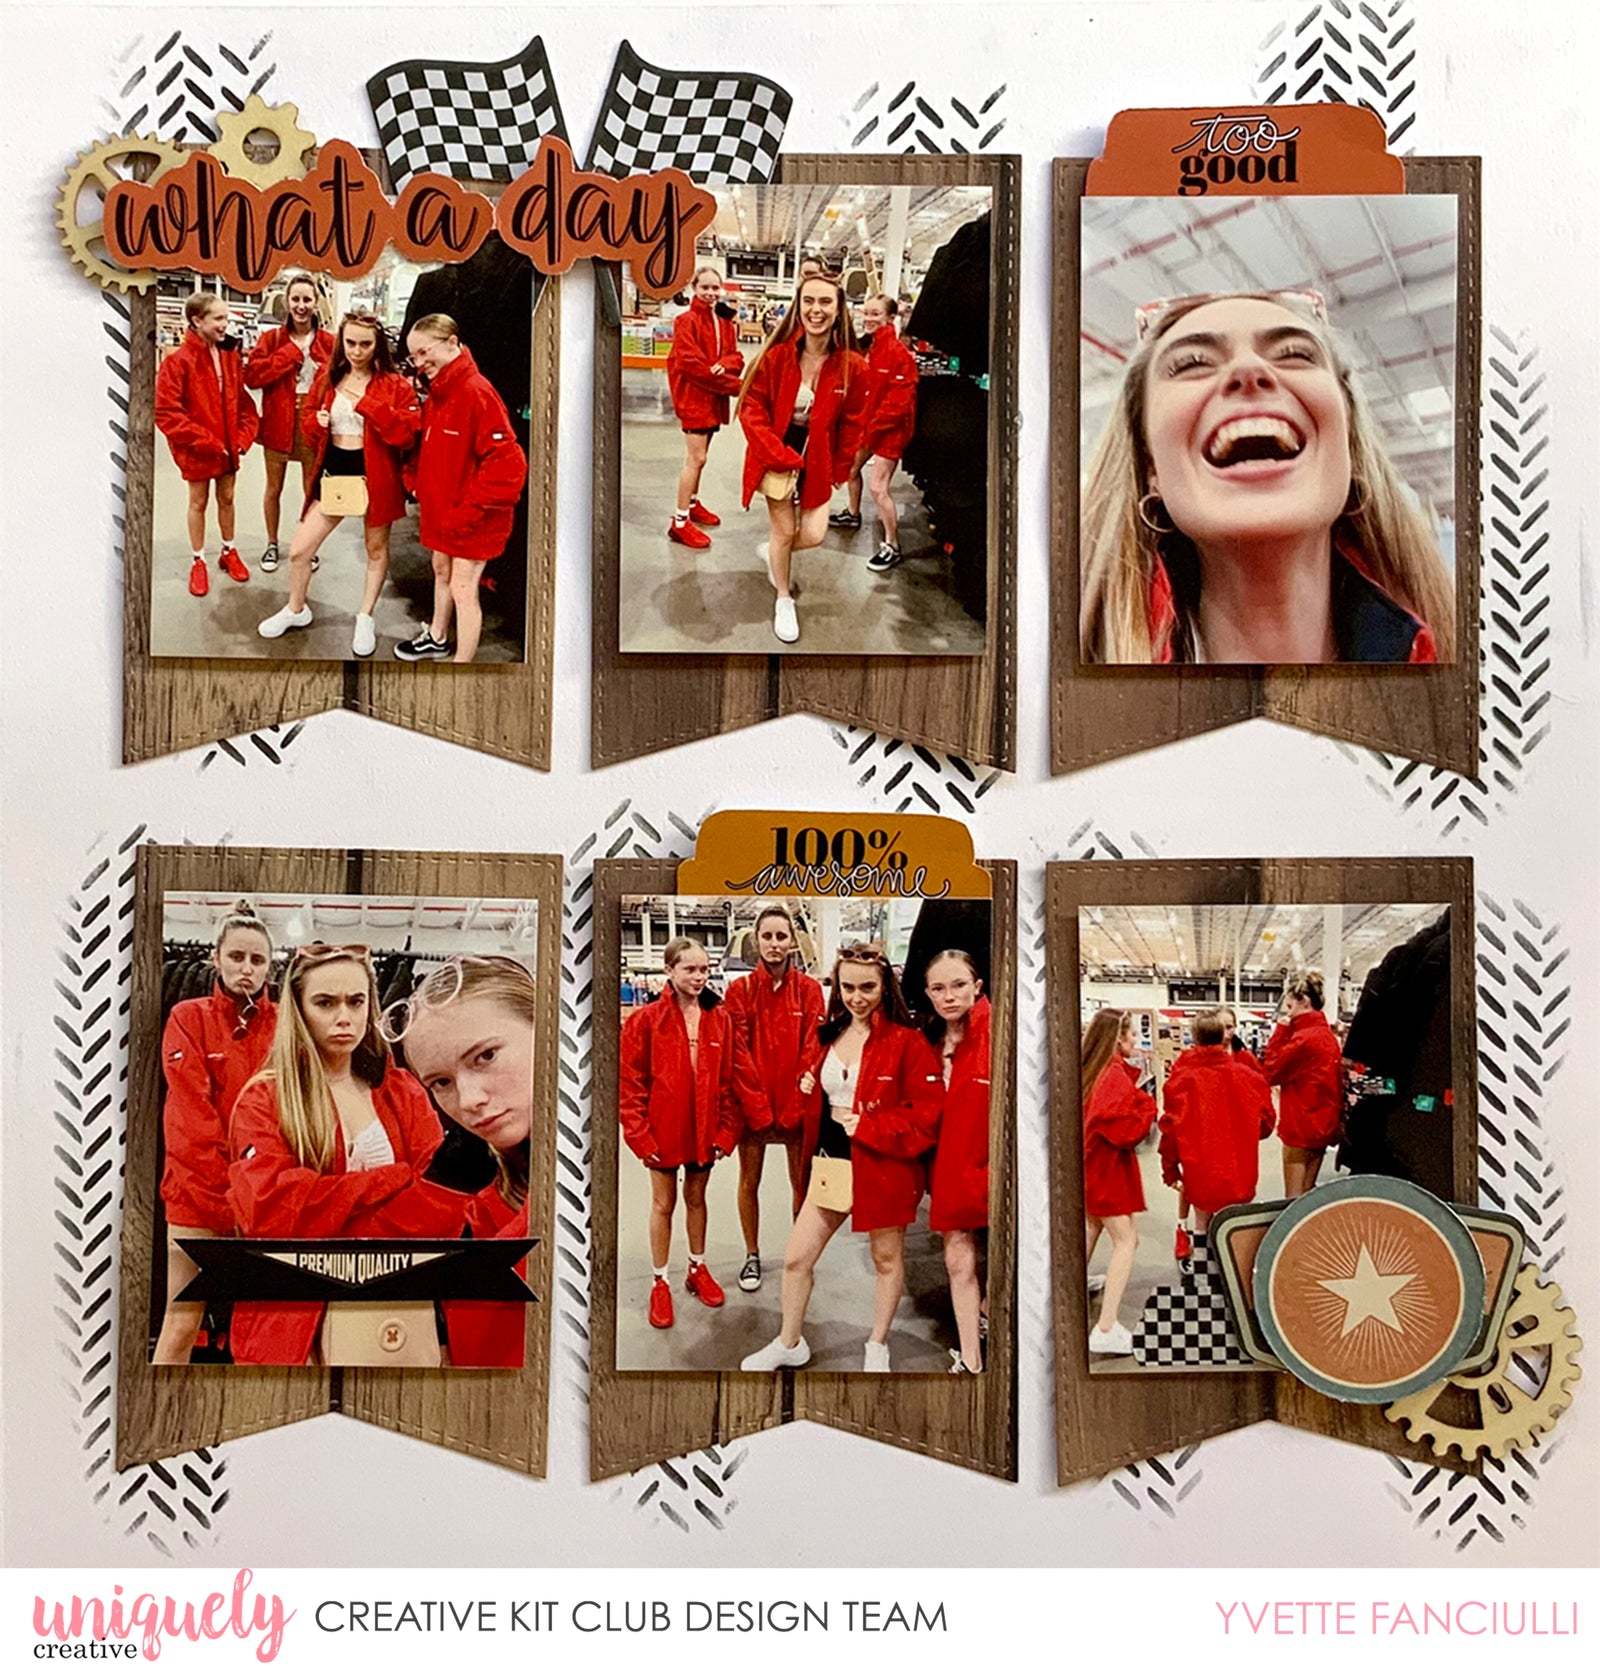
What a Day - Yvette Fanciulli

Uniquely Creative Products Used:
UCP2241 Air Show, UCP2249 Drive & Fly Creative Cuts, UCMM1736 Checker Plate Mini Stencil, Drive & Fly Cut-a-Part Sheet, Drive & Fly Laser Cut, Checker Washi Tape, Watercolour Cardstock, UCD1995 Stitched Banner Die
Other Products Used:
Trimmer, scissors, adhesive tape, foam tape, glue, black ink pad, die cutting machine
Photo Size: 2 3/4" x 3 1/2" (x6)
Instructions:
1. Using Air Show paper, cut 6 banners with the Stitched Banner die. Use the 3rd largest die to fit these photos on the paper.

2. Crop your photos and add foam adhesive to the back of each photo.

3.Using the Checker Plate Mini Stencil with Black Ink and a blending brush, make some marks on the watercolour cardstock. Use your photos as a guide and try to get the marks toward the edges of where the photos will sit.

4. Choose your embellishments, title and fussy cut elements from the cut-apart sheet.

5. Lay everything out to see if you need to add more stencilling.

6. Make a cluster using washi tape and creative cuts at the bottom right corner.

7. Make another cluster for the top left corner using creative cuts and laser cuts. Use a hot glue gun to adhere the laser cuts.
8. Add the fussy cut elements from the cut-a-part sheet to complete the layout.