BROTHERS LAYOUT TUTORIAL - RACHEL DUTKO

To recreate this sweet layout created by Design Team member Rachel Dutko you can follow the steps below:
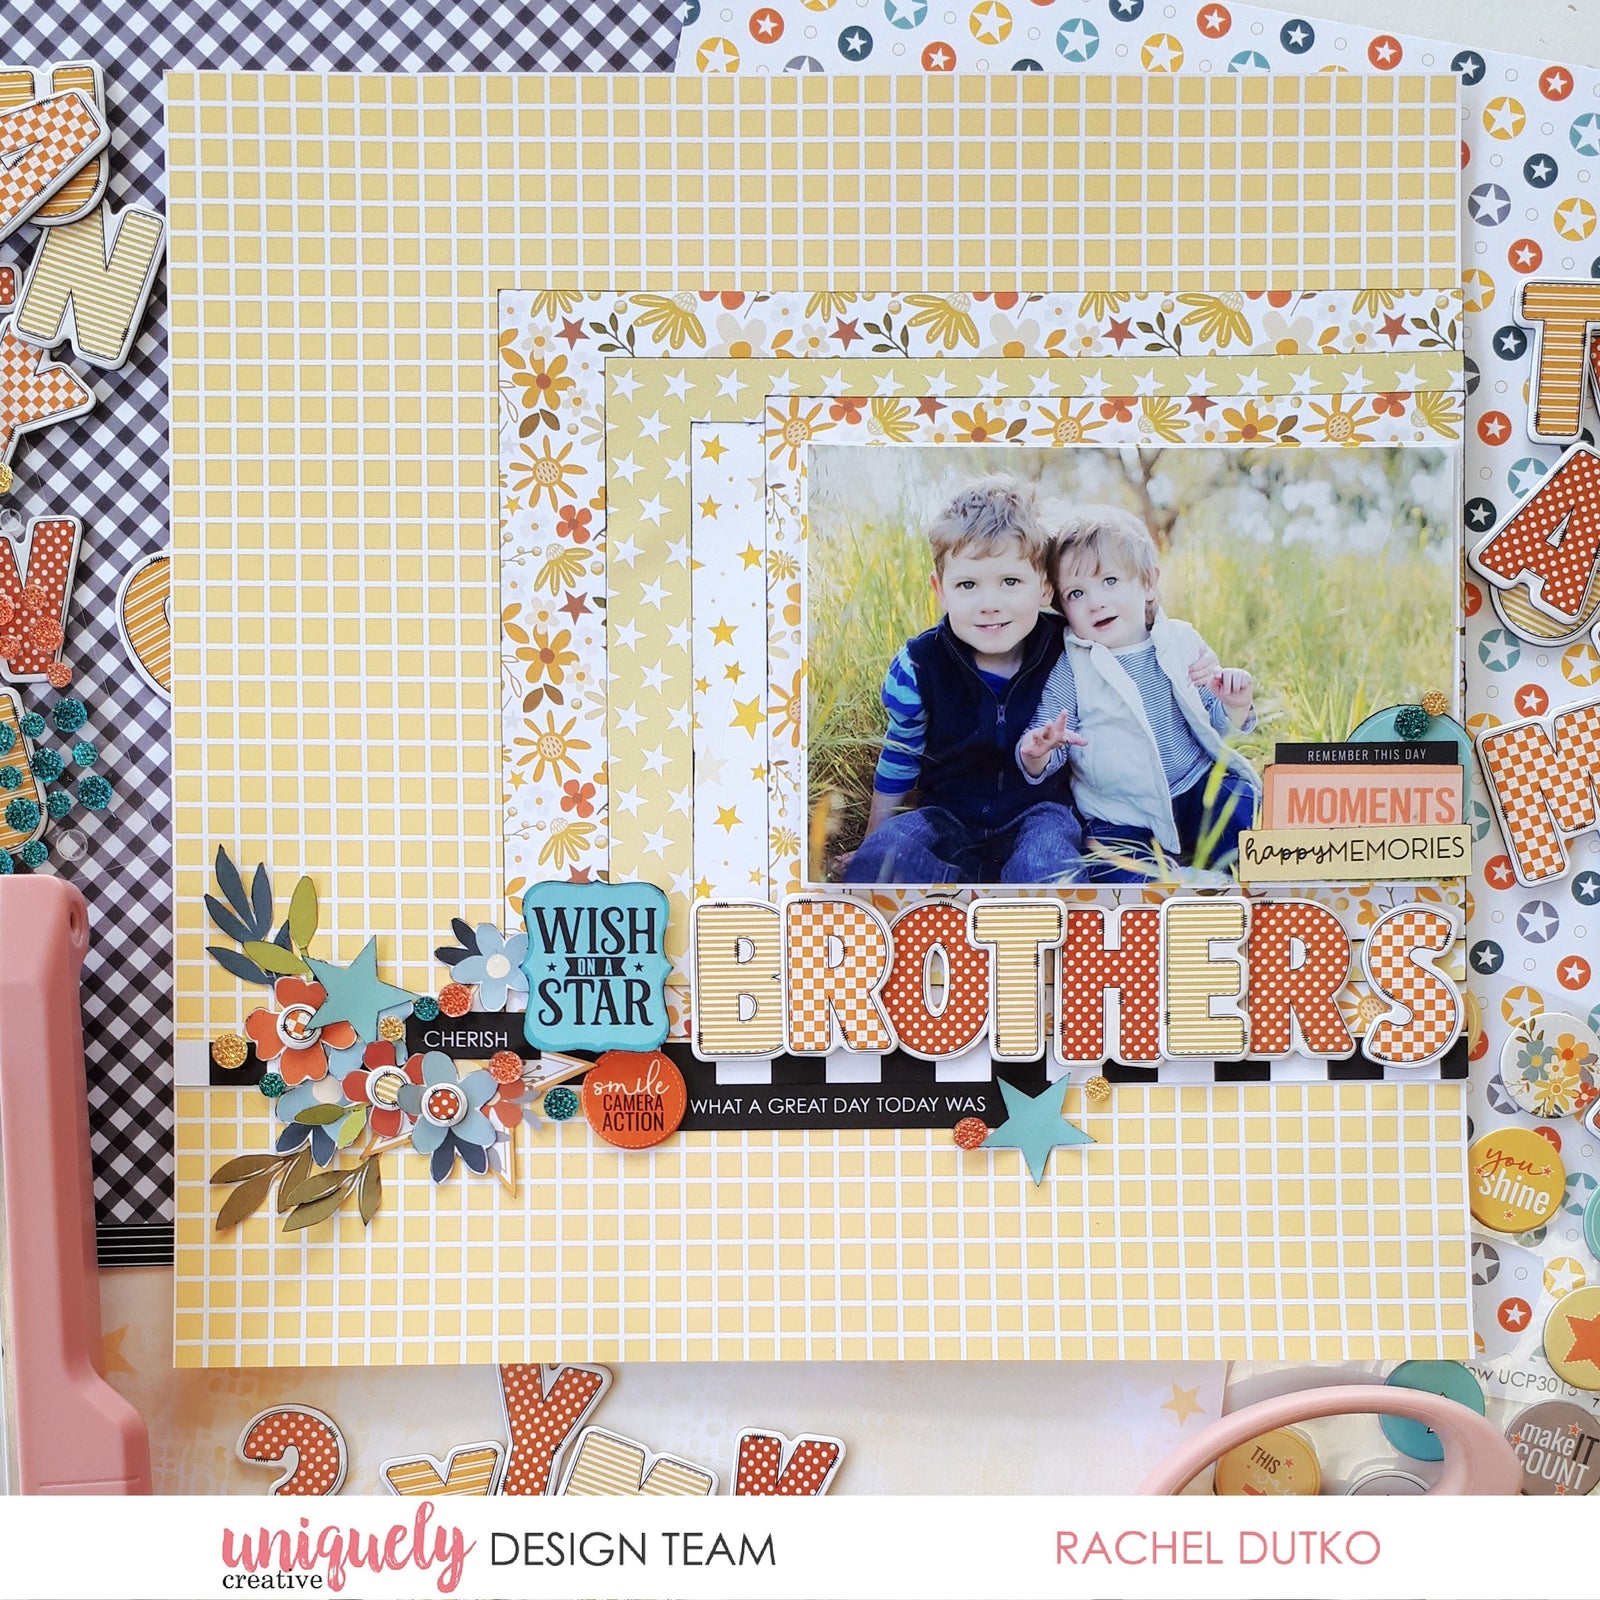
Uniquely Creative Products Used:
· UCP3014 Star Dust paper
· UCP3013 Starry Eyed paper
· UCP3011 Bright Star paper
· UCP3021 Creative Cuts
· UCE2163 Chipboard Alpha Stickers
· UCE2162 Chipboard Stickers
· UCE2117 Sparkly Stickers – Celebrations
· Foam Mounts
Other Products Used:
· Black Soot Archival Ink
· Cardboard
Photo size: 4" x 6"
Step 1:
Trim the branding strip from the Star Dust paper. Keep this aside as we will use it on the layout. Trim 2 pieces of the Starry Eyed paper (B-side), one 9”x7” and one 6 ½” x 5”. Trim the Bright Star paper to 8” x 6”. Ink the edges with black ink – See image 1
Step 2:
Adhere the black and white stripe branding strip to the layout 2 ½” up from the bottom of the page. Adhere the paper layers in size order against the right-hand-side, sitting on the black and white strip – See image 2
Step 3:
Matte your photo with Starry Eyed paper B-side (photo is 6”x4”). Adhere some cardboard or foam mounts and adhere to the layout on the right-hand-side. Trim a piece of Starry Eyed paper to 4 ½” x 1”, ink the edges and add in as an extra paper layer – See image 3
Step 4:
Adhere your title using the Chipboard Alpha Stickers– See image 4
Step 5:
From the Creative Cuts choose some quotes, floral star and 2 stars. From the cut-a-part sheet (on the back of the paper pack packaging) trim 2 quotes and some florals. Ink the edges with black ink – See image 5
Step 6:
Adhere the embellishments to the layout on the left-hand-side of the title. Adhere some quotes on the right-hand-side – See images 6,7

Step 7:
Add a Chipboard Sticker, Sparkly Stickers and 3 dots from the Chipboard Alphas onto the centre of the flowers – See image 8
carol
December 28, 2025
I am so inspired by this cute LO and am ready to start scrapping my Christmas pictures. Thank you