Bundle of Joy Tutorial - Natalie Elphinstone

Card Size: 10.5cm x 14.8cm white
Uniquely Creative Products Used:
UC1844 Fox Builder Stamp, UCD1992 Fox Builder Die, UCD1994 Candy Stripe Cover Plate Die, Fox Builder Lasercut “Congratulations”, Cut-A-Part Sheet, Watercolour Paper, UCE1772 Uniqolour Markers, UCE1804 Foam Dots
Other Products Used:
Coloured Paper, Staz-On Ink, Versamark Ink, Gold Embossing Powder
Instructions:
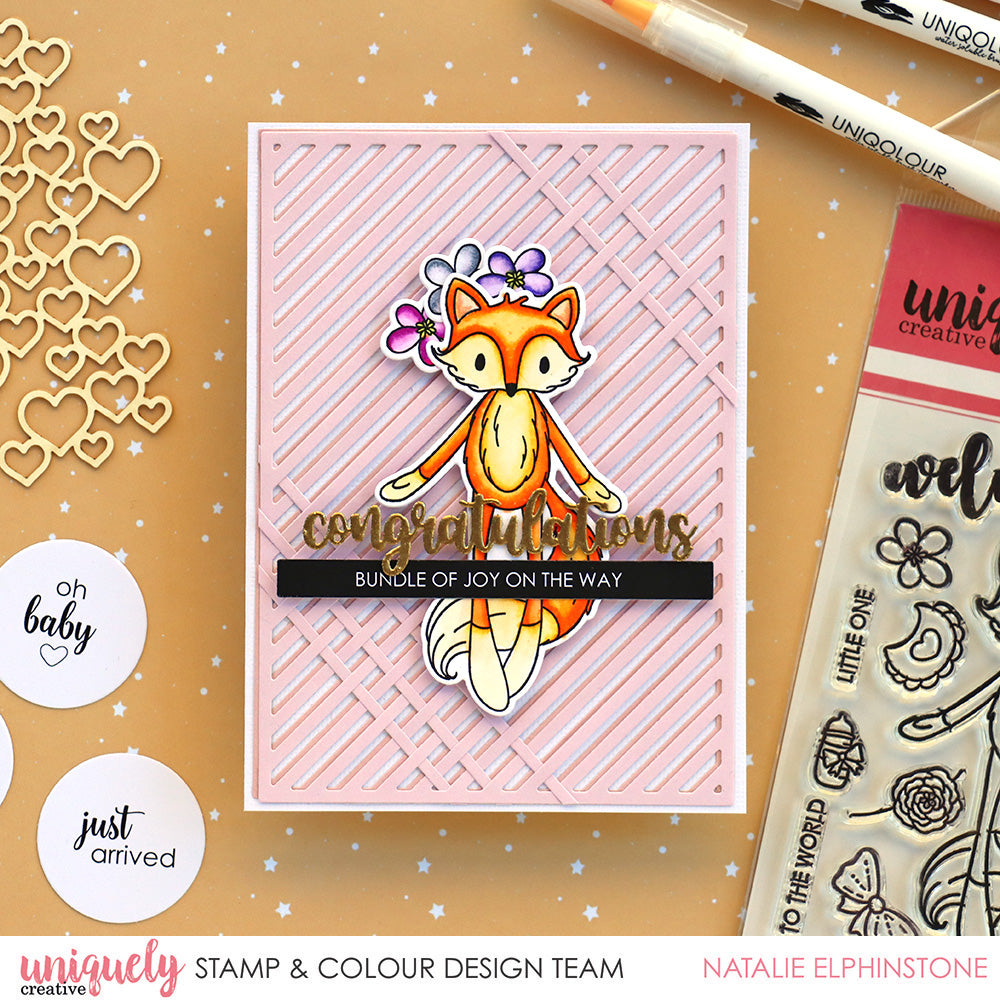
1. Start with the Candy Stripe cover plate. Die cut out a background in pink paper (or your choice of colour). Remove all the leftover strips and keep them aside. (You could weave in between the stripes, like in the above photo)

2. Natalie also cut another version of the cover plate die in a slightly darker shade of pink, and layered that behind her weaved version, adhering it just marginally off-kilter to achieve a kind of shadow effect.

2. Stamp the fox image from the stamp set onto Watercolour Paper using permanent ink. Stamp a few flowers and other accessories to give yourself options for how to decorate the card at the end. Using the Uniqolour Markers to colour your images – I just love the vibrancy these achieve, and the watercolour effect is always amazing. When it’s all dry, cut it out with the matching dies.

3. Press the lasercut words into your Versamark inkpad, then dip it into the gold embossing powder. Using a heat gun, heat-set your word, repeat the process a second time. This gives a really thick coating and looks nice, even and glossy.

4. Now it's time to assemble all the pieces of the card together. The pink woven cover plate background is adhered to a white card. Add the fox with a few flowers in her hair, and finish with the gold laser cut sentiment and a word strip.

