CAPTURED MOMENTS LAYOUT TUTORIAL - MARIA ALOISI
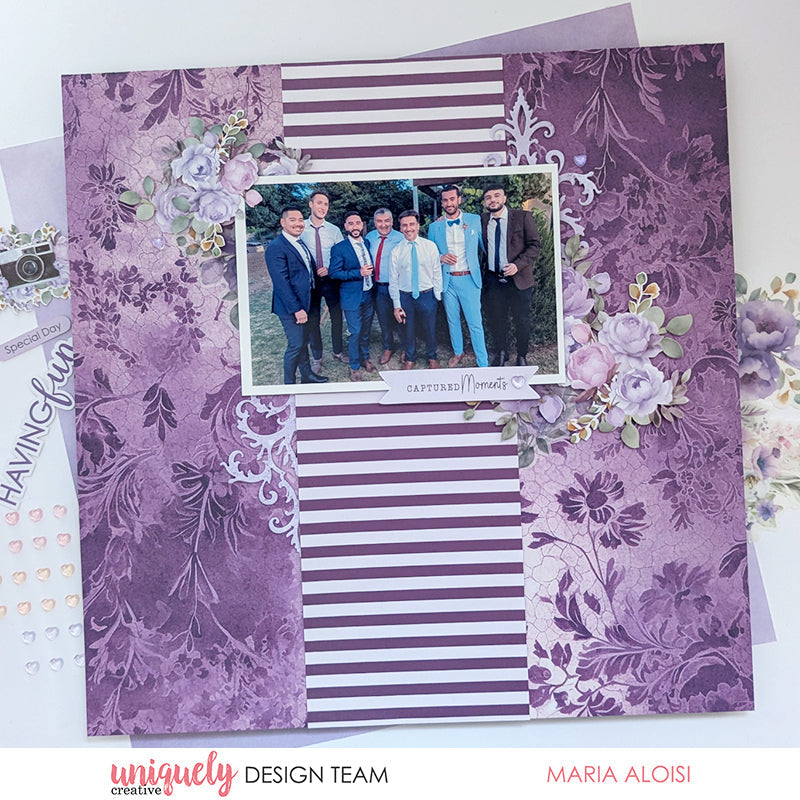

To recreate this amazing layout created by Design Team member Maria Aloisi you can follow the steps below:
Uniquely Creative Products Used:
· UCP3064 Pretty Purples Paper
· UCP3066 Magical Mauve Paper
· UCP3070 Living Life’s Moments Paper
· UCP3074 Ultraviolet Delight Creative Cuts
· UCP3075 Ultraviolet Delight Vellum Creative Cuts
· UCD2227 Romantic Damask Die
· UCE2185 Dew Drop Heart Stickers – Romantic
· UCE1981 Die Release Tool
· UCE1803 Foam Mounts Squares & Strips
· UCE1859 6mm Double Sided Tape
· UCE1872 Fussy Cutting Scissors
Other Products Used:
· Paper trimmer
· Die cutting machine
Photo size: 6"x4' landscape
Step 1:
Use the Magical Mauve paper for the base. Remove the branding strip – See image 1
Step 2:
Cut a piece 4” x 12” from the Pretty Purples (reverse) paper. Using Double Sided Tape add to the centre of the base page – See image 2
Step 3:
Using Foam Mounts, add the 6” x 4” photo, 2” from the top edge – See image 3
Step 4:
Using the Romantic Damask Die and the Pretty Purples paper die cut two pieces – See image 4
Step 5:
Add the die cut pieces to the base page – See image 5
Step 6:
Embellish the page by adding creative cuts and vellum creative cuts to the sides of the Pretty Purples strip – See image 6
Step 7:
To finish, fussy cut the ‘Captured Moments’ banner from the Living Life’s Moments paper. Using Foam Mounts, add towards the bottom right-hand corner of the photo. Add some Dew Drop Heart Stickers – See image 7