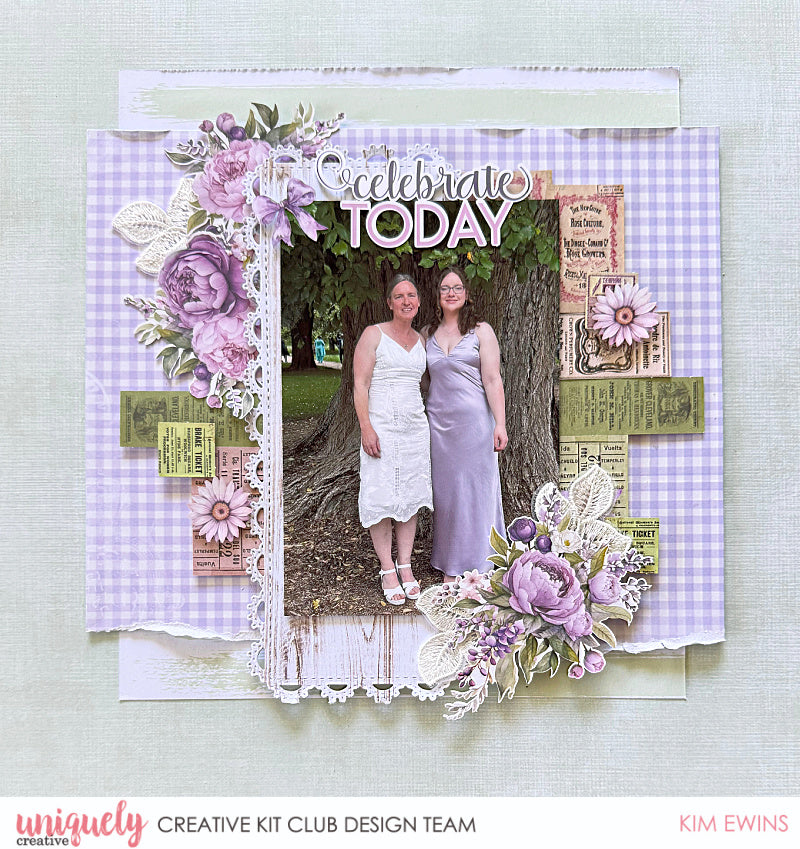
CELEBRATE TODAY LAYOUT TUTORIAL - KIM EWINS

To recreate this gorgeous layout created by Design Team member Kim Ewins you will need the products listed below:
Uniquely Creative Products Used: ·
UCP2871 Serene
UCP2872 Tranquil
UCP2873 Serenity
UCP2874 Whisper
UCP2894 Serenity Creative Cuts
UCE2054 Rose Lace Leaves
UCD2178 Slim Lace Frame & Flourishes
Other Products Used:
Scissors, trimmer
Glue, adhesive, foam mounts
Cardboard
Manual die cutting machine.
Photo size: 6” x 4” portrait orientation
Instructions:
Step 1:
Use Serene as the base of the layout.
Step 2:
Cut Tranquil paper 8 ¼” x 9 ½” – See Image 1
Step 3:
Measure in 2 ¾” from left hand side of Serenity paper and trim. Carefully tear the flower section from the paper. – See image 2
Step 4:
Cut a piece of cardboard slightly smaller than the Serenity piece. Adhere to the back.
Step 5:
Adhere Tranquil section to the Serene base, roughly 2” in from left hand side of base and 1 ½” from top edge. – See image 3
Step 6:
Adhere raised Serenity piece on top of the Tranquil section
Step 7:
From the Whisper paper cut one Slim Lace Frame, using the die & die cutting machine. – See image 4
Step 8:
Cut cardboard and adhere to the back of the cut die piece.
Step 9:
Take photo and adhere cardboard/foam mounts to the back of the photo.
Step 10:
Stick die cut piece slightly left of centre of layout, then adhere raised photo. -See image 5
Step 11:
Take a selection of Rose Lace Leaves and creative cuts adhere cardboard or foam mounts to the back of some of the creative cuts, adding height and dimension. -See image 6
Step 12:
Adhere Creative Cuts around photo & tucking leaves amongst flower clusters.
Step 13:
Stick sentiment in place on photo as title.
