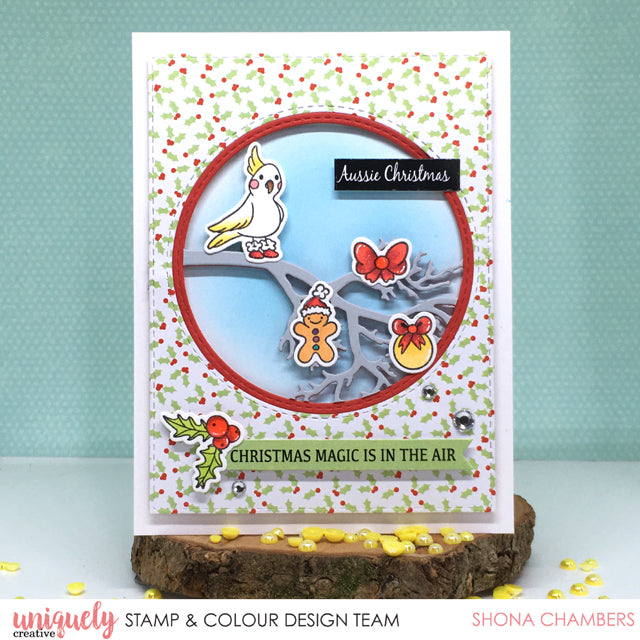
Christmas Magic - Shona Chambers

Card Size: 4 1/4" x 5 1/2"
Uniquely Creative Products Used
Aussie Christmas 2 Stamp Set, Aussie Christmas 2 Dies, Aussie Christmas 2 Patterned Paper, Aussie Christmas 2 Cut-a-Part Sheet, O Christmas Tree Stamp Set, O Christmas Tree Matching Dies, Round Branch Window Die, Silver Rhinestones, Clear Sparkle Brush
Other Products Used
White Cardstock, Red Cardstock, Grey Cardstock, White Foam, X-Press It Foam Tape, Gina K Amalgam Black Ink, Gina K Connect Glue, Glossy Accents, Distress Ink: Mermaid Lagoon, White Gelly Roll Pen
Colours Used
Altenew Artist Markers:
Red: R206, R217
Yellow: C001, Y205
Brown: Y612, Y932
Green: G804
Blue: B802
Pink: R403, R603
Purple: R702
Instructions
1. Die cut the Round Branch Window Die with some red and grey cardstock. Use the rectangle die from that set on some of the patterned paper from the kit and die-cut the round window die from the middle of it too. Cut the grey branch out from the circle to glue it over the red branch and keep the circle frame red.

2. Stamp out images with Gina K Amalgam Black Ink on white cardstock from the Aussie Christmas 2 Stamp Set and O Christmas Tree Stamp Set. Colour them with Altenew Artist Markers and die cut with the matching dies.

3. Glue the grey branch over the red branch and place the red circle die cut in the patterned paper. This was held in place with some foam tape on the back. Cut tiny pieces of foam tape to go behind the branches to give it dimension and stability.
4. After working out where the circle would sit on the card front, blend some Distress Ink to create a ‘sky’ and press the panel over the top.

5. Glue the images to the branch (like ornaments) and add some foam tape behind the cockatoo so he could sit on the branch too.
6. Use the Cut-A-Part Essentials #4 Die to cut the sentiment sheet from the kit and adhere the ‘Aussie Christmas’ on some foam tape. Repeat with the green sentiment and glue on a holly image.
7. After adding some highlights with a white Gelly Roll pen, Use a Clear Sparkle Brush on the bows, santa hat and santa boots. Add some Glossy Accents to the middle of the bows. Finally, for a bit more shine, add some Silver Rhinestones to complete the card.

AlfrMuh
January 05, 2021
Restoration of bath coverings https://megaremont.pro/ekb-restavratsiya-vann