Christmas Tag Layout - Yvette Fanciulli

Uniquely Creative Products Used
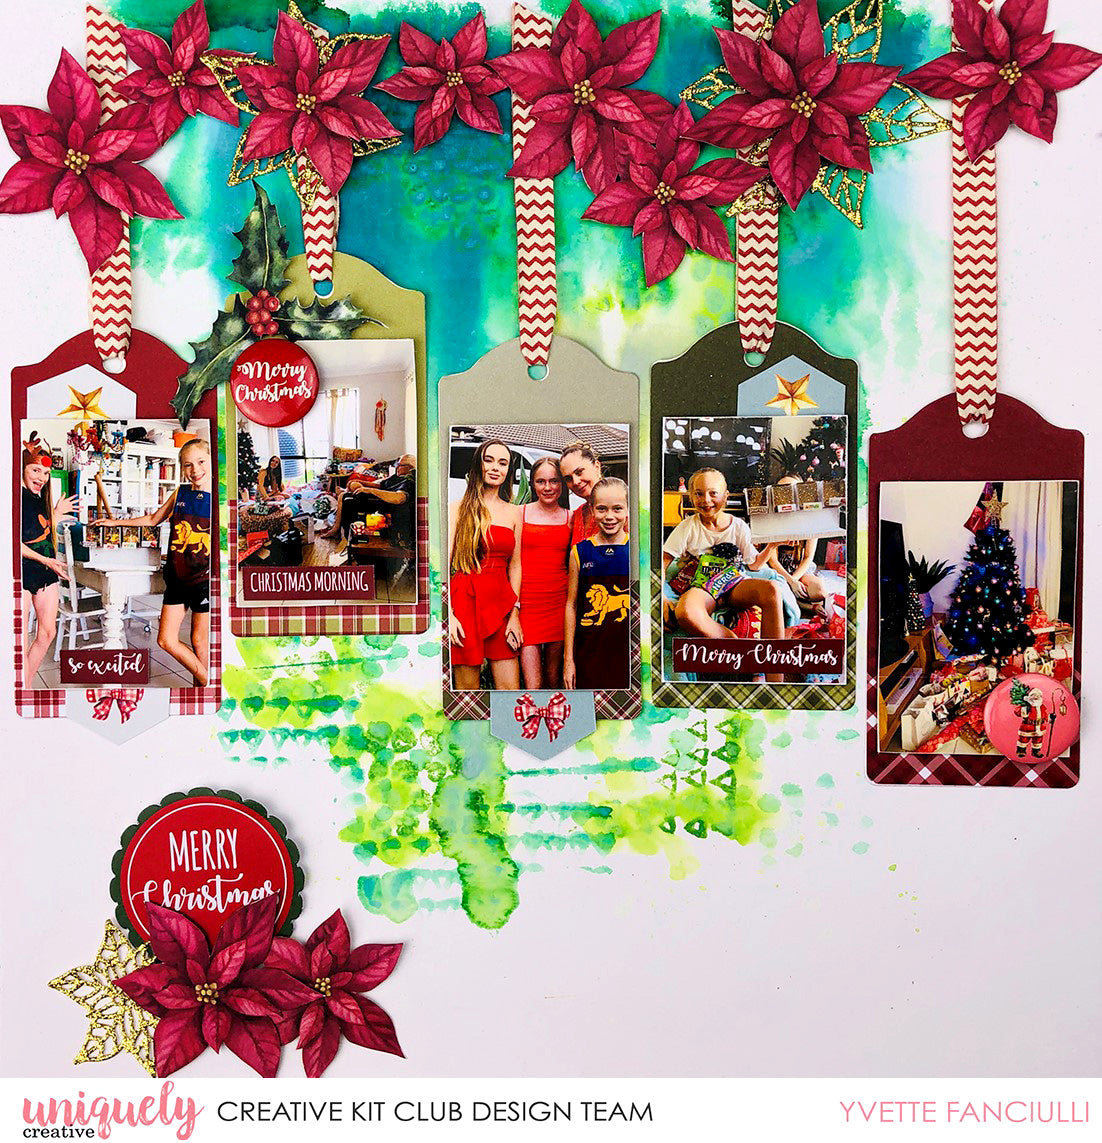
UCP2121 Gifts paper, UCP2122 Holly paper, UCP2127 Holly Jolly Christmas Creative Cuts, UCE1802 Holly Jolly Christmas Flairs, UC1766 Prints Mark Making Stamp, Chevron printed ribbon, Christmas Wooden Mix, Gold Glitter Card, Holly Jolly Christmas Cut-a-part sheet, UCD1951 Poinsettia die
Other Products Used
Tape runner, glue, foam adhesive, scissors, trimmer & ruler, manual die cutting machine, paintbrush, Distress Oxide: Pine Needles, Bundled Sage, Mowed Lawn
Photo Size: 5" x 7" Landscape
Instructions
1 Die cut some Poinsettias with glitter card. Fussy cut the poinsettias and holly from Holly paper. Cut tags from Gifts paper.

2. Using Distress Oxide ink or paint/ink and water spray bottle, create some colour at the top part of watercolour cardstock. Scrape the ink pad directly onto the cardstock and spray with water. Use the mark making stamp to create some texture while it is still wet.

3. Create the tags with your photos and some elements from the cut-a-part sheet and Creative Cuts. Add ribbon and attach to your cardstock. Add foam adhesive to the photos for dimension. Add some flairs to the tags and fussy cut holly.

4. Create a cluster at the bottom left corner with Creative Cuts and flowers.

5. Use foam adhesive to adhere the fussy cut flowers and gold poinsettias to the top of the page, covering the ends of the tag ribbons.
