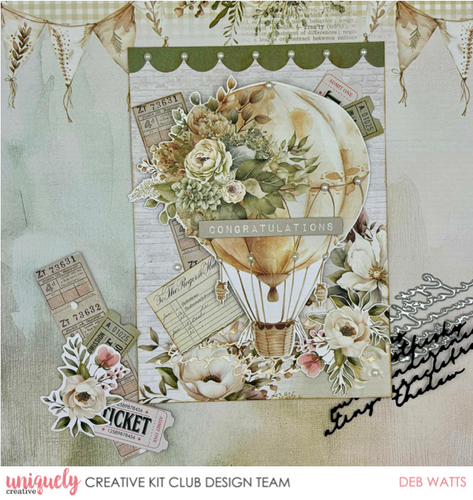
CONGRATULATIONS CARD TUTORIAL - DEB WATTS

To recreate this beautiful card created by Design Team member Deb Watts you will need the products listed below:
Uniquely Creative Products Used:
- UCP2861 Charming paper
- UCP2864 Adorable paper
- UCP2865 Hello Darling Creative Cuts
- UCD2172 Layered Script Die
- UCE1872 Fussy Cutting Scissors
- UCE1882 Chantilly Pearls
- UCCA1722 Chantilly Lace Cardstock
- UCE1859 6mm Double Sided Tape
- UCE1903 Foam Mounts Squares & Strips
Other Products Used:
- Vintage Photo distress ink
- Dauber
- Guillotine
Instructions:
- Cut a 10-inch x 7-inch panel from Chantilly Lace Cardstock, fold in half to create a 5 x 7-inch card base. Cut a 5 x 7-inch panel from Charming paper - include floral spray towards bottom of paper. See Image 1

-
Fussy cut hot air ballon and scallop from adorable paper and using the Layered Scrip die, die cut from Chantilly Lace cardstock. See Image 2.

-
Select ‘Congratulations’, tickets and floral spray from Hello Darling Creative Cuts Cuts. See Image 3.

-
Dauber Vintage Photo distress ink around edges of the paper panel and adhere to card base. Adhere the fussy cut scallop to top of panel and trim off excess. See Image 4.

-
Adhere the script die cut towards the bottom of the card from. Use foam mounts to adhere the ballon in position. Arrange the tickets under the ballon and adhere in place. Use foam mounts to adhere the floral spray and ‘Congratulations’ in place. Add Chantily lace pearls in place. See Image 5.
