Dream Holidays Tutorial - Melanie Parnell

Uniquely Creative Products Used:
UCP2291 Nature, UCP2293 Canopy, UCP2288 Daintree, UCP2299 Rainforest Retreat Cut-A-Parts, UCP1725 Rainforest Retreat- Laser Cut, UCP2298 Vellum Creative Cuts, Collection Pack, Puffy Stickers, Enamel Dots, Green Washi Tape, Yellow Washi Tape, Enamel Dots, Metal Caps
Other Products Used:
Trimmer, Adhesives, Scissors, 3D Foam Tape, Tacky Glue, Double Sided Tape
Instructions:
1. Cut white card 15cm x 30cm.
2. Fold in half and then on left edge fold in 3.5cm. Tape down.
3. Cut inner liner for card using Nature 2291 at 14.5 x 15cm.
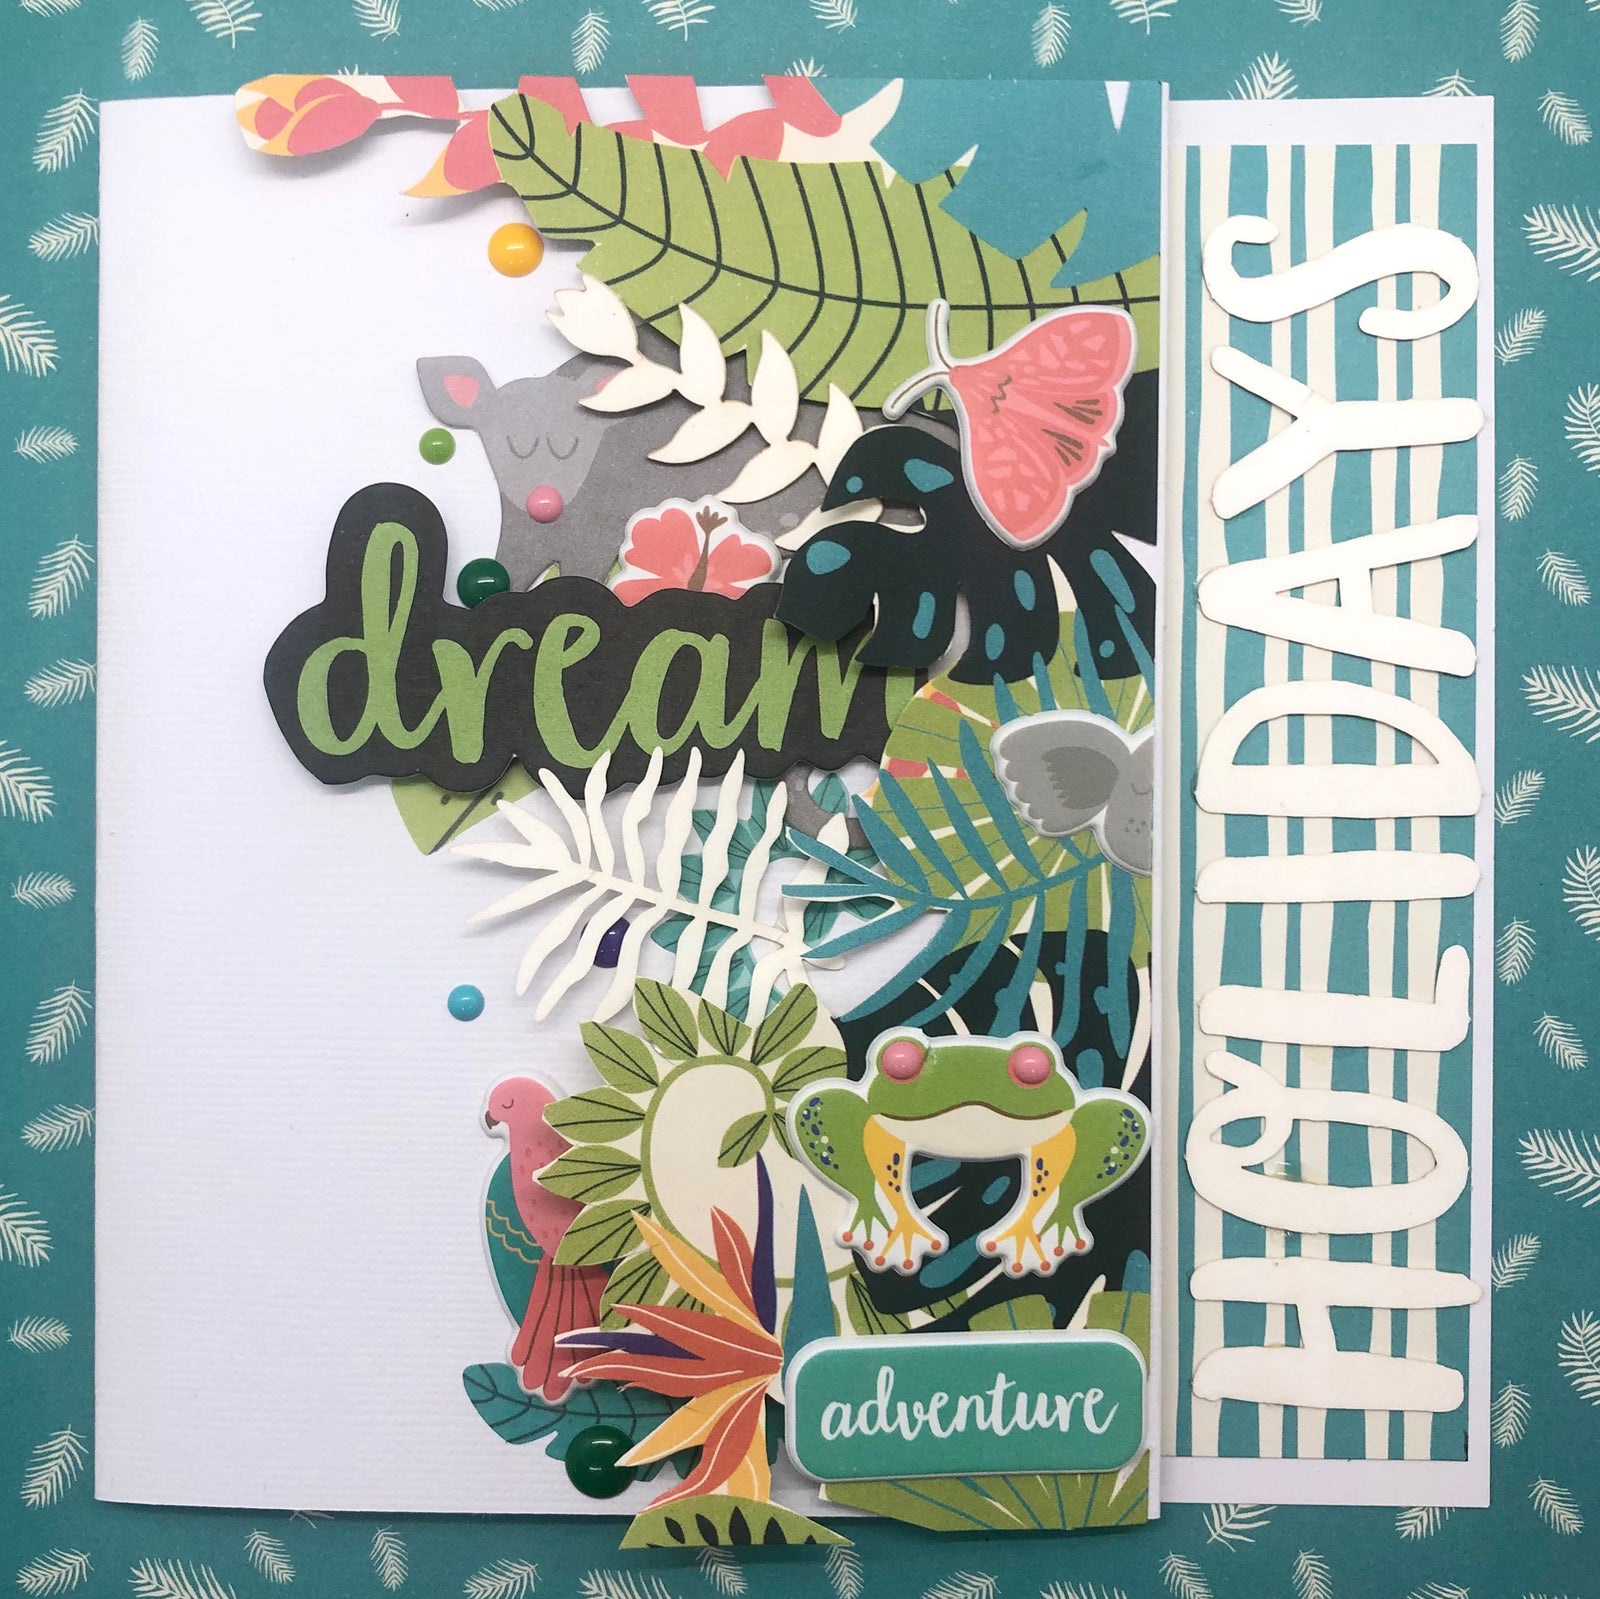
4. Fussy cut Canopy, choose part of the edge of the paper with all the foliage. Cover the right side of the card with this, remember to place 3d foam underneath it to lift it.
5. To build up the front of your card use, puffy stickers, laser cuts, rainforest collection pack, title ‘dream’ to create a layered rain forest. Finish off with enamel dots and metal caps
6. Stick down the word HOLIDAYS on the edge of the card with tacky glue.
7. Use your left over scraps white card to draw 3 different sized circles 1 x inside circle of double sided tape, inner circle of washi as well as outer circle.

8. Turn over the card and cover those circles with both colours of washi and vellum leaf stickers. Cut out circles. Layer inside the card with 3d foam. Use puffy stickers and collectables to decorate. Use a range of colours and sizes in enamel dots.


9. Line the other side of the care with Daintree 14.5 x 8.5cm and cut 10 x 7cm out of Canopy. With the Canopy piece use your scissors to create two slits on the right side to hold your gift card.
10. On left side of card cut words out of rainforest retreat-cut-a-parts. Glue these down. Finish off with extra enamel dots.