Eat, Craft, Sleep Tutorial - Natalie Elphinstone

Uniquely Creative Products Used:
UC1857 Crafty Stamp Set, UCD2032 Crafty Die Set, UCD2033 Embroidery Hoop Die, Arty Laser Cut, Cut-A-Part Sentiment Strips, UCD1958 Cut-A-Part Essentials #5 Die, UCD1977 Scalloped Nesting Square Dies, UCD1976 Stitched Nesting Square Dies, Watercolour Paper, Uniqolour Markers, Foam tape
Other Products Used:
Glitter Craft Foam, Sizzix Texture Roll, Coloured Cardstock, Distress Ink, Clear Embossing Powder
Instructions:
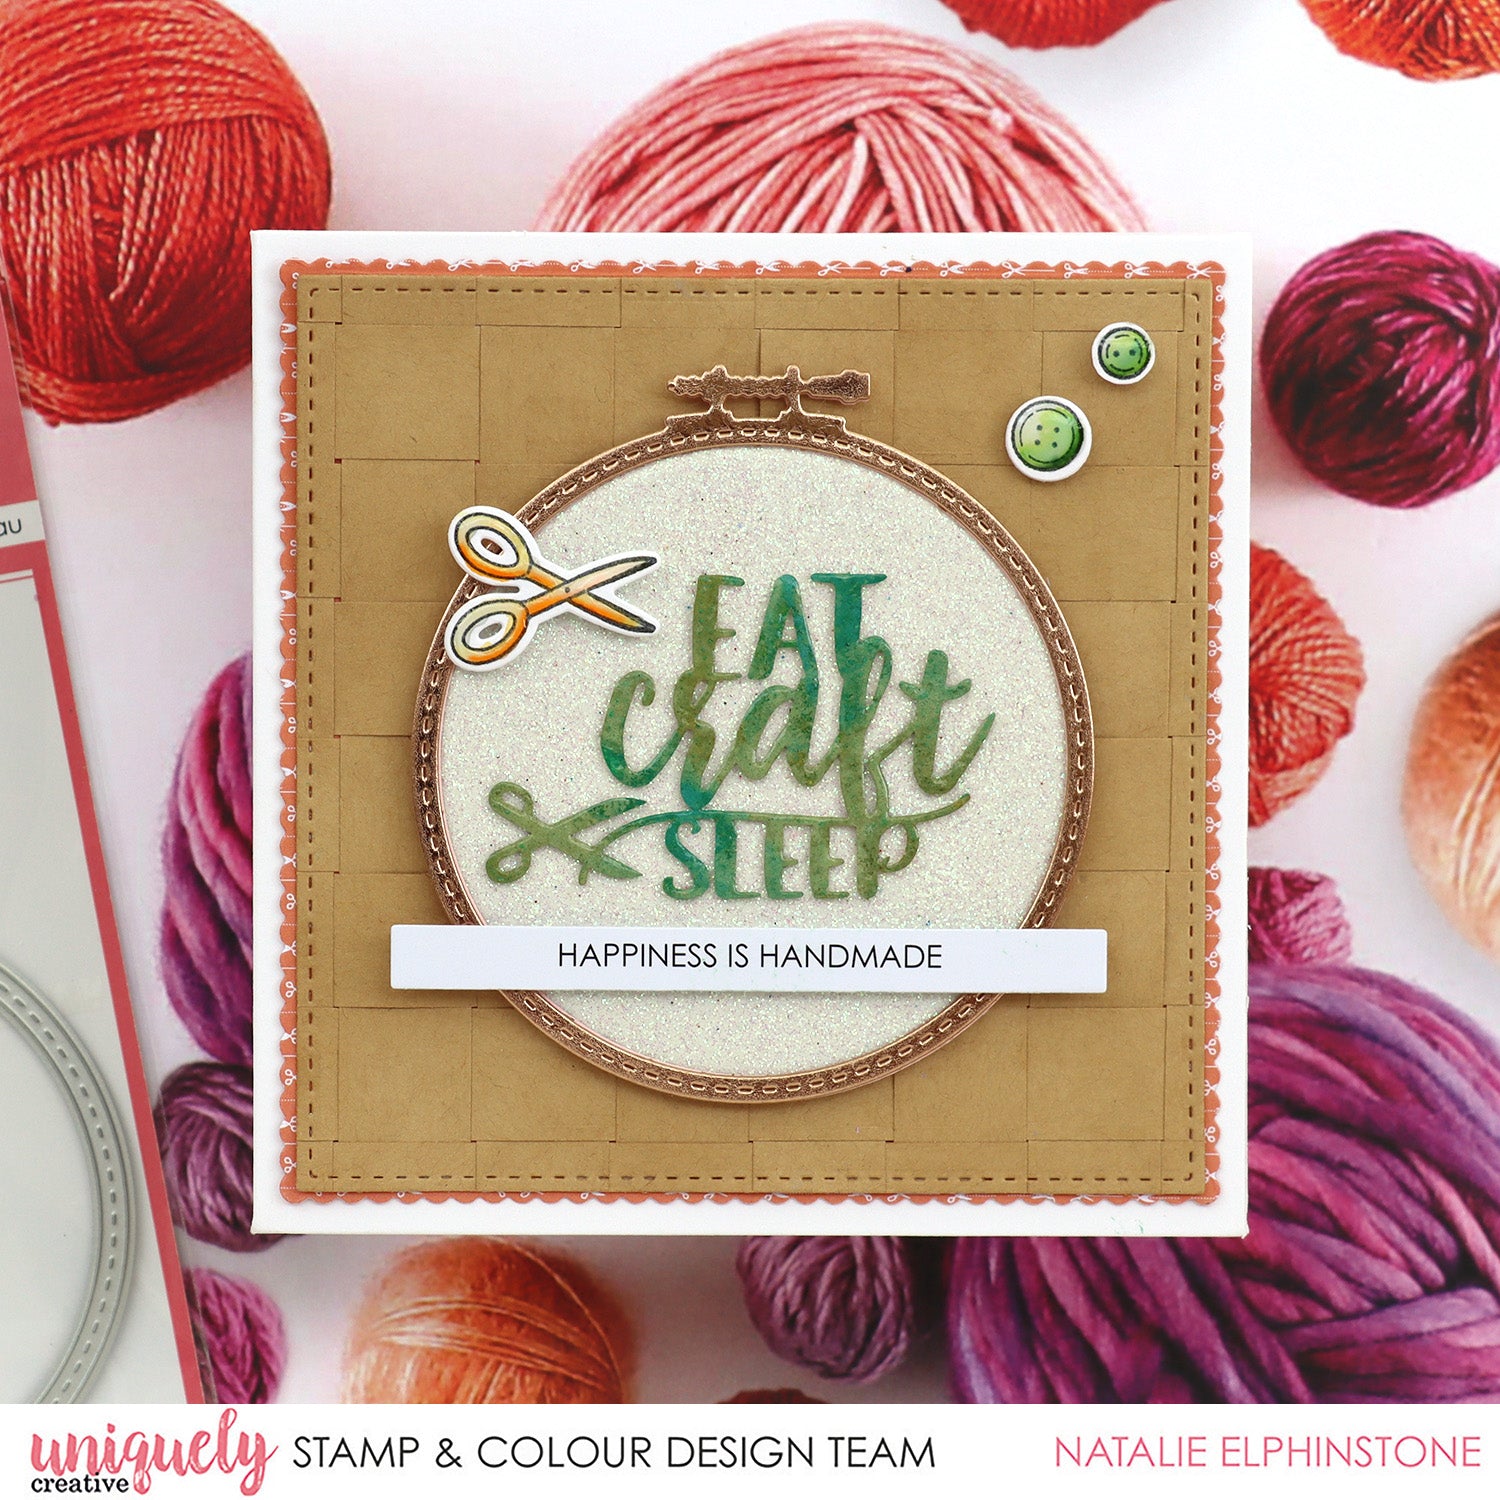
1. To create the background of Natalies card she tried a paper-weaving technique. Cut a bunch of brown paper strips all the same width (1.5cm). Note: paper, not cardstock, this will make it easier to weave.
To start lay one strip horizontally. Then adhere strips running vertically, alternating sticking them on top and below the horizontal strip. Do this all the way across.
Stick a new strip running horizontally, directly below the original strip (again making sure to alternate adhering it above and below) – only put adhesive on the end of it. Weave it in and out of the vertical ‘hanging’ strips until you reach the end, and then you can put a bit more adhesive on this end too.
Keep on repeating the technique until you finish the whole square!

2. Don't worry if the ends of your woven paper piece are a bit messy, because it will need to be trimmed down when die cutting it. Die cut using the large stitched nesting square die. This will give it a more ‘professional’ finished look.
Die cut one of the patterned papers from the kit with the large scalloped nesting square die and adhere behind the woven square so just the edges of the scallops are peaking out. Adhere these layers onto the Square Card now – this is now your background.

3. The key to creating some lovely dimension is to cut multiple layers. Using the embroidery hoop die and cut some white glitter craft foam, some light pink cardstock, and some rose gold sizzix texture roll.

4. Most of this card was created from die cuts. The only images Natalie stamped and coloured and cut out were the scissors, and the two little buttons from the Crafty Stamp Set.

5. The sentiment was one of the laser cuts from the arty kit. Colour by dabbing on two colours of green distress ink, directly from the stamp pad itself. Coat it with some clear embossing powder for a glossy finish. With all the little bits and pieces finished, stick them all down onto the card – making sure to use plenty of foam tape for more dimension!


