Fairy Tale Card Tutorial by Ashlee McGregor

Uniquely Creative Products Used:
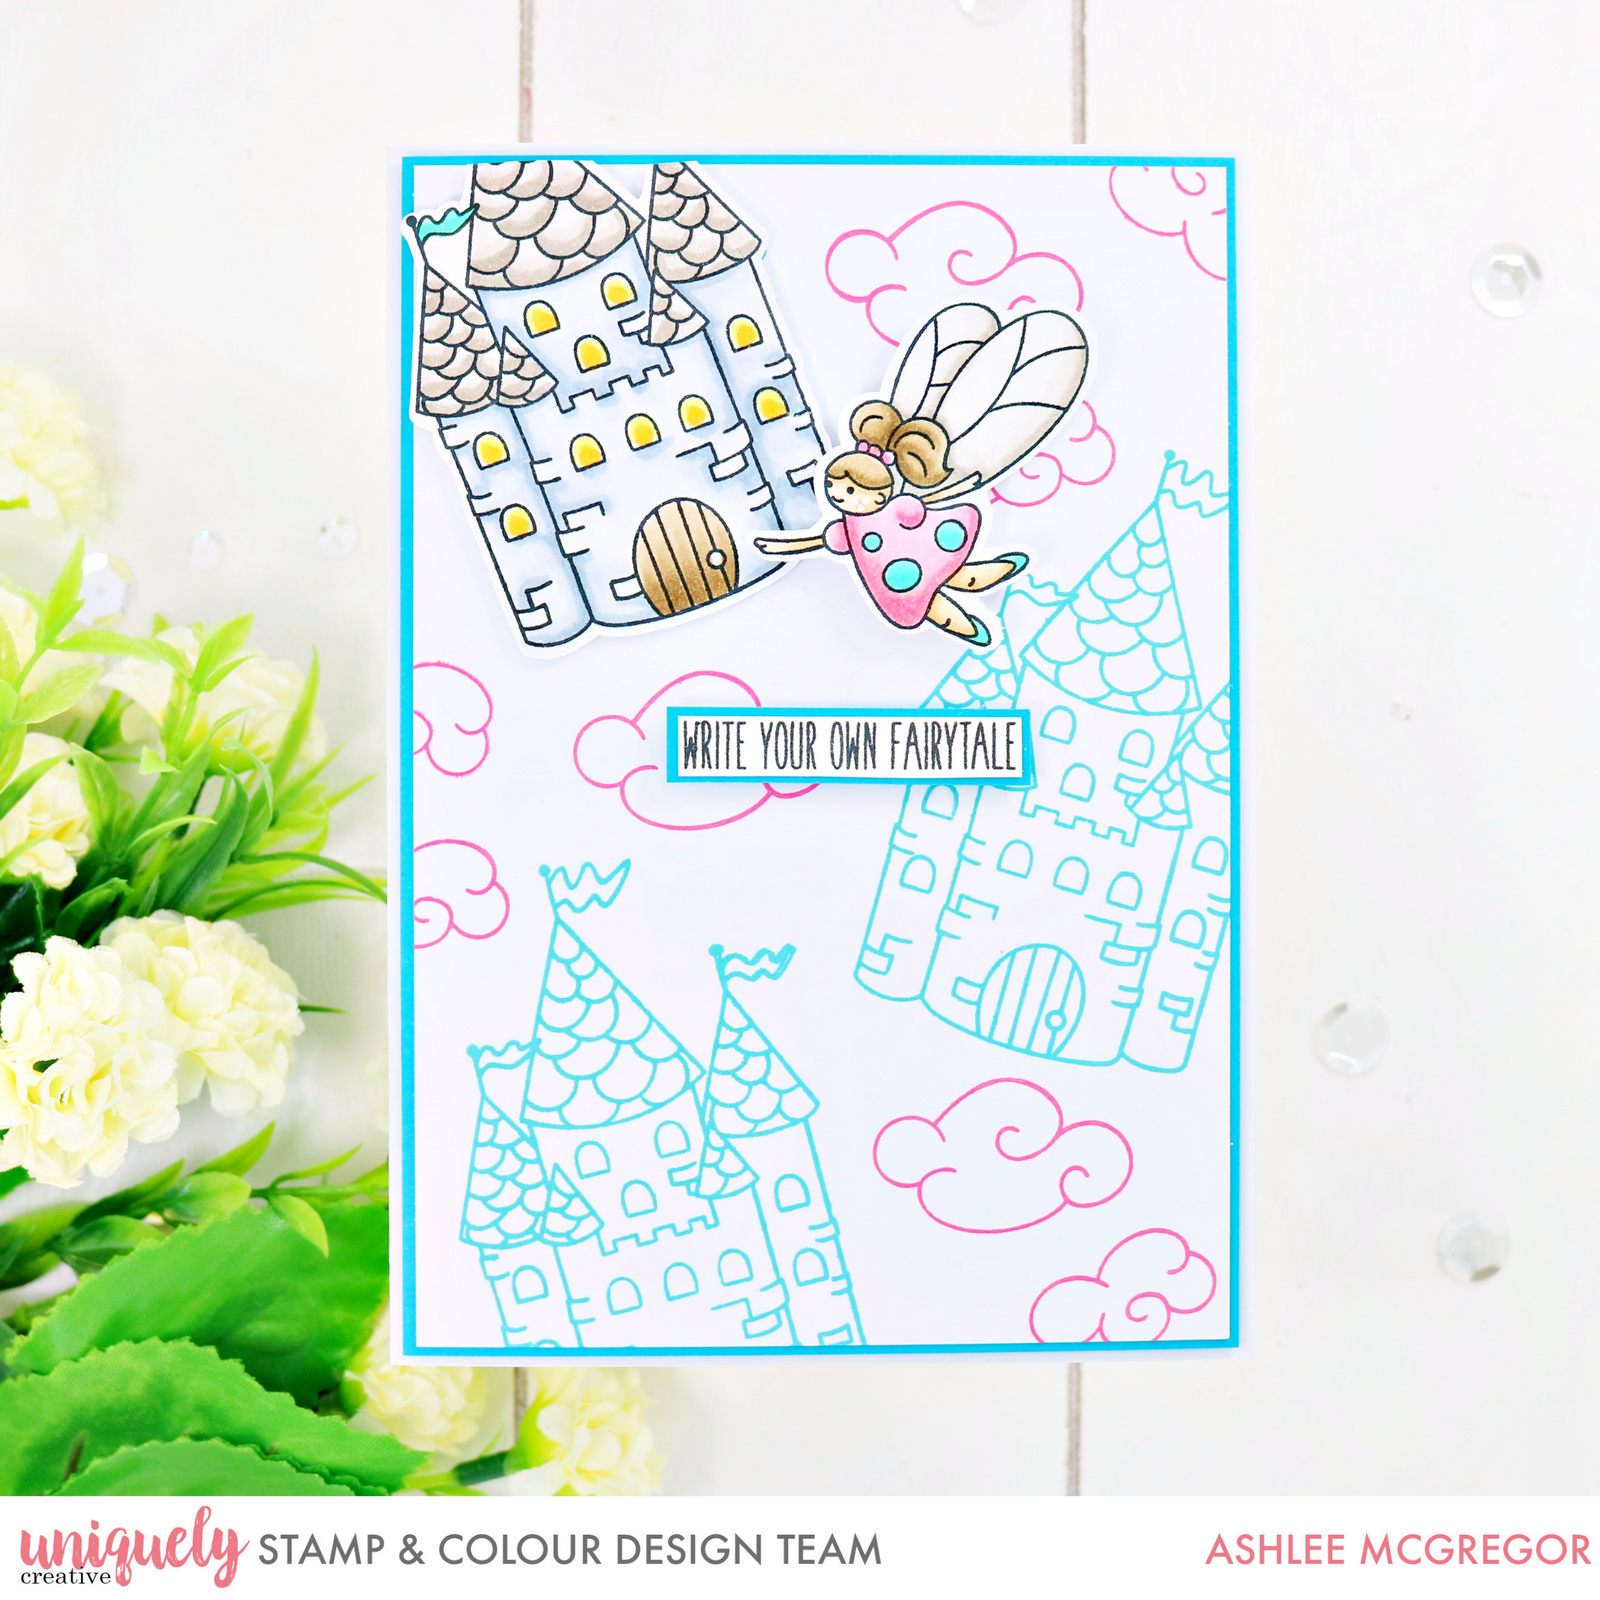
Fairytale Wishes Stamp & Colour Kit
Other Products Used:
Distress Oxide Inks, Momento Ink, Copic Markers
Copic Colours Used:
Skin - E50, E51, E53, E55
Hair - E42, E43, E44
Dress - R30, RV32, RV34, BG32, BG34, BG49
Wings - W00, W1, W4
Castle - C00, C1, C4, W1, W2, W4
Door - E42, E43, E44
Lights - Y02, Y17
Flags - BG32, BG34
Step 1
First stamp the castle image using Broken China Oxide Distress Ink, repeatedly over a white cardstock base.

Step 2
Fill in the empty areas by stamping both sizes of the clouds using Picked Raspberry Distress Oxide Ink.

Step 3
Stamp your sentiment onto a little white strip and then adhere it onto a piece of matching cardstock.
Trim it down to create a sentiment banner.

Stamp, colour and die-cut the selected images and then adhere all pieces to the base using foam tape.