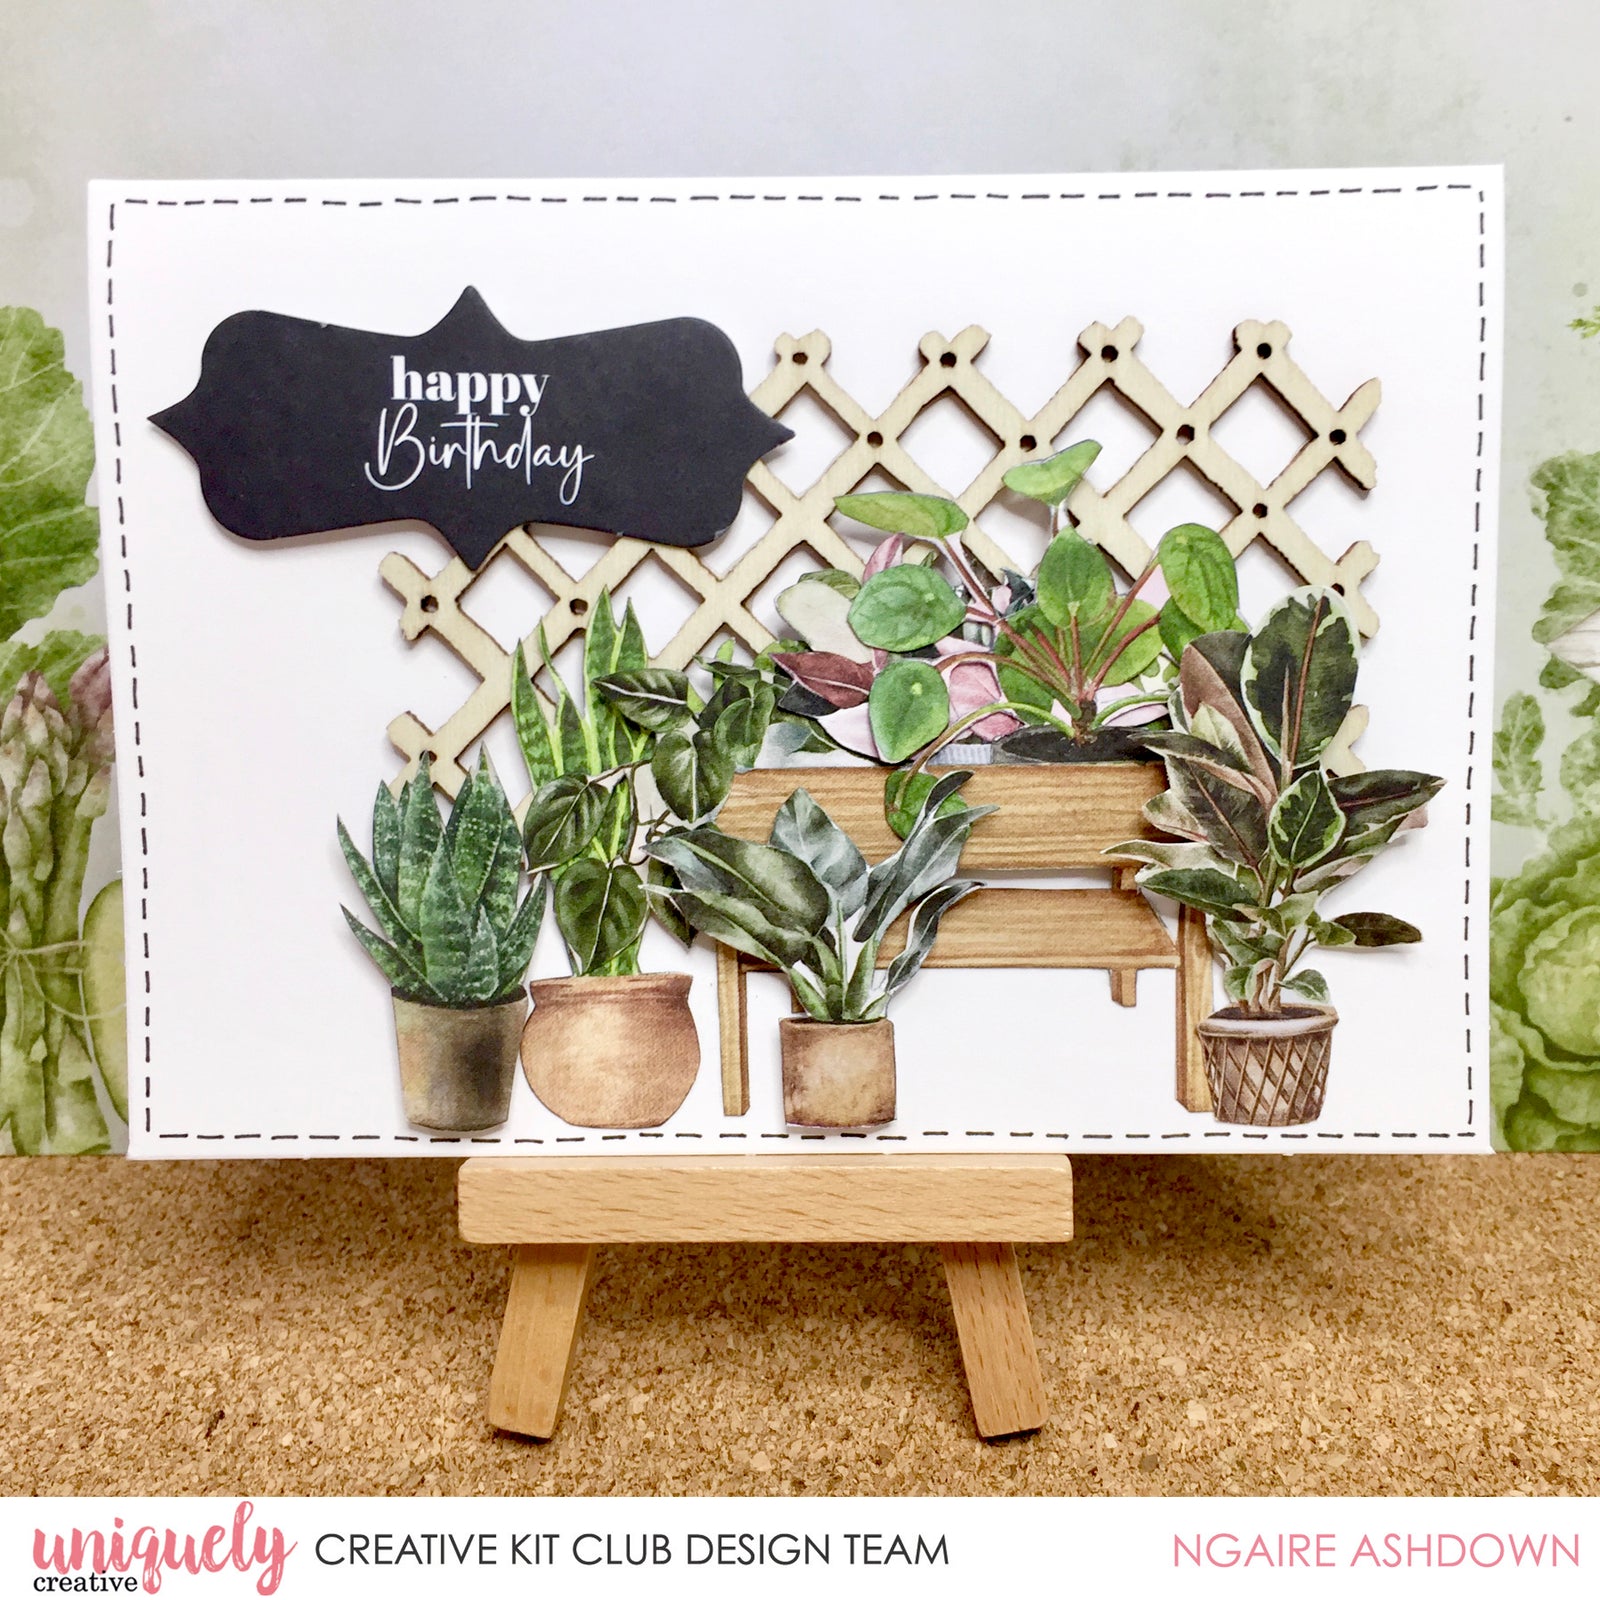
Garden Happy Birthday Tutorial - Ngaire Ashdown

Uniquely Creative Products Used:
-
UCP2484 Houseplants paper
- UCP2490 Garden Path Creative Cuts
- Laser cut sheet
- UCE1945 Fine liner pen #03
Other Products Used:
-
Sharp scissors, ruler
- Craft Knife
- UCE1811 White rectangle card base
- Liquid glue
- Foam dots
Instructions:
1. Fussy cut some of the potted plants from the Houseplants paper including the plant stand.

2. Choose one of the smaller potted plants from the Creative Cuts pack and cut the white border off the piece you choose.
3. Use a craft knife to cut a line in the plant stand just under the line of greenery. DO NOT cut to the side edges! You can also cut out the background pieces, if desired.
4. Using a grey marker, edge all the pieces to hide the raw white edges.
5. Add your potted plants through the line and trim the pots that peek out of the bottom of the planter box.

6. Carefully remove the lattice piece from the laser cut sheet.
7. Using strong liquid glue adhere the lattice piece to card front (off centre)

8. Audition all the potted plant pieces to your liking – glue the planter stand with pots to your card first. Use liquid glue and foam dots to adhere the rest of the potted plants to the card. (Leave top left corner for the sentiment).

9. Add the black and white Happy Birthday sentiment from the Creative Cuts pack.

10. Using the 03 fine liner pen, add dashes around the card front about .5cm in form the edge of card to create a border.