Grateful Layout - Lydell Quin

Uniquely Creative Products Used:
UCP2313 Stories, UCP2319 Marvellous, UCP2315 Woodlands, UCP2320 Book Week, UCP2314 Characters, The Story Garden Cut-a-Part Sheet, UCE1807 Paper Doilies, UCD2023 Type Texture Die, UCD2024 Bookmark Die, Uniquely Creative Black Sparkle Brush
Other Products Used:
Distress Ink - Black Soot, Distress Oxide - Peeled Paint, gesso, paint brush for splattering, black fine tipped felt pen, adhesives
Instructions
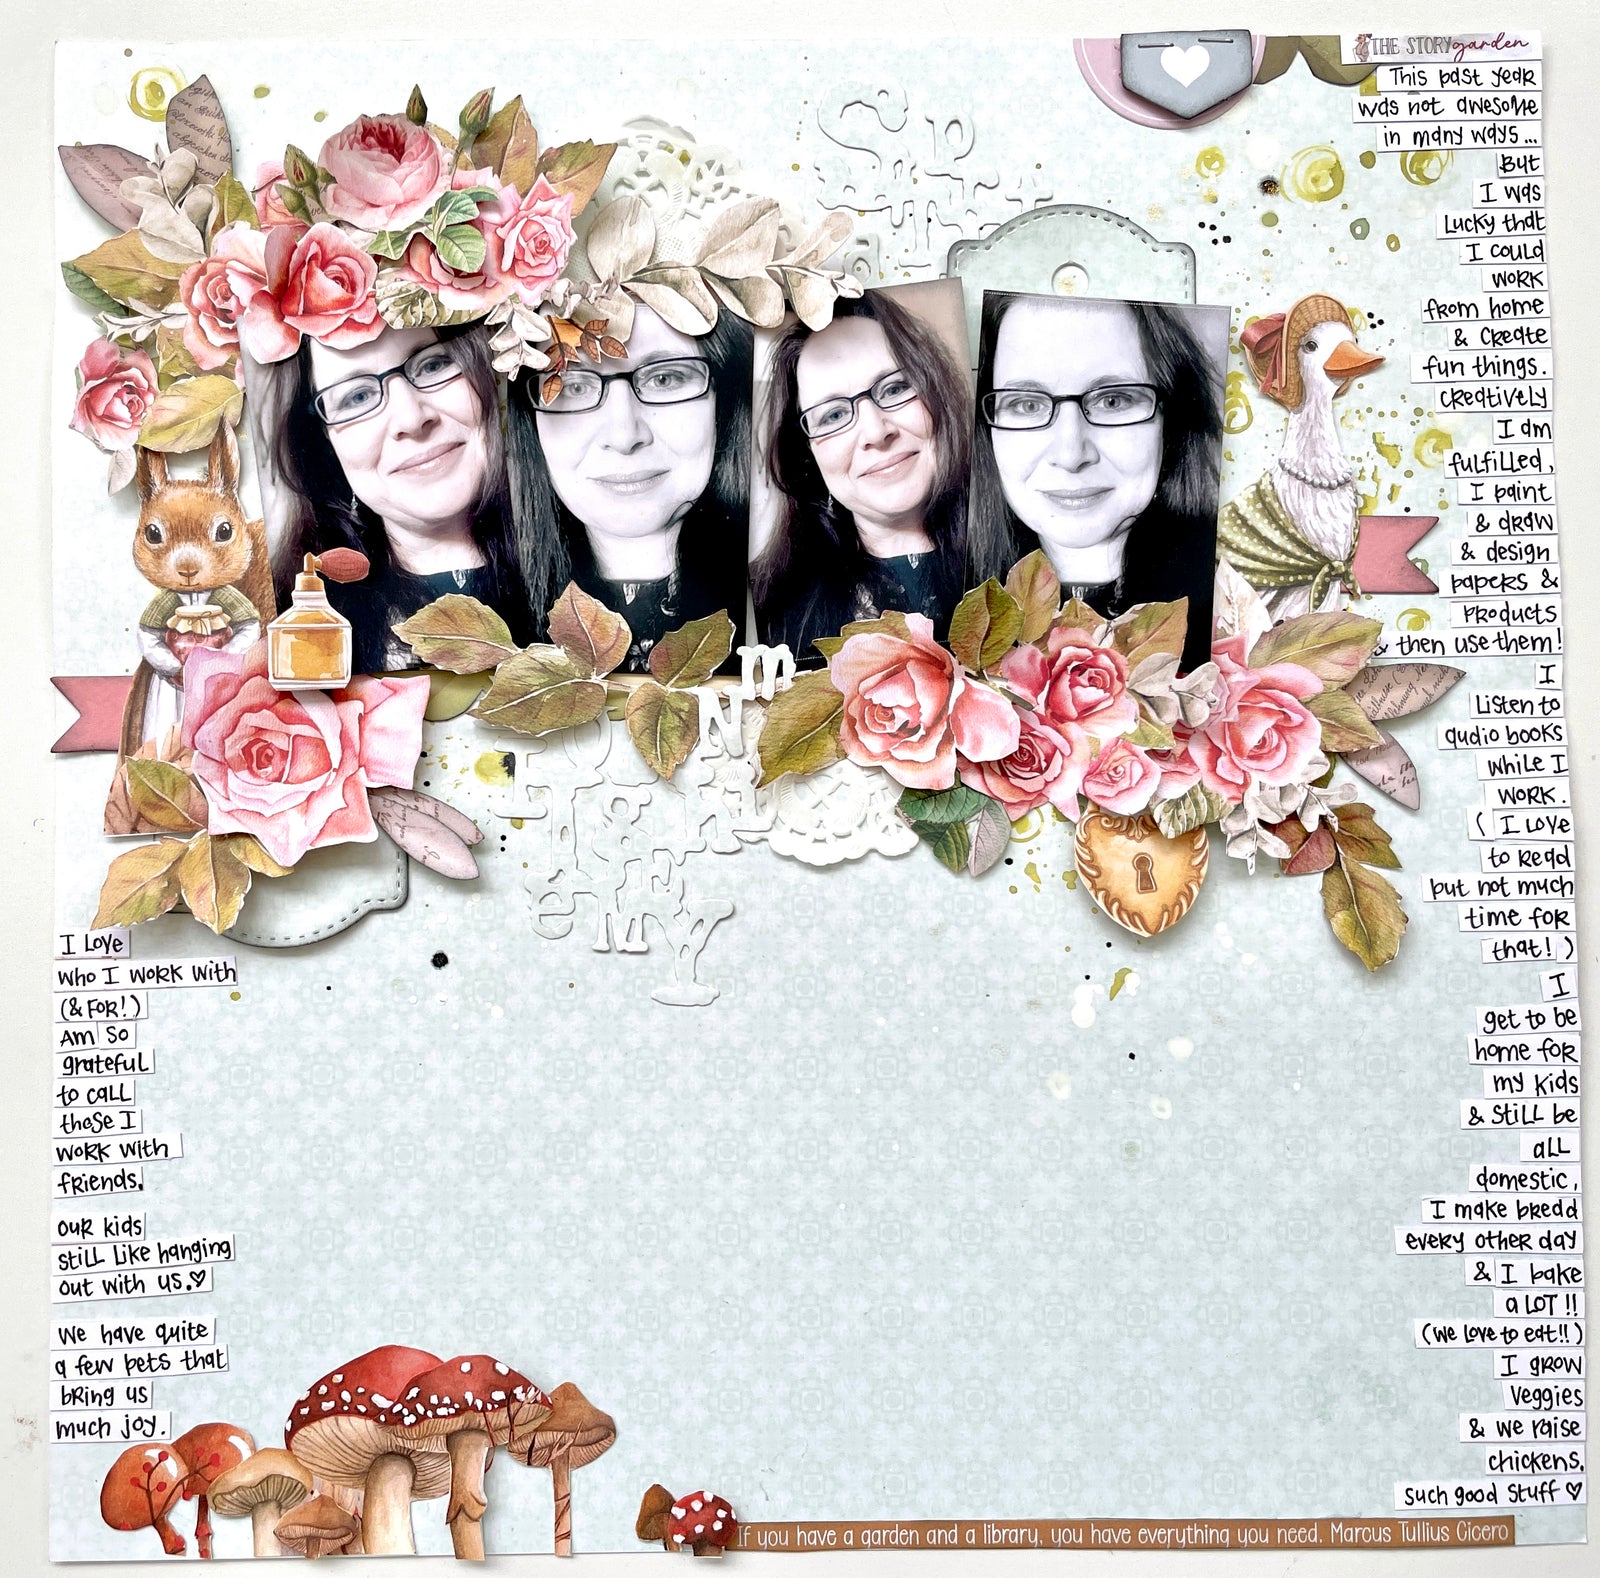
1. Chose a background paper that is not too busy. I used the pale green side of UCP2313 Stories. Add some splatters with Distress Oxide, gesso and a black Sparkle Brush. This is optional but fun to do. Use a paintbrush and watered down Ink/gesso and splatter, drying off between colours.

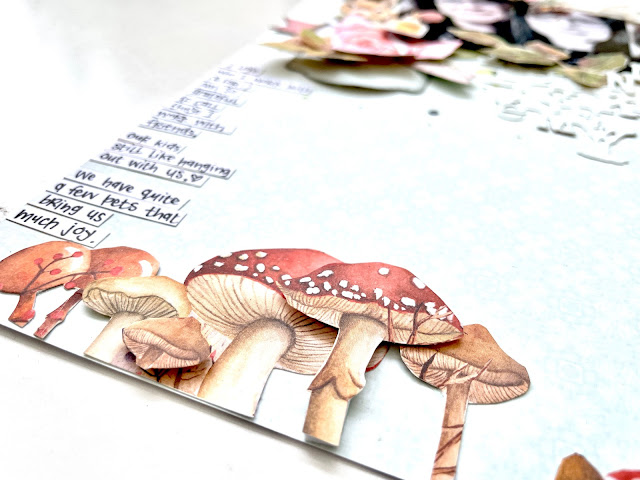
2. Fussy cut florals and leaves from UCP2313 Stories, UCP2319 Marvellous and UCP2320 Book Week - Ready to build your floral arrangements on your page. Cut out a couple of characters from UCP2314 Characters paper and mushrooms from UCP2315 Woodlands paper.
3. Print photos. Lydell used 4, 2x3 photos, but you could change up the sizes very easily and just build around whatever you have. Ink each photo with black ink.
4. Cut a small doily from the Doily Pack (UCE1807) and cut in half. Start assembling your page.


Tip…. To make your photos stand out in a heavily layered layout, use box board or scraps of cardboard to lift your photos.
5. Die cut the Type Texture Die (UCD2023) and the Bookmark Die ( UCD2024) from a piece of the same colour background paper (UCP2313-Stories) Cut each in half and use half at the top and half at the bottom of your photos (see main image for placement)

6. Start laying out your florals, bending them up slightly to create dimension in your layers. (See main image for placement ideas). Glue the underneath ones as soon as you like the placement and then start gluing ones on top. Only put glue in the centres so you can tuck in things here and there as well as retain the dimension. Add in the characters and little bits you like as you go.

8. Add your journaling on strips (I used the reverse side of the manufacturers strip). Cut it in half length wise, write on the strips then cut it up to use it. Glue on piece by piece.