Hampster Picnic - Ashleigh Newton-Spence

Uniquely Creative Products Used:
- UC1861 Autumn Stamp Set
- UCD2045 Autumn Die Set
- Autumn Cut-a-Part Sheet
- UCD1958 Essentials Die #5
- UCCA1757 Tree Bark Cardstock
- UC1751MM Scene Builder Clouds & Grass Stencil
- UC1803 Foam Mounts – Squares & Strips
- UCD1974 Stitched Nesting Rectangle Dies
Other Products Used:
- Distress Oxide – Forest Moss, Peeled Paint, Iced Spruce
- Distress Ink – Ground Espresso, Walnut Stain
- Copic Markers
- R11, R37, R39, R59, R46, R89, RV69
- E11, E13, E15, E17, E21, E25, E27, E29, E33, E34, E35, E53, E99
- YG93, YG95, YG99, YG97
- YR09, YR18, YR23, YR24, YR27
- X-Press It Blending Card
- Hero Arts Intense Black Ink
- Sakura Gelly Roll Pen – White
- Sakura Gelly Roll Pen – Black Glaze
- 2mm Foam Tape
- Kokuyo DotLiner Glue Tape
- Taylored Expressions Blending Brushes
- MISTI Stamping Tool
- Basic Kraft Cardstock
Instructions:
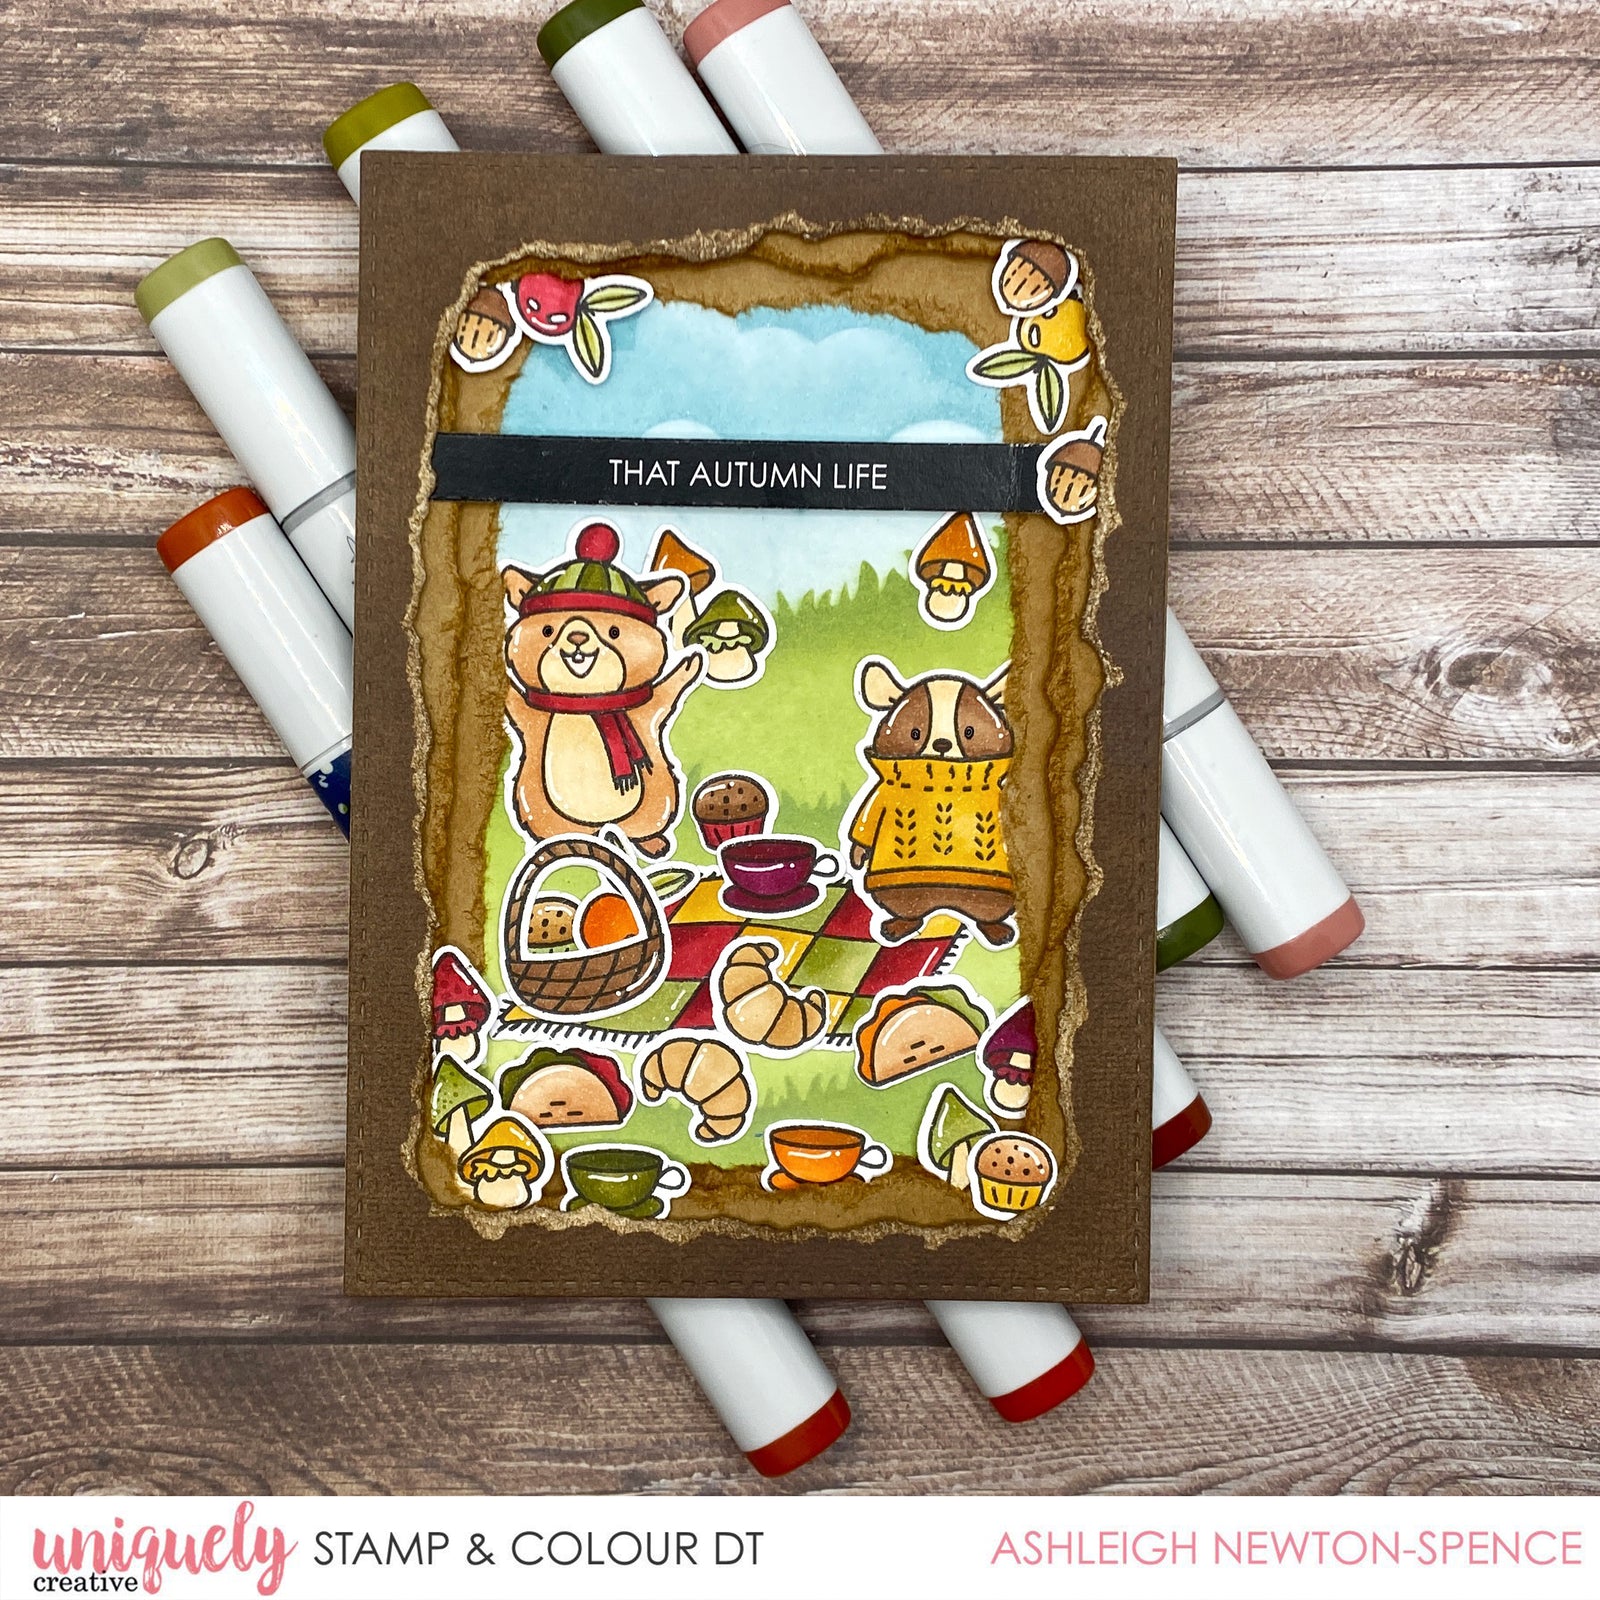
1. Stamp out the images from the stamp set onto blending card. Ashleigh used multiples of a lot of the food bits and mushrooms to fill in her scene.

2. Colour in all the images using Copic Markers and cut them out with the matching dies. Don’t forget to add your white highlights with gel pen and add black glaze pen to the hamsters eyes.

3. Cut out one of the largest Stitched Rectangles and using distress oxide, blending brushes and the Cloud Stencil, create your scene. Ashleigh wanted to have less cloud, and more grassy banks so she has the grass coming up to about 2/3 of the way of the card.

4. Cut out two of the largest stitched rectangles from a basic kraft cardstock, and then one from the new Uniquely Creative cardstock in Tree Bark. Cut a hole in the middle of each of them and then tear out a circle. Start with a smaller one for one, then have it a bit bigger for the second. The last one, in the Tree Bark cardstock needs to be the biggest. This will create our woodland window to look through. Add a bit of distress ink around all the tear lines to add some depth.

5. Using glue tape, attach the first rectangle to your background. This is the one with the smallest hole.

6. Adhere your images to the background. Remember that this is a window, so your main images can get tucked behind the border. This will give it a real layered look. Add foam strips around the outside of the second window and attach to the background. This is where you can add in a few mushrooms or acorns to bring the scene to life.

7. Add foam tape around the final cardstock layer and attach to the panel. Finish tucking any additional images within the layers and adhere.

8. Use the Cut-a-Part Essentials #5 die to cut up the sentiment strips included in the kit. Add foam tape behind it and adhere in the scene. Use any final images to decorate.
