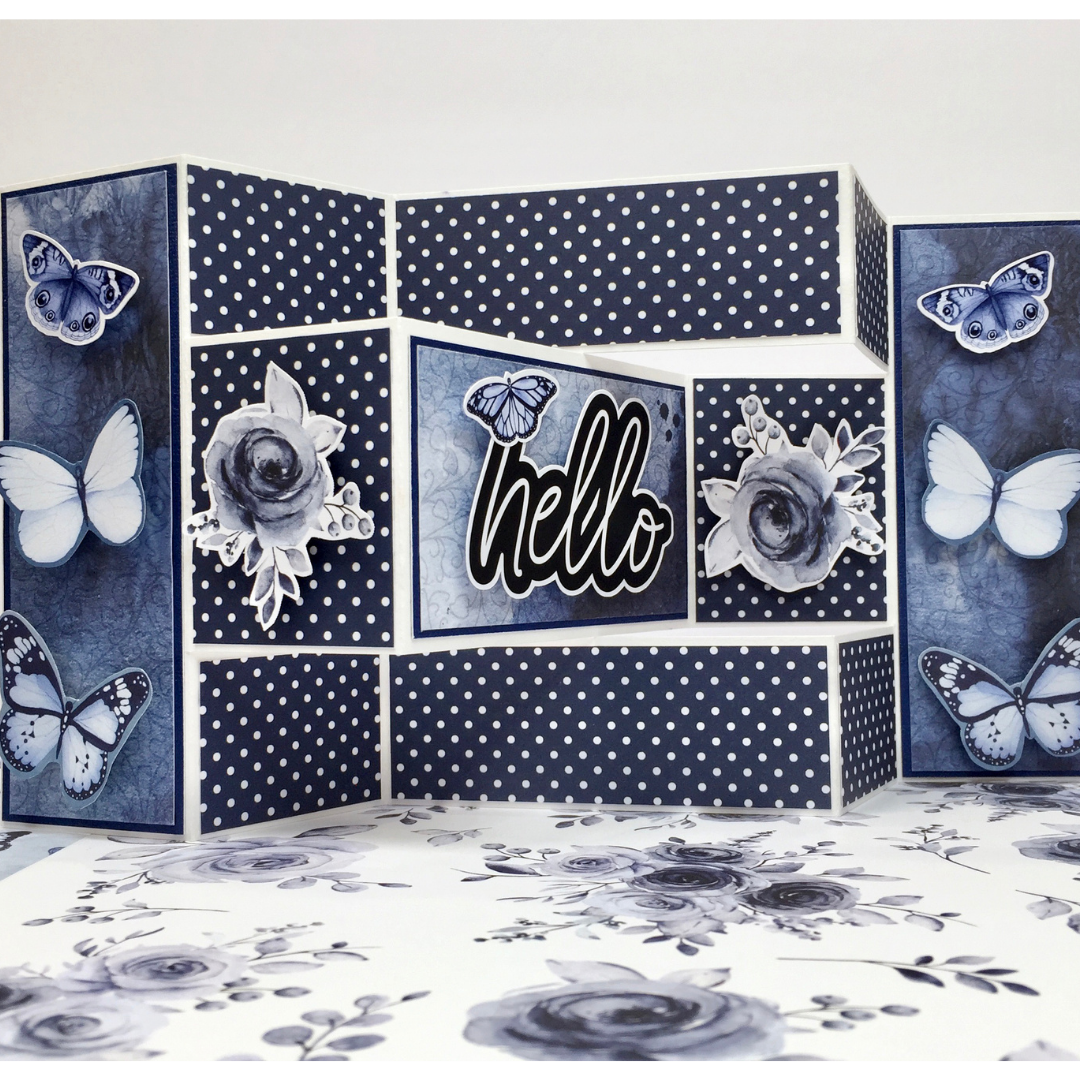
Hello Trifold Shutter Card Tutorial - Ngaire Ashdown

Uniquely Products Used:
- UCE1775 Watercolour cardstock
- UCCA1745 Royal Cardstock
- UCP2379 Midnight
- UCP2381 Butterfly Beauty
- UCP2378 Majestic
- UCP2385 Creative Cuts
Other Products Used:
- Paper trimmer
- Scissors
- Double-sided tape
- Foam dots
- Scoreboard
- Card Base Template (included)
Instructions:
1. Cut watercolour cardstock 12” x 5 ½”.
2. Using the template provided, score this cardstock at 2”, 4”, 8”, and 10” on the long side.) Dotted lines on template
3. Using a paper trimmer (or craft knife) cut between the 2” and 10” score lines 1 ½” from each edge. (Solid black lines on template)

4. Fold score lines as per photo.

5. Cut 2 pieces 5 3/8” x 1 7/8” from the Royal cardstock (side panels). Adhere using double-sided tape.
6. Cut 1 piece 3 7/8” x 2 ¼” from the Royal cardstock and adhere using double-sided tape to the inside centre panel.
7. Cut the branding strip from the Midnight patterned paper. Cut 2 pieces 5 ¼” x 1 ¾” and 1 piece 3 ¾” x 2 1/8” and adhere these pieces on the Royal cardstock panels.
8. Using the B side of the Butterfly Beauty patterned paper cut the following pieces and adhere to the card base as shown.
- Top left, top right, bottom left, and bottom right: 1 7/8” x 1 3/8” = 4 pieces
- Top centre, and bottom centre: 3 7/8” x 1 3/8” = 2 pieces
- Left centre, and right centre: 1 7/8” x 2 3/8” = 2 pieces
9. Fussy cut some butterflies from the left-over Butterfly Beauty patterned paper.

10. Fussy cut 2 of the small darker rose clusters from the Majestic patterned paper.
11. Decorate card panels with the butterflies, sentiment from the Creative Cuts pack, and the flowers. Use foam tape or dots to raise the elements. Bend up the butterfly wings slightly.

12. Adhere a small butterfly from the Creative Cuts pack to the sentiment.

Lynne Lake
May 27, 2022
Wow , I love this and can’t wait to make it hopefully tomorrow.