HAPPY BIRTHDAY CARD TUTORIAL - MARIA ALOISI

To recreate this beautiful birthday card created by Design Team member Maria Aloisi you can follow the steps below:
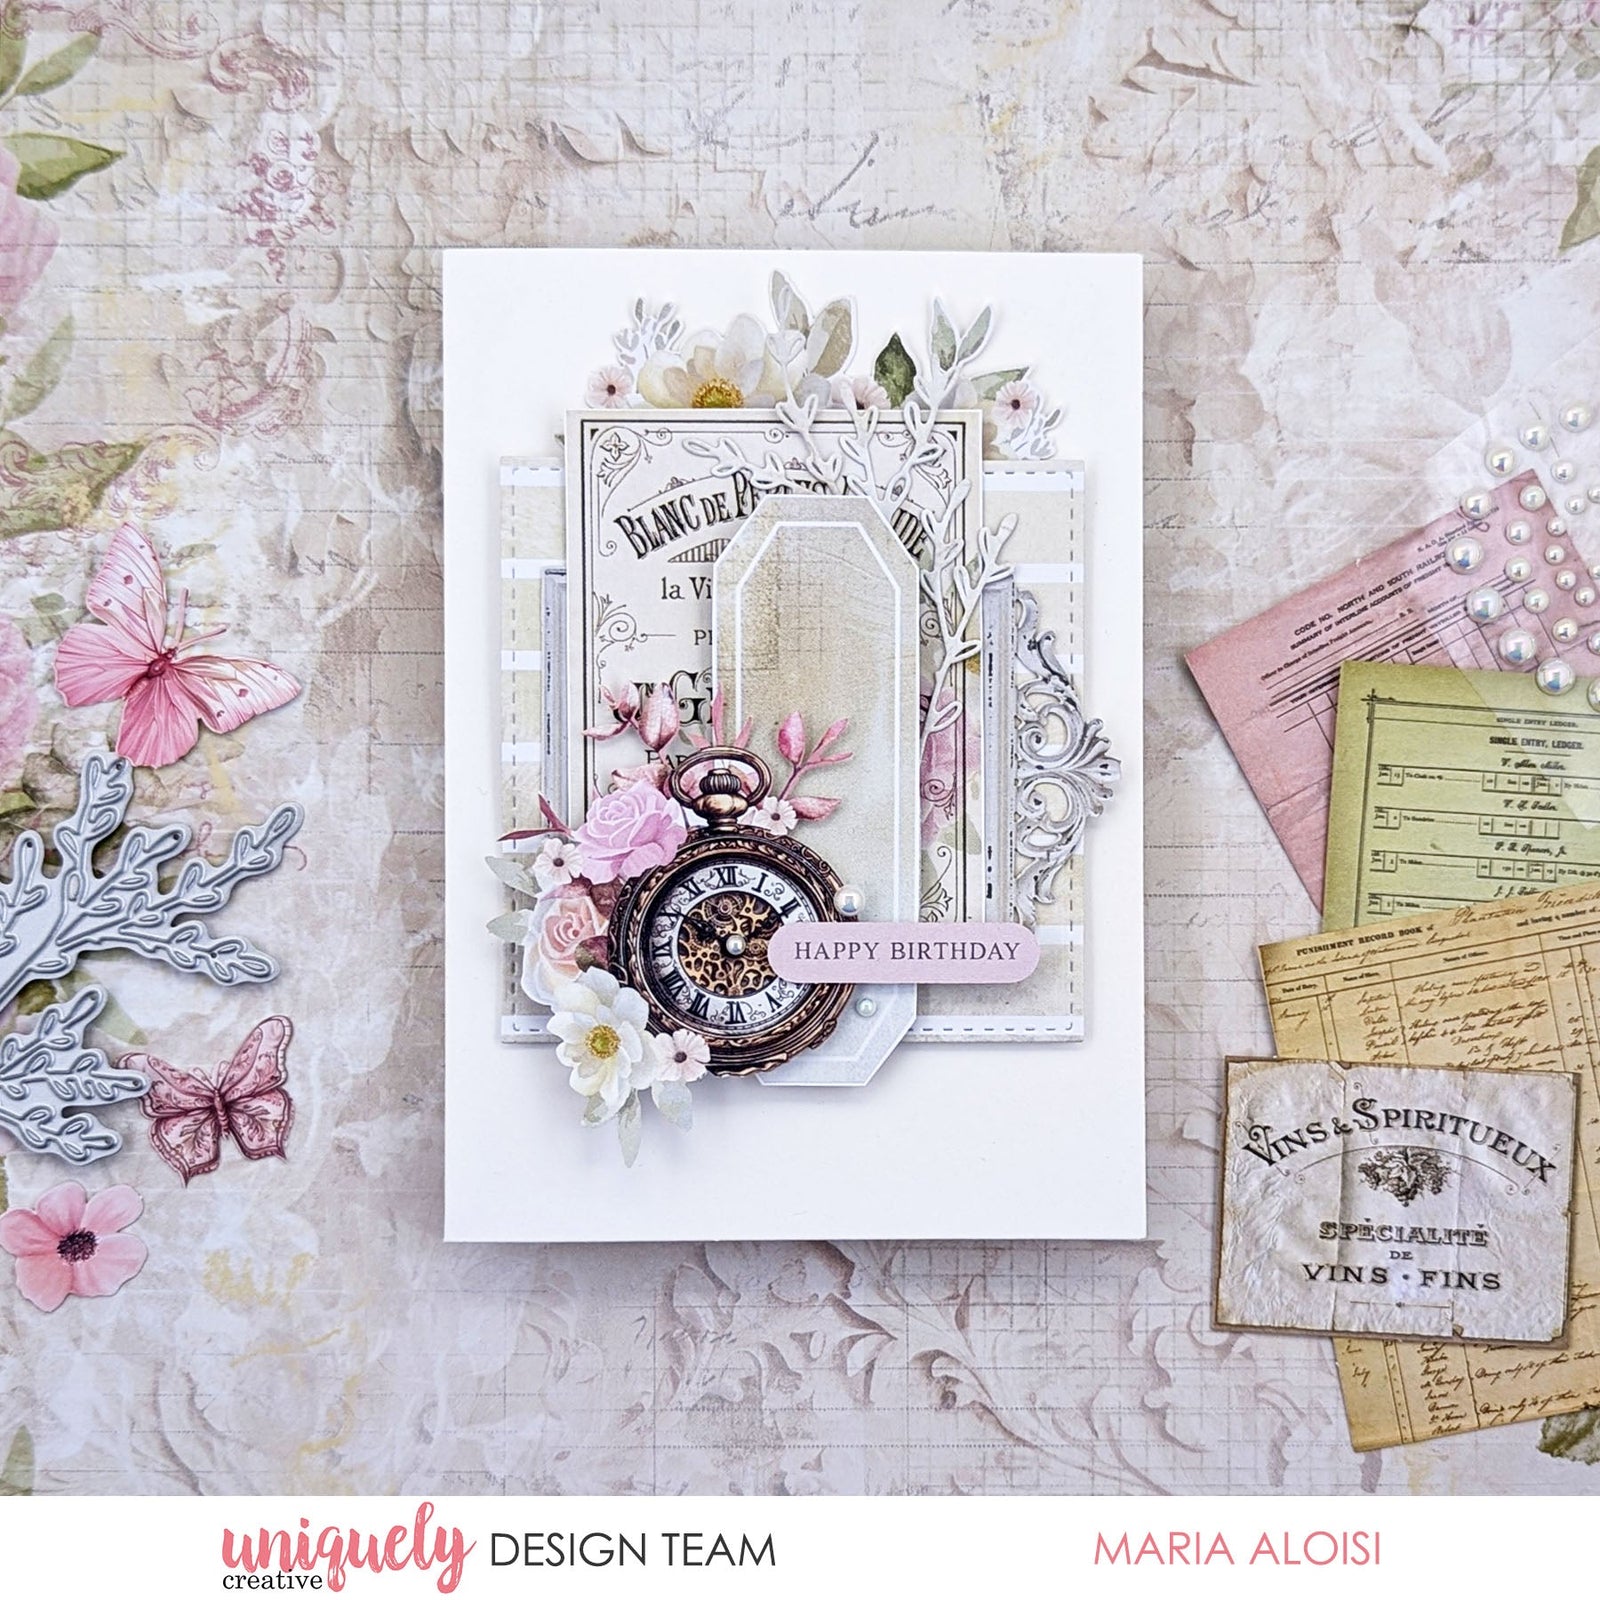
Uniquely Creative Products Used:
· UCP2922 Documenting Paper
· UCP2925 Remember-Fussy Cuts Paper
· UCP2926 The Story-Folio Bits Paper
· UCP2929 Dear Diary Creative Cuts
· UCD2196 Delicate Foliage Die
· UCE1728 Iridescent Pearls
· UCD1976 Stitched Nesting Square Die
· UCE1872 Fussy Cutting Scissors
· UCE1811 Rectangle Cards and Envelopes
· UCE1803 Foam Mounts Squares & Strips
· UCE1859 6mm Double Sided Tape
Other Products Used:
· Die Cutting Machine
Card size is 10.5cm x 14.8cm
Step 1:
Using a Stitched Nesting Square Die (5th largest die), cut a square from the Story-Folio Bits (reverse) paper. Adhere using foam mounts so that it is ⅜” from the left edge and 1¼” from the top of the card – See image 1
Step 2:
Tuck a floral creative cut under the top of the square die cut piece and add a frame creative cut on top – See image 2.
Step 3:
From the Remember-Fussy Cuts paper, cut the poster image and add on top of the frame creative cut – See image 3. Step 4:
Using the Delicate Foliage Die, cut a piece from the Documenting paper. Add to the card. Fussy cut a banner image from the Story-Folio Bits paper. Using foam mounts, adhere on top of the die cut foliage piece – See image 4.
Step 5:
Using foam mounts, add the pocket watch creative cut and the happy birthday creative cut towards the bottom of the banner – See image 5.
Step 6:
Add Iridescent pearls to finish – See image 6.
Gaye
August 08, 2025
Thank you! I struggle with how to stack ephemera, this step by step tutorial is really useful…