Dinosaur card tutorial with our new card making kit

Our new Dino Roar Card Making Kit is sure to be a fan favorite. a super cute dino stamp is included in the kit, add on the new Evergreen Stencil to make a fun background for your newly coloured images.
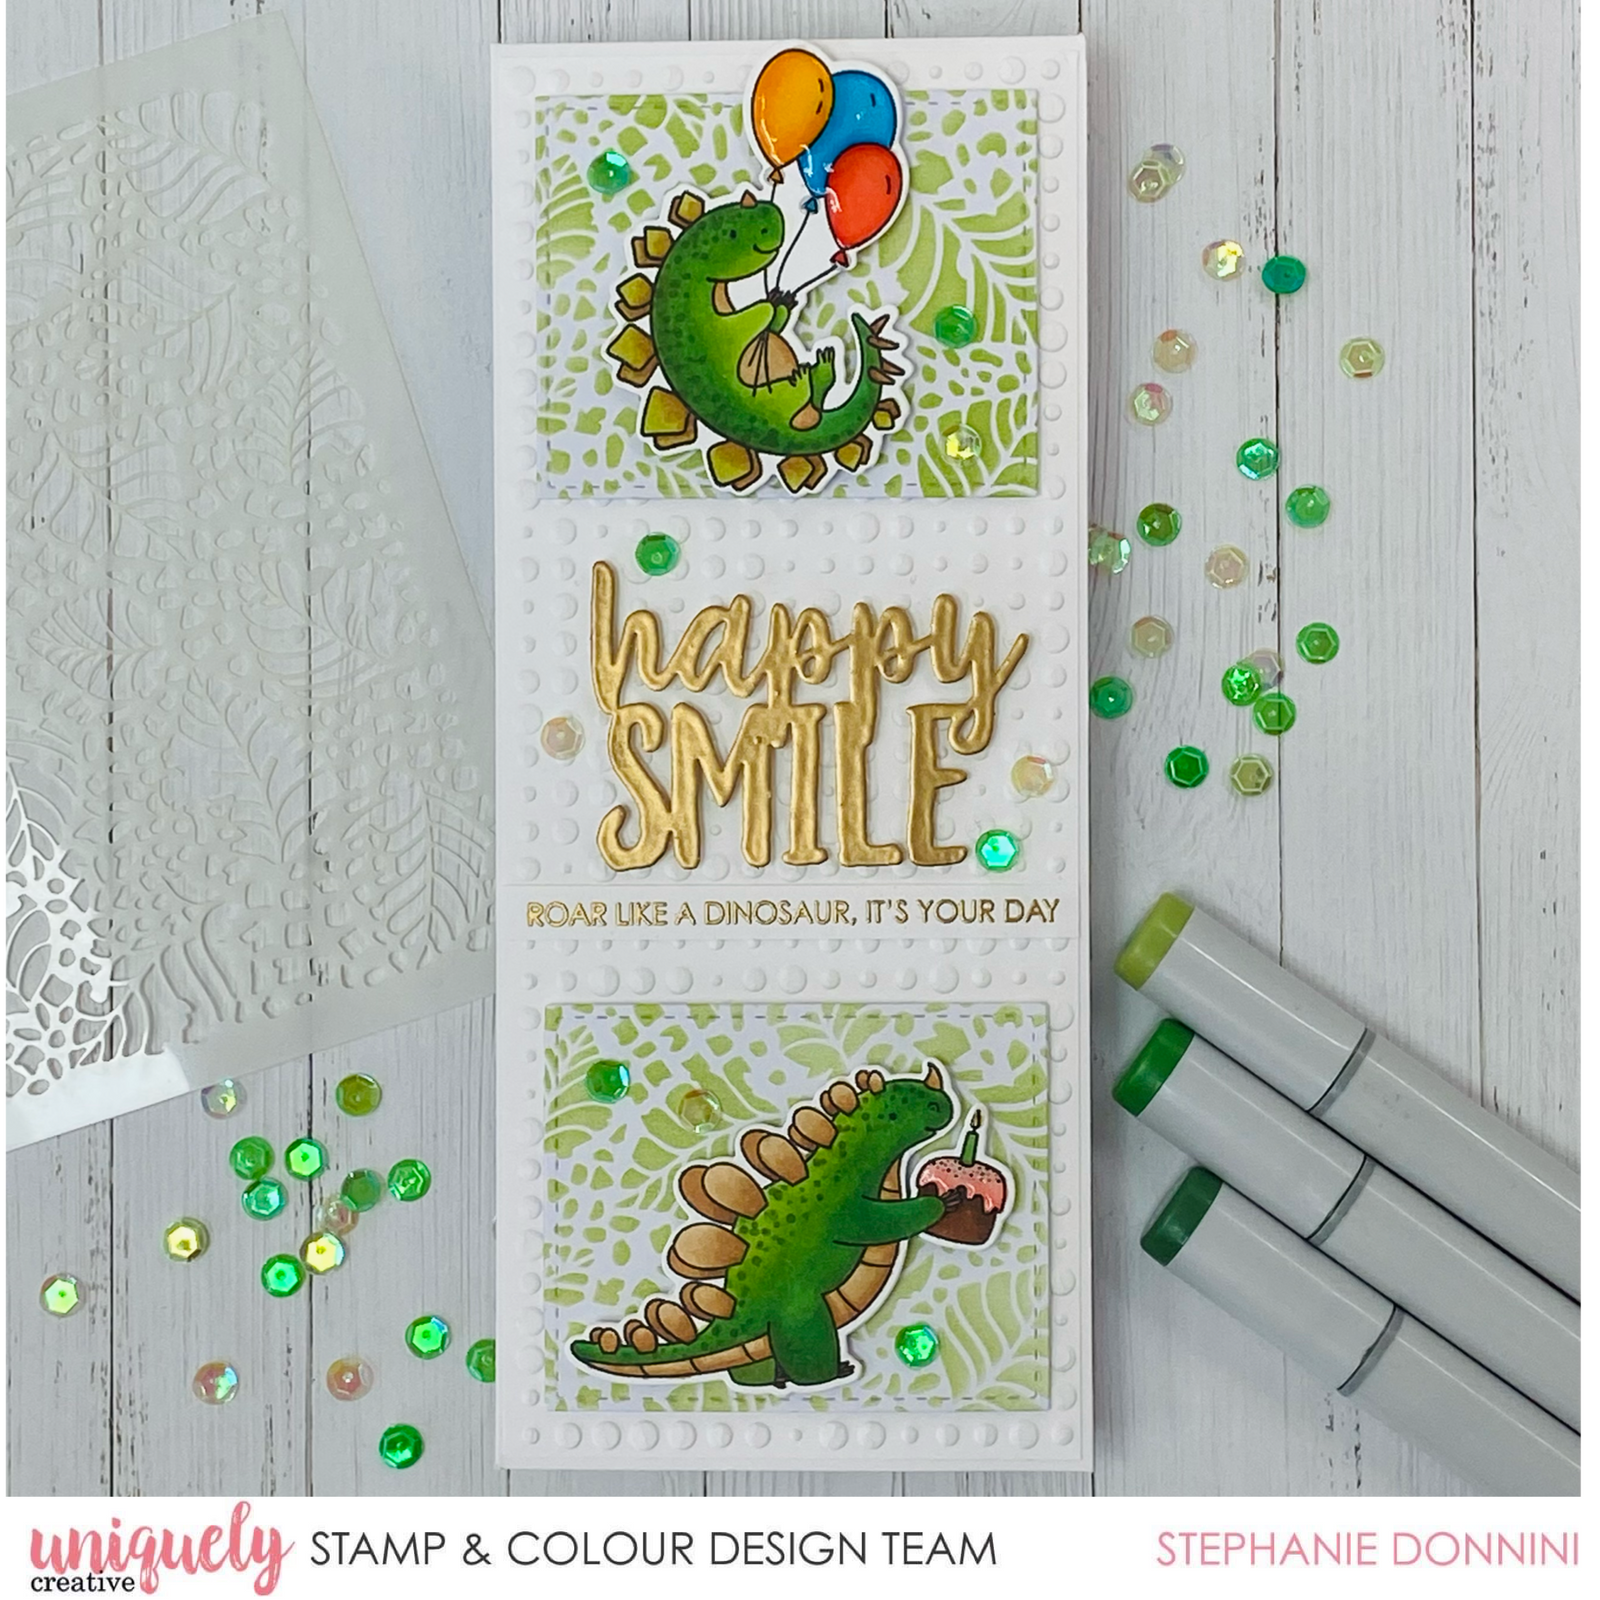
DT Member Steph Donnini has a great tutorial on how to make the fun dinosaur card for your dino loving friends.
Uniquely Creative Products Used:
- UC Dino Roar Laser Cut
- UC Evergreen Stencil
- UC Roarsome Die
- UC1862 Roarsome Stamp Set
- UC UCEF2010 Inspiring Slimline Embossing Folder
- UCD1964 Slim 3 Window Die
- Blending Brush
- Foam Mounts
Other Products Used:
- Black Amalgam Ink
- Blending Card
- Rich Gold Wow Embossing Powder
- Versamark Ink
- Heat Tool
- Glossy Accents
- Tropical Sea Sequins
-
Distress ink- Mowed Lawn, Twisted Citron
- Colours Used: Copic Markers- YG67, YG17, YG03, E59, E57, E35, B04, B02, R24, R22, YR68, YR15
Instructions:
1. Using the Inspiring Slimline Embossing Folder, take a piece of white cardstock and run it through your die cutting machine. It creates an amazing circle pattern, adding great texture to your card.

2. To make some stitched rectangle panels, use the Slim 3 Window die to make 2 panels from white blending cardstock. Use a blending brush to apply distress ink over the Evergreen stencil.

3. Stamp, emboss, colour, and die cut some of the dinosaur images from the Roarsome stamp set. After images are coloured, you can apply some glossy accents to the balloons and cake icing.

4. Apply Versa mark ink to the ‘Happy Smile’ laser cut, then gold heat emboss. Repeat this process twice for a thick, nice glossy finish. Then gold heat emboss one of the stamp sentiments.

5. Adhere the stencilled panels to each end of the slimline card base with UC foam mounts. Then if you like extra dimension adhere the dinosaur images with foam mounts as well.

6. Adhere the Gold Laser cut and sentiment strip in the centre of the card then glue a scattering of sequins for the finishing touch.
