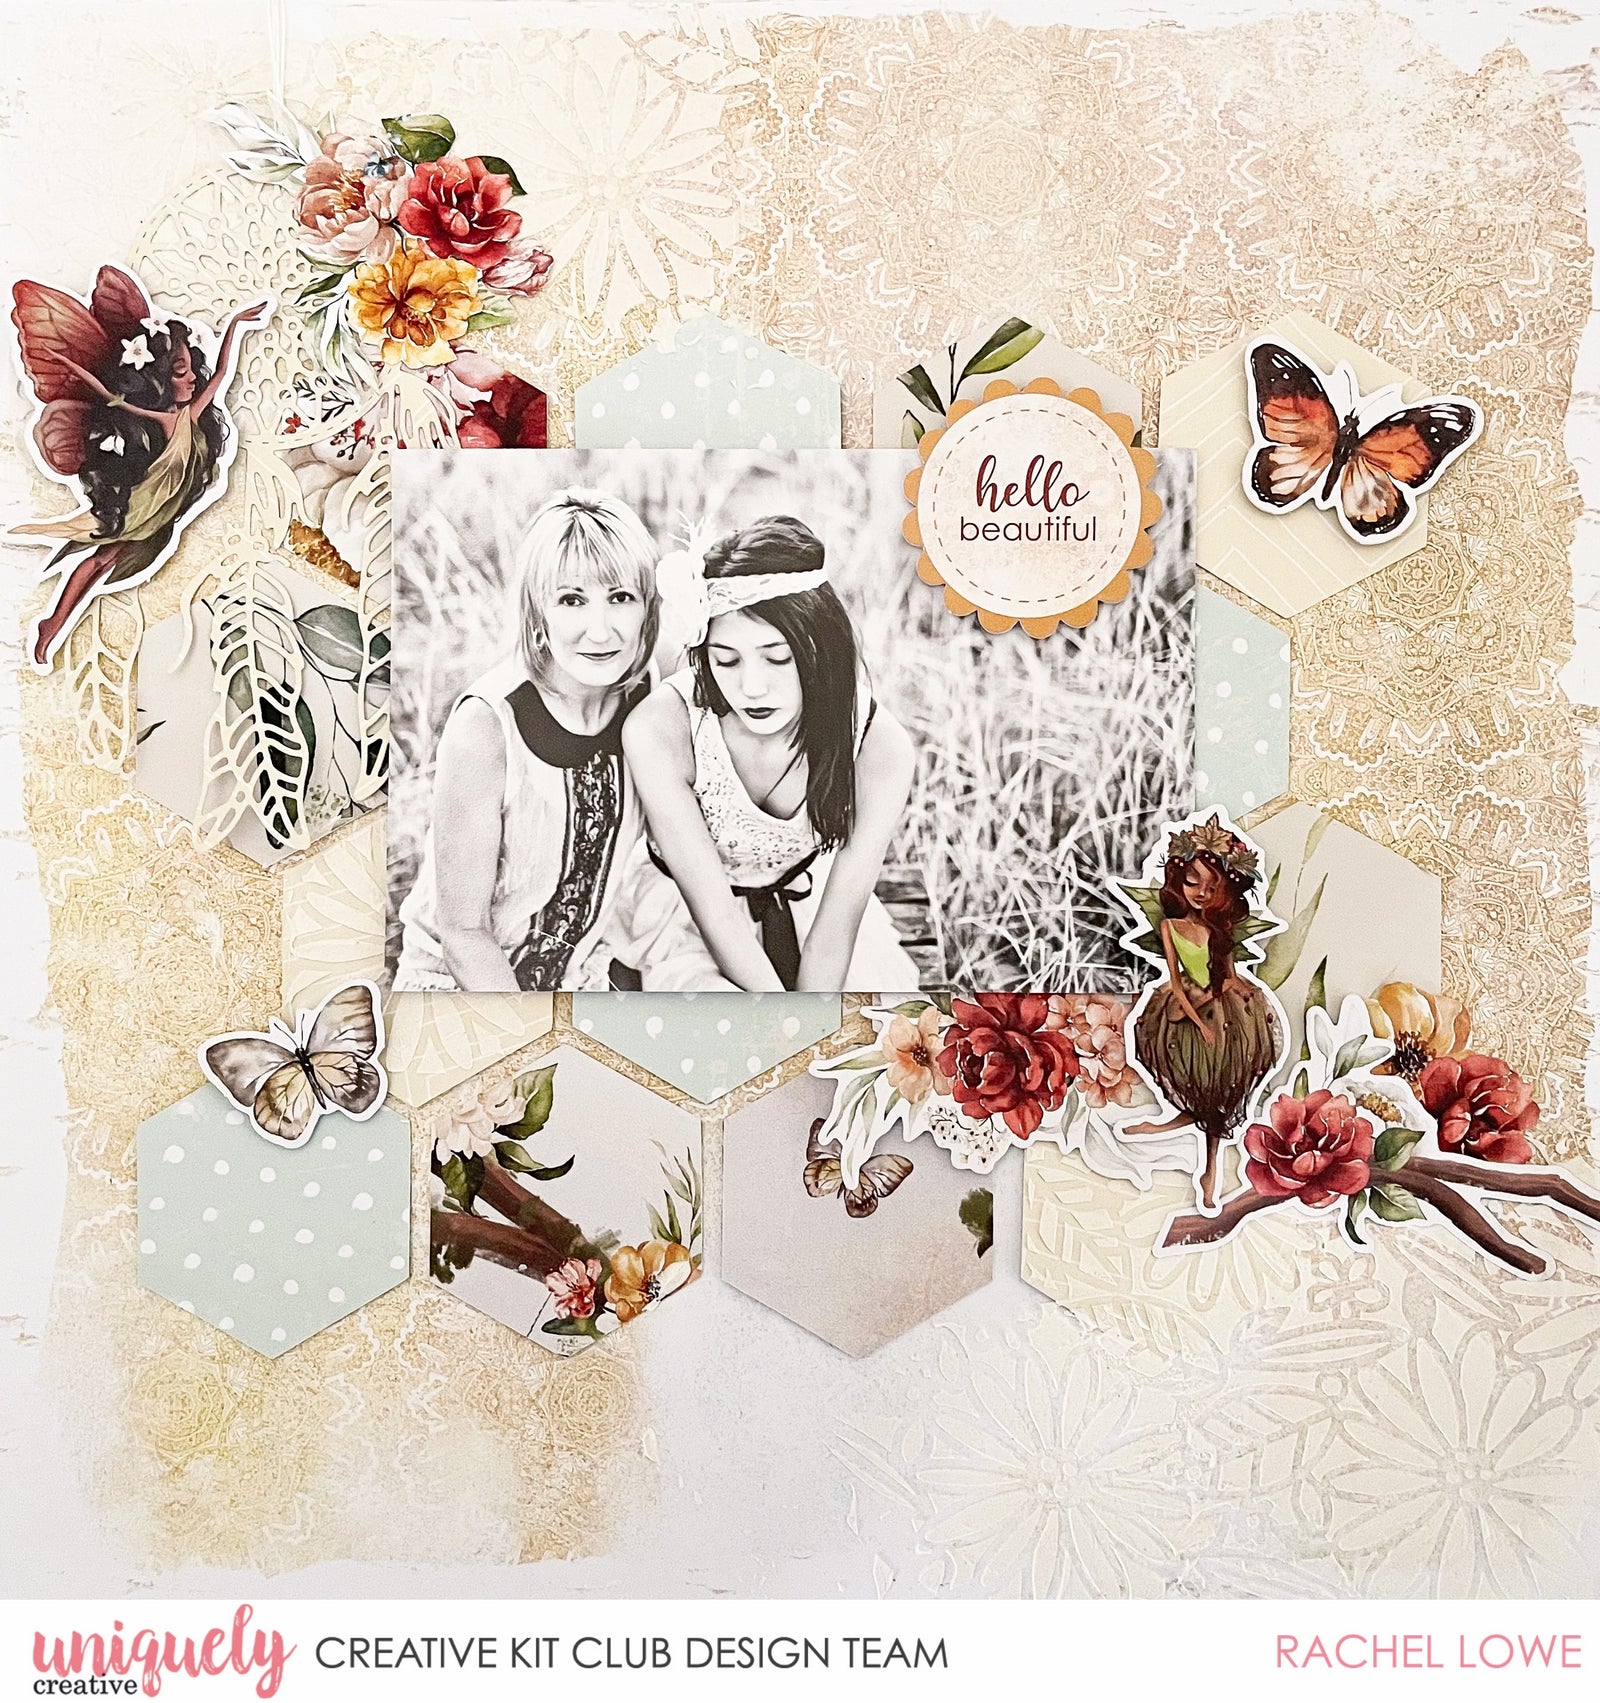
Hello Beautiful Tutorial - Rachel Lowe

Uniquely Products Used:
- UCP2407 Ophelia
- UCP2401 Deliah
- UCP2405 Clementine
- UCD2056 Boho Dreamcatcher Die
- UCP2411 Mixed creative cuts
Other Products Used:
- Scissors
- Paper Trimmer
-
Foam tape
- Cream twine
- Texture Paste
Instructions:
1. Using the Opulent Stencil and texture paste (optional you could use ink pad) stencil two areas, top left and bottom right. Allow to dry.

2. Cut 15 two inch hexagons and adhere to base paper as in diagram.

3. Cut one Dreamcatcher with the die. I cut using Delilah paper. Add a floral bloom to add a contrasting colour. Using wet glue attach to the top left of you page, leave the feathers unglued so they appear to be floating. Add one of the Garden Fairies from the mixed creative cuts.

4. Add your photo (mine is 6x4 inches landscape) with foam tape 1 inch from the top row of the hexagons. Create another embellishment cluster bottom left of the photo. I tucked one of the larger floral die cuts slightly under my photo. I added another garden fairy die cut and under her add one of the floral branches so she appears to be standing on it. I added several smaller die cuts under the floral branch die cut.

5. Add several of the butterfly die cuts around my page. Finish off by adding the round phrase sentiment die cut ‘hello beautiful’ directly onto your photo with foam tape.

6. Lastly add some twine to the top of my dreamcatcher. Do this by sewing from the top of the dreamcatcher and attached at the back with double sided tape.
