Our Warehouse is Now Closed for Christmas - All Orders will Ship from 7th January 2026
Our Warehouse is Now Closed for Christmas - All Orders will Ship from 7th January 2026
Add description, images, menus and links to your mega menu
A column with no settings can be used as a spacer
Link to your collections, sales and even external links
Add up to five columns
Add description, images, menus and links to your mega menu
A column with no settings can be used as a spacer
Link to your collections, sales and even external links
Add up to five columns
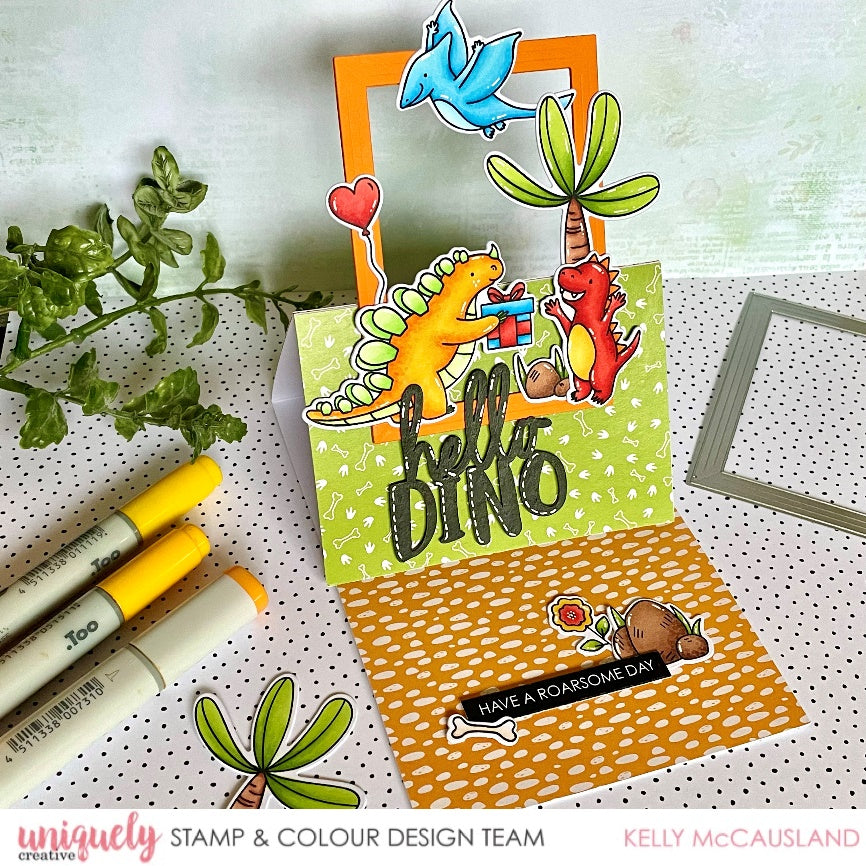
Hello Dino Tutorial - Kelly McCausland
July 02, 2022

Uniquely Creative Products Used:
- UC1863 Dino Roar Stamp
- UCD2051 Dino Roar Die
- UC1862 Roarsome Stamp
- UCD2050 Roarsome Die
- UCD1907 Frames Die
- UCD1958 Cut A Part Essential #5 Die
- Dino Roar Cut A Part Sheet
- Dino Roar Laser Cut
- Dino Roar Pattern Papers
Other Products Used:
- White Card Stock
- Orange Card Stock
- White Gel Pen
- Black Paint
-
Copics: Orange / Yellow: Y15, Y35, Y38, Light Green: YG11, YG05, YG07, Red: R22, R24, R29, Blue: B00, B02, B04, B06, Leaf Green: YG11, YG17, YG67, Brown: E13, E15, E18. A little R30 for inside the dino’s mouth. A little E50 and E53 for a bit of colour on the bone.
Instructions:
1. Cut a strip off a 12 x 12 sheet of white Cardstock at 10.5 cm wide. This will be your card base. Score at 6” and 3”.

2. Next cut your patterned papers. You will need 2 of the same pattern for the front of your card and an another one with a different pattern for the inside. Also cut an extra piece of white card stock the same size. All 4 Pieces need to measure 10.5 cm x 7.6cm. Cut 3 frames using the frame die. Use orange card stock to match your papers but use what you have that matches the paper you pick.

3. Adhere your 2 patterned paper pieces to your card front. Try to get them as close to the fold as possible so you don’t have a white line across the middle of your card front. Open your card and adhere your white card stock on the bottom half then add you patterned paper on top. Adding the extra layer of card will give just enough of an edge for your card front to stand up against. Adhere your 3 frames together.

4. Colour your images and die cut. Paint your ‘hello Dino’ sentiment black. Once dry add details with a white gel pen.

5. Assemble your card. Only add glue to the bottom section of your frame so that when you bend the card front the top of the frame stands up. Don’t for get to add your extra sentiment and images to the inside of your card.

Leave a comment
Newsletter
Join our mailing list and never miss an update …
