Hope Your Day Is Magical Tutorial - Ashleigh Freeston

Uniquely Creative Products Used:
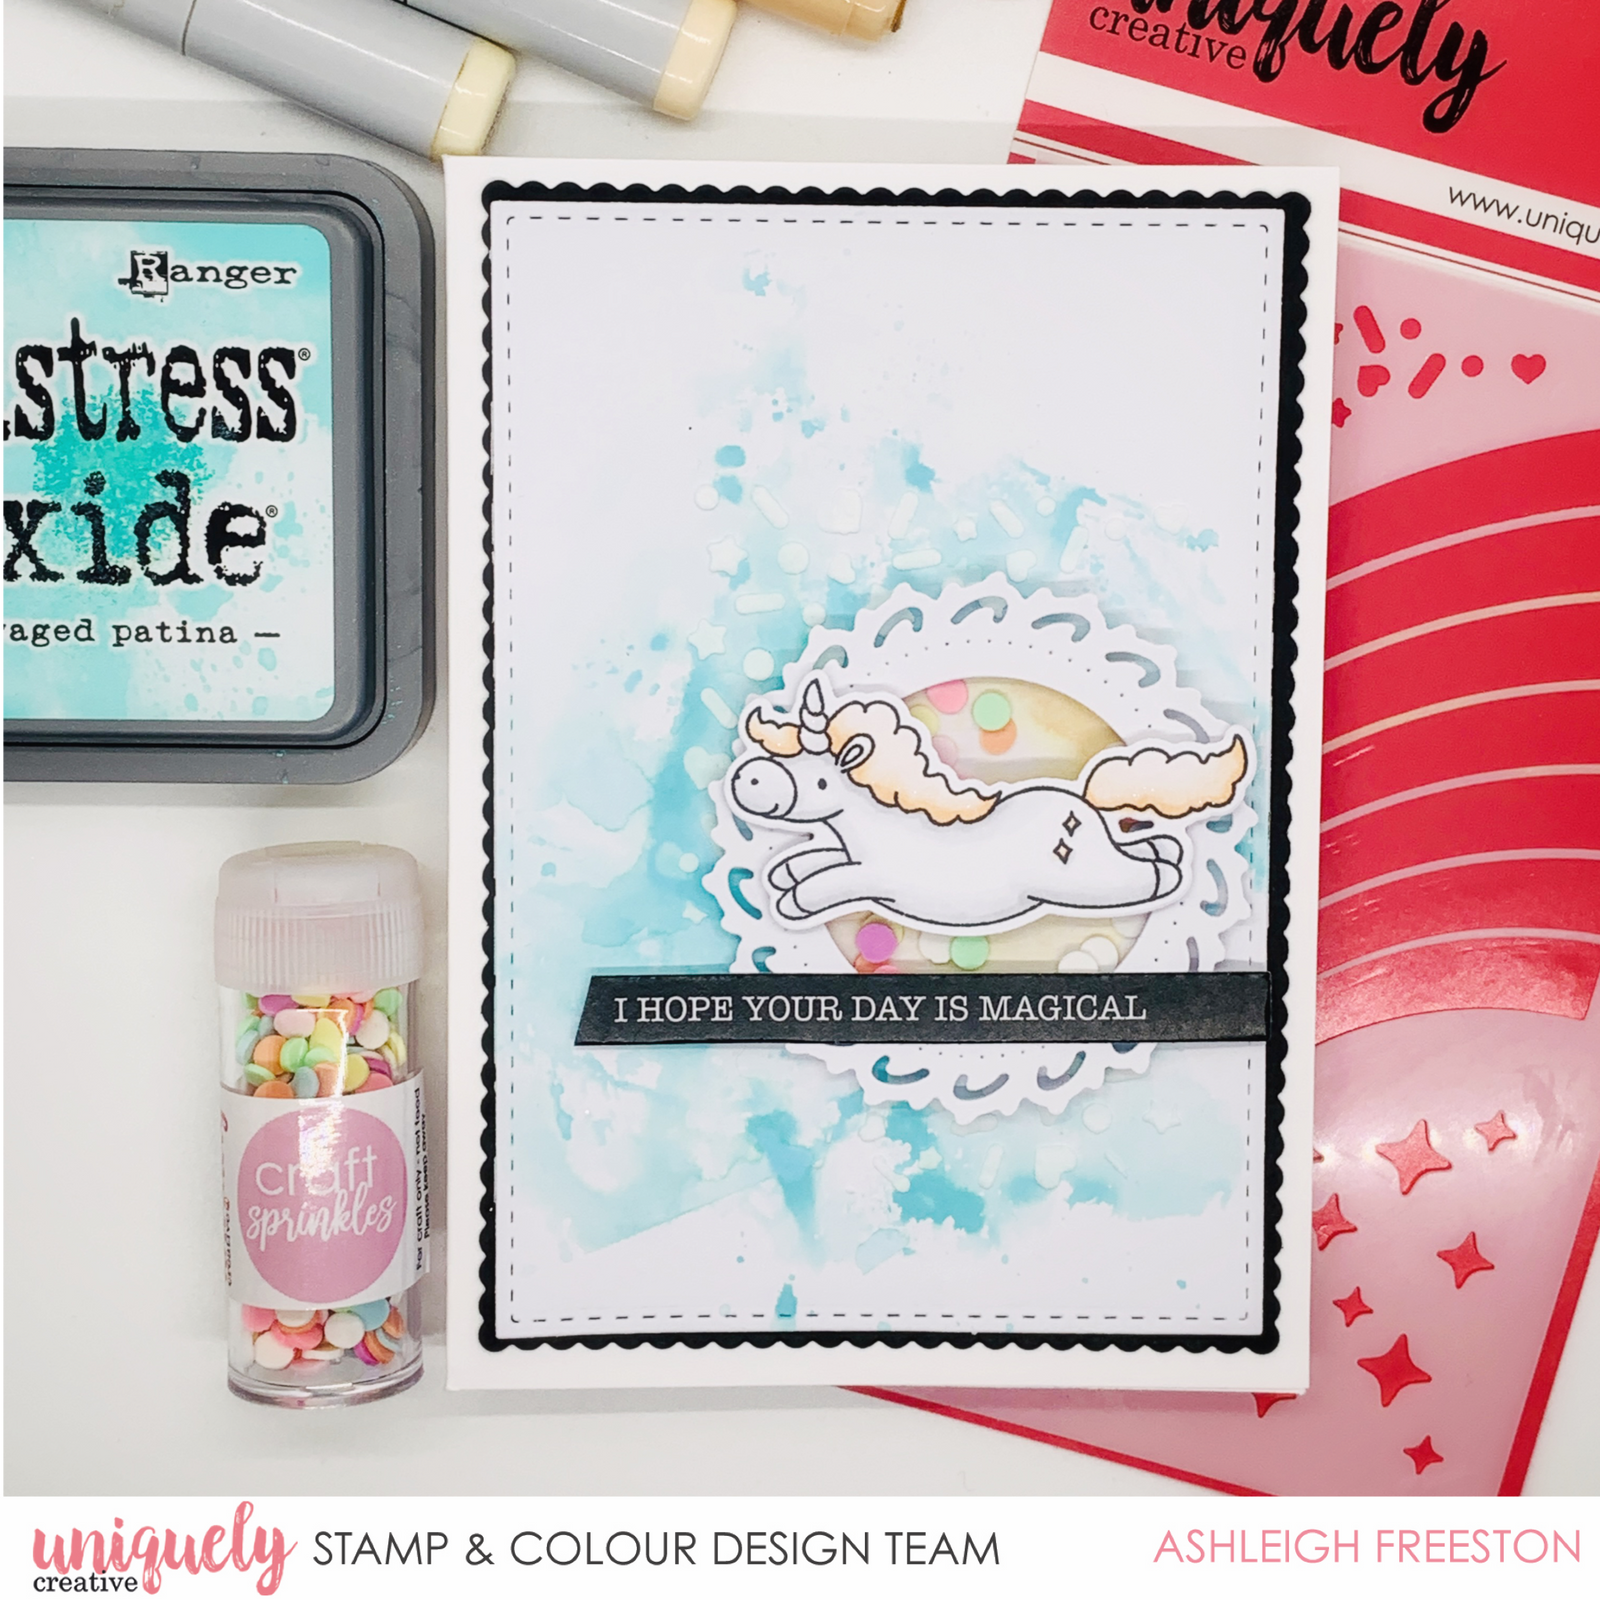
UC1855 Unicorn Magic Stamps, UCD2030 Unicorn Magic Dies, Unicorn Magic Cut-a-Part Sheet, UCD2005 Lace Circle Die, UCMM1756 Rainbow Magic Stencil, UCD1975 Scalloped Nesting Rectangle Dies, UCD1974 Stitched Nesting Rectangle Dies, UCD2003 Stitched Nesting Circle Die, Cut-a-Part Essentials #5 Die, Rectangle Card & Envelopes, Foam Mounts, Clear Sparkle Brush, Gold Sparkle Brush, Pastel Confetti Craft Sprinkles
Other Products Used:
Smooth White Cardstock, Black Cardstock, Distress Oxide: Salvaged Patina & Dried Marigold, Acetate Sheet, Water Spray Bottle, Texture Paste, Adhesives
Copic Colours:
Unicorn – C1, C0, C00, 0; YR0000, YR000, YR00, YR01
Instructions:
1. Die cut largest stitched rectangle die from white cardstock. Press Salvaged Patina Distress Oxide onto acetate sheet and spritz with water. Turn over and press onto background piece. Repeat until you are happy with the background and dry well with a heat tool.
2. Once background is dry, spread texture paste through the sprinkles section of the Rainbow Magic stencil to add some texture, focussing on the right side of the card. Dry completely with a heat tool.

3. Die cut stitched nesting circle from white cardstock and use ink smoosh technique with Dried Marigold Distress Oxide. Dry well with heat tool. Die cut Lace Circle from white cardstock.

4. Adhere a circle of acetate to back of Lace Circle piece and add foam mounts around the outside circle. Create shaker by adding Pastel Confetti Craft Sprinkles and close shaker by adhering the stitched circle to the back.

5. Stamp and colour the images with the colouring medium of choice (I used Copic markers). Die cut or fussy cut the images once complete.

6. Assemble the card by adhering the shaker element to the right side of the card. Adhere the sentiment, and finally, add the stamped image with foam mounts.