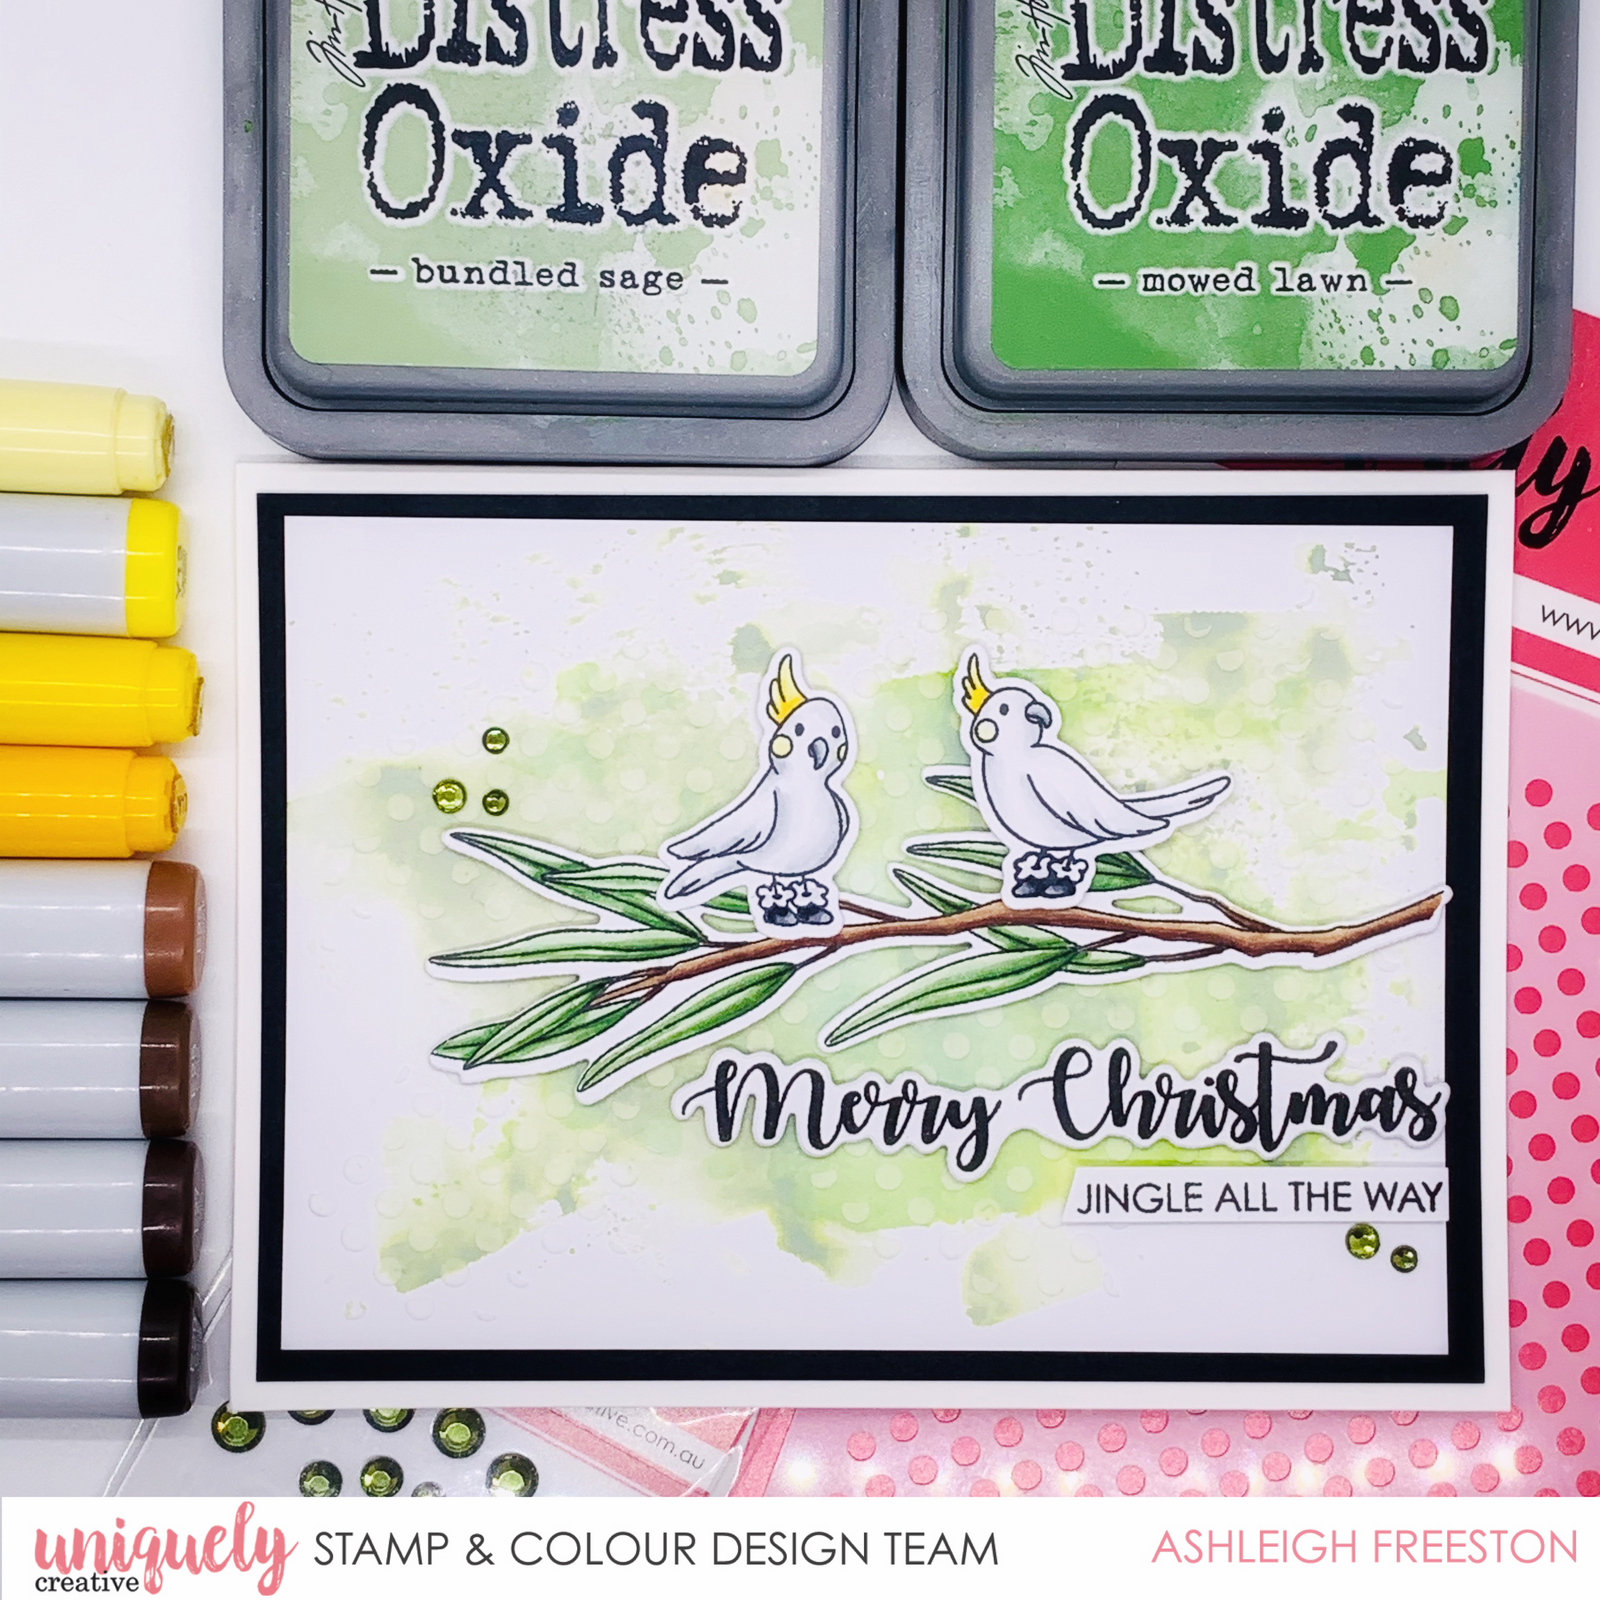
Jingle All the Way - Ashleigh Freeston

Card Size: 4 1/4" x 5 3/4"
Uniquely Creative Products Used
UC1815 Aussie Christmas 2 Stamp, UC1936 Aussie Christmas 2 Die, Kookaburra Party Stamp & Die Set, Christmas Sentiments Stamp & Die Set, Tiny Dots Stencil, Sage Rhinestones
Other Products Used
Smooth white cardstock, black cardstock, white card base, blending card, acetate/plastic packaging, water spray bottle, Distress Oxides: Mowed Lawn & Bundled Sage, black ink, adhesives, texture paste
Colours Used
Copic Markers
Cockatoo – Y11, Y13, Y15, Y17 (crest); Y11, Y13 (cheeks); C00, C0, C1, C2, C3 (body); C1, C3, C5 (beak)
Branch – E21, E23, E25, E27, E29
Leaves – YG61, YG63, YG67, YG17
Instructions
1. Cut base card down to 5 3/4” high.
2. Cut black cardstock to 4” x 5 ½””. Cut white card to 3 ¾” x 5 ¼”.
3. Smoosh one colour of Distress Oxide (Mowed Lawn) onto acetate sheet and spritz with water. Turn over and press onto cardstock. Dry with heat tool. Repeat with Bundled Sage Distress Oxide and dry completely.
4. Spread texture paste through Tiny Dots stencil at random places and dry well with a heat tool.

5. Stamp your images onto blending card, and colour in with the colouring medium of your choice (I used Copic markers). Die cut with the matching fussy cutting dies.

6. Stamp the sentiment from ‘Christmas Sentiments’ stamp set onto white cardstock with black ink and die cut using matching dies

7. Complete the card by adhering all images and sentiments onto the background piece. Adhere background onto black cardstock and then onto the card base. Finish off the card with some Sage Rhinestones.
