JOY LAYOUT TUTORIAL - KYLIE KINGHAM

To recreate this beautiful layout created by Design Team member Kylie Kingham you will need the products listed below:
Shop the products
Uniquely Creative Products Used:
- UCP2808 All Is Bright Paper
- UCP2812 Be Merry Paper
- UCP2813 Holly Bouquet Paper
- UCP2814 Jolly Gift Tags Paper
- UCP2816 Merry & Bright Creative Cuts
- UCE1816 Dusty Teal Flowers
- UCE1810 12 x 12 Burlap Sheet
Add-Ons Used:
- Merry & Bright cardstock bundle
- UCD2160 Decorative Frame Die
Other Products Used:
- Black twine
- Hole punch
- Trimmer
- Scissors
- Adhesive tape
- Glue
- Foam squares
- Distress tool
- Manual die cutting machine
Instructions:
- Remove the branding strip from a sheet of the Holly Bouquet paper.
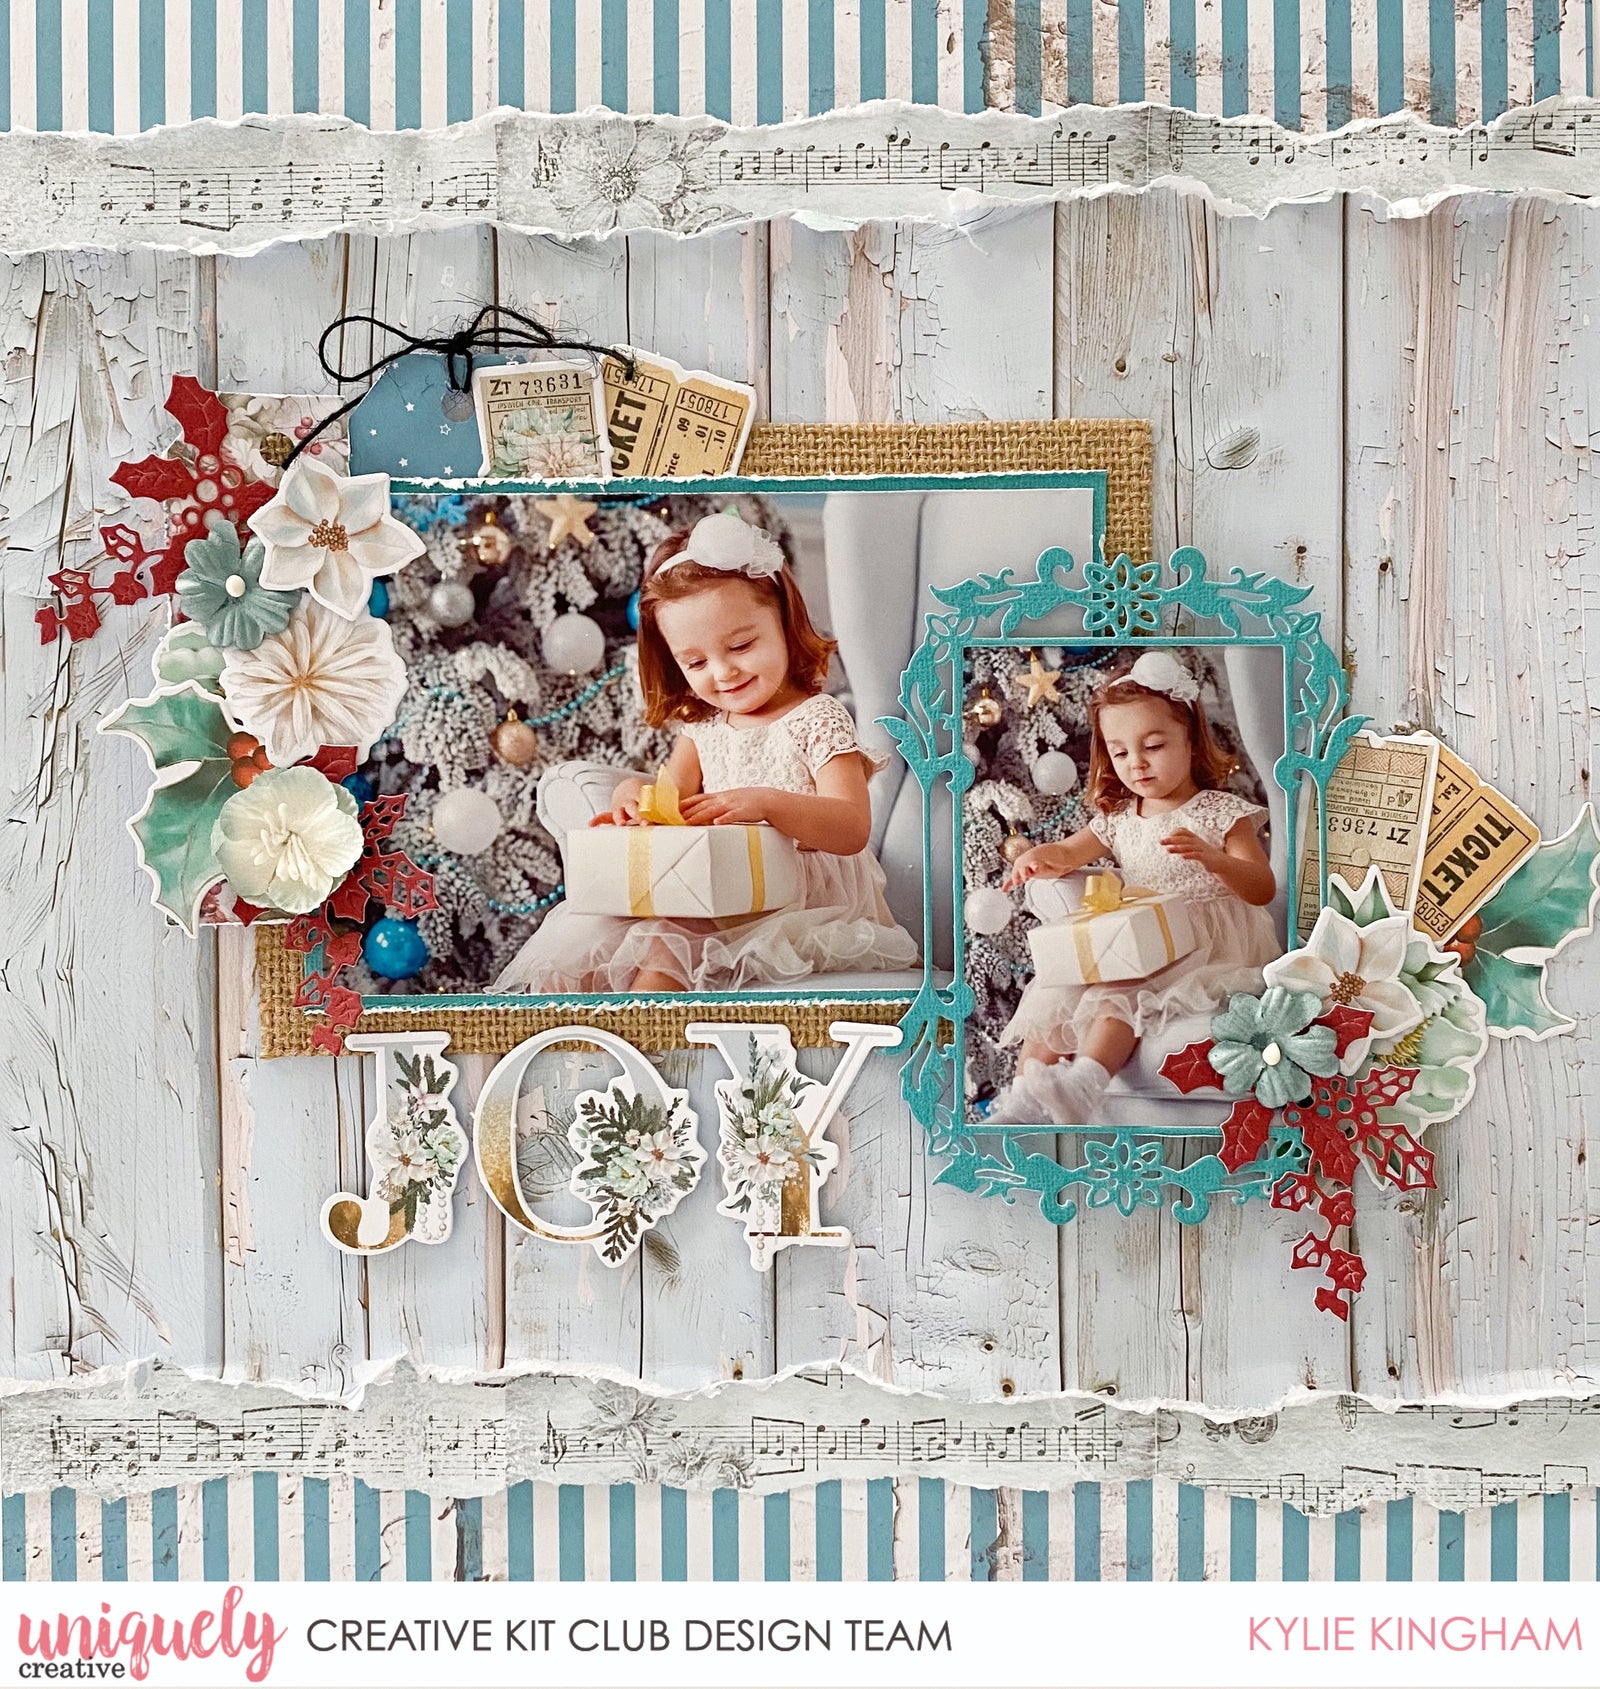
- Tear two 1.5” x 12” strips of Be Merry paper and adhere them 1” from the top and bottom edge of the paper. See image 1

- Trim a 8.5” x 12” piece of All Is Bright paper and distress the top and bottom edge. Adhere this centred over the Holly Bouquet paper. Set aside for now.
See Image 2
- Cut a frame using the Decorative Frame die from the Seabreeze cardstock. (Included in the add-on cardstock bundle). Using the centre off-cut carefully use it as a template to trim a photo to size. You will need to cut the photo approximately 1 mm wider than the off-cut. Adhere the frame to the photo. See Image 3

- Distress the edges of a 6” x 4” photo lightly. Cut a piece of the Seabreeze cardstock to measure 6.25” x 4.25” and distress the edges. Adhere the photo centred to the cardstock.
- Cut a piece of Burlap to measure 6.75” x 4.75”. Glue this to the background page. Adhere the larger photo centred over the top. Using foam squares, adhere the smaller photo in the frame to the bottom right corner of the larger photo.
- Using foam squares adhere the ‘Joy’ title from the creative cuts below the larger photo. See Image 4

- Add a cluster of creative cuts and the Dusty Teal flowers to the top left corner of the large photo.
- Use the Holly sprig die included with the Decorative Frame die to cut some decorative pieces from ‘Christmas’ cardstock. (Included with the add-on cardstock bundle) Include some of these amongst the other embellishments.
- Fussy cut a tag or two from the Jolly Gift Tags paper and add behind the top edge of the large photo. Hole punch the top of one and tie some black twine. See Image 5

- Adhere more creative cuts/die cut holly sprigs behind the bottom right corner of the smaller photo on the page for balance. See Image 6

2 Responses

Ann Ewbank
October 13, 2024
Love this page.