JOY STEPPER CARD TUTORIAL - ALICIA BOROWSKI

To recreate this amazing card created by Design Team member Alicia Borowski you can follow the steps below:
Shop the products
Uniquely Creative Products Used:
- UCP2802 Presents Paper
- UCP2799 Making a List Paper
- UCP2804 Checking it Twice Paper
- UCP2805 Christmas Wishes Creative Cuts
- UCE2025 Christmas Wishes glitter dimensional stickers
- Dove cardstock
- UCE2027 2025 Calendar pads
Other Products Used:
- Black cardstock
- Trimmer, scissors
- Double-sided tape, foam tape
- Distressing tool
- Distress Oxide ink (peacock feathers, faded jeans, black soot)
- White 10.5cm x 14.8cm card base
Instructions:
- Cut a 20.0cm x 30.0cm piece of Dove cardstock and mark the following measurements. – See image 1.
- In a portrait position, measure 10cm to find the middle and draw a pencil line from top to bottom.
- Along the pencil line, measure and mark from the top and moving down and without moving the ruler at 2.5cm, 5cm, 10cm, 15cm, and 22.5cm. Repeat on the outside edge.

- Using a knife and ruler, cut along the pencil line from the 2.5cm to 22.5cm mark. Fold the card base in half and using a bone scorer, score from the pencil line to the outside edge marked at 2.5cm, 5cm, 10cm, 15cm and 22.5cm in a hill and valley motion – See image 2.

- Continue folding and score the lines in a concertina to achieve the steps - See image 3.

- Cut a 9.5cm x 12cm and a 9.5cm x 4.5cm piece of Making a List paper. Cut a 7.0cm x 9.5cm and a 19.5cm x 2.0cm piece of Presents paper. Edge with brown in and distress all edges of the 4 paper pieces – See image 4.

- Attach the 4 card panels as shown – See image 5.

- Cut the balloon panel from the Checking it Twice paper. Edge with brown ink and distress all edges of the balloon panel. Gather all other elements – See image 6.

- Mount, layer and adhere remaining elements on the card panels – See image 7.

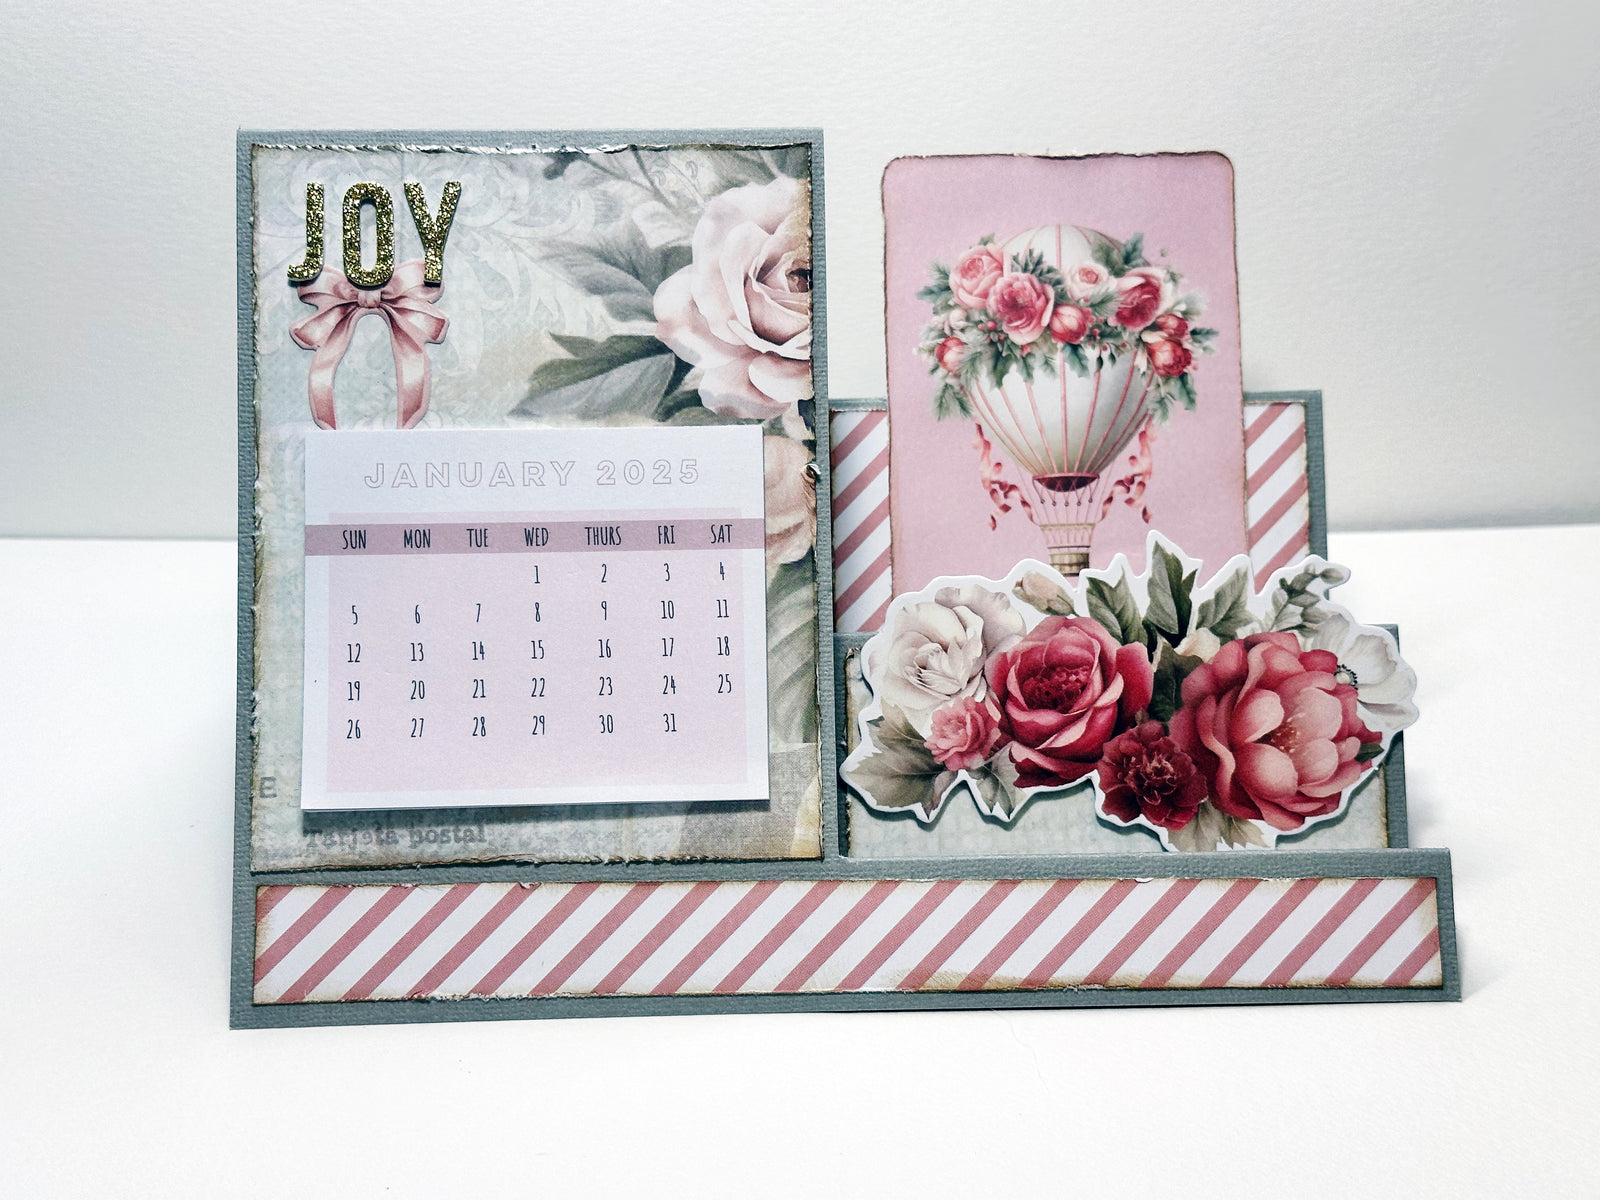
- Stand and press the card to display - See main image.
