Joy Wreath Tutorial - Jenny Dix

Uniquely Creative Products Used:
UCD2016 Eucalyptus Wreath Die, UCEF2004 Daisy Embossing Folder, UCEF2003 Christmas Script Embossing Folder, UCD1975 Scalloped Nesting Rectangle Die, UCD1974 Stitched Nesting Rectangle Die, UCD2003 Stitched Nesting Circle Die, UCD1830 Tall Uppercase Alpha Die, Clear Sparkle Brush, Ice Sequins, Iridescent Pearls
Other Products Used:
White Card Stock, Acetate, 3D Tape, Tape Runner
Instructions:
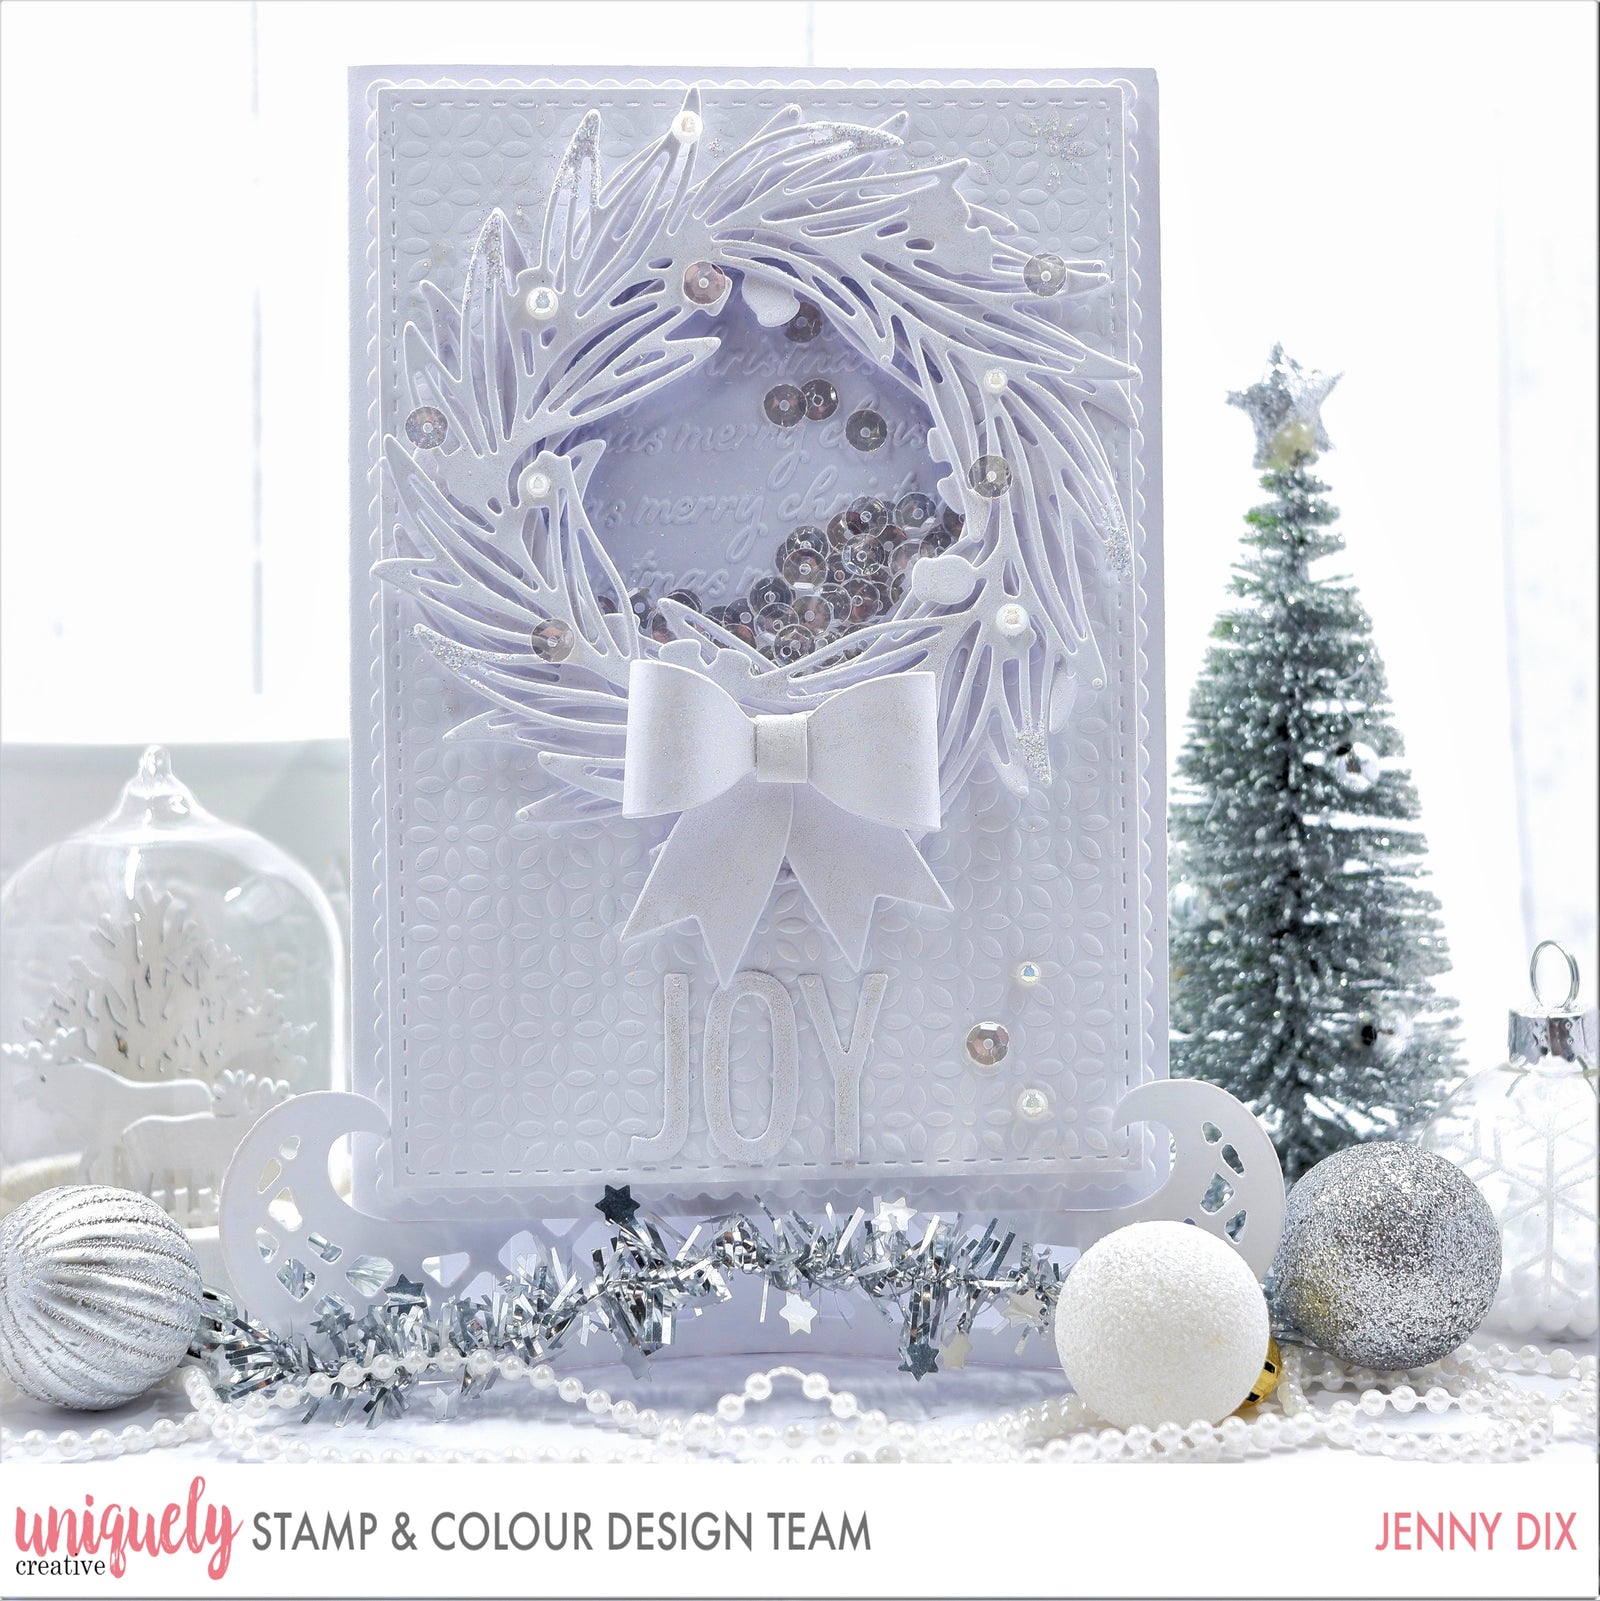
1. All cut in white card stock. Card base 25cm x 14.5cm, 1 x Largest Scalloped Die, 2 x second largest stitched rectangle, 1 x acetate second largest rectangle. Using 3rd stitched circle die cut one of the rectangles 2cm from the top centred then using the daisy embossing folder emboss it. The other stitched rectangle emboss using the Merry Christmas folder.

2. Die cut two white 2 wreathes, 1 bow and the letters to spell JOY. Make the bow up and glitter each piece with the Clear Sparkle Brush.

3. Layer the scalloped piece on the base with 3D tape. Create a shaker using the Merry Christmas piece as the backing and use sequins in the shaker.

4. Glue the shaker to the base and the first wreath on.

5. With the second wreath I 3D' it and put it a bit off centre so it was a little different to the bottom one. Glued the Joy on and decorated with sequins and pearls.
