Just For You Tutorial - Ashlee McGregor
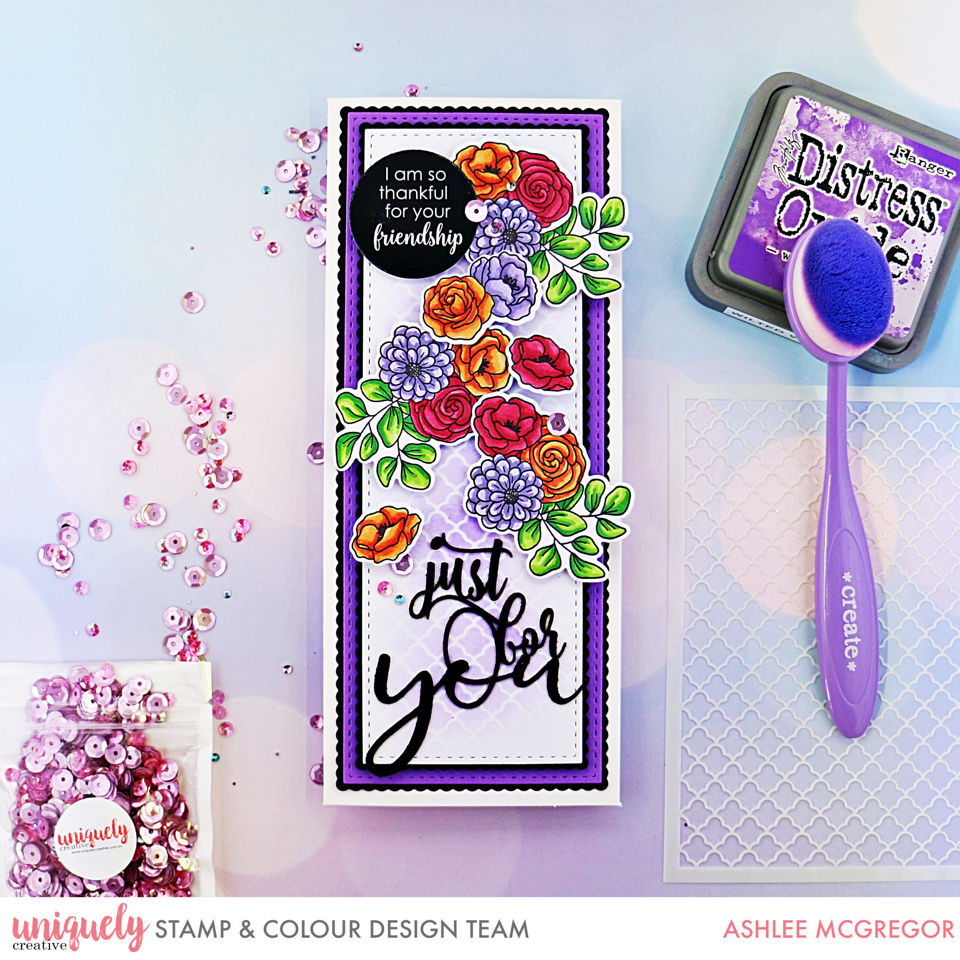

Card Size: 8.8 x 21cm
Uniquely Creative Products Used:
UC1842 Teacup Builder Stamp Set, Teacup Laser Cut, Cut-A-Part Sheet, UC1987 Teacup Builder Dies, UCMM1747 Trellis Stencil, UC Sequins, UC1803 Foam Squares, UCD1973 Slimline Nesting Rectangles, UCD1973 Slimline Scalloped Nesting Rectangles, UC1812 Slimline Card Base & Envelopes
Other Products Used:
WOW! Embossing Powder Black Glitz, Distress Oxide Ink Wilted Violet, Purple Cardstock, Glue Dots, Parkoo Shop Alcohol Markers
Instructions:
1. Using the slimline nesting rectangles die cut one from the purple cardstock and then the size below from your white cardstock. On the die cut white piece use the trellis stencil and ink blend with distress oxide ink wilted violet through the stencil.

2. Using the slimline scalloped nesting rectangles, die cut the co-ordinating backing sizes to the pieces that were previously cut in step 1 to layer behind them with black cardstock.

3. Layer all the pieces together using some UC foam squares for different layers of dimension.

4. Add one of the cut-a-part sentiments to the top of the card and then use some WOW! embossing powder in the colour black glitz to emboss the laser cut sentiment. Once it has been embossed glue the laser cut to the bottom half of the card.

5. Stamp, colour and die cut a bunch of the beautiful flowers from the teacup builder stamp set.

6. Attach all the coloured images to the card base using UC foam squares and then finish off with a touch of UC sequins attached using glue dots.
