LIVE, LAUGH, LOVE LAYOUT TUTORIAL - KIM ARNOLD

To recreate this beautiful layout created by Design Team member Kim Arnold you can follow the steps below:
Uniquely Creative Products Used:
· UCP2998 Be Happy Paper
· UCP2999 Choose Joy Paper
· UCP3000 Good Day Paper
· UCP3001 You Are Enough Paper
· UCP3003 Be Kind Paper
· UCP3009 Heart & Soul Creative Cuts
· UCP3010 Heart & Soul Floral Creative Cuts
· UCD2207 Oversized Scallop Nesting Rectangle Die
· UCD2208 Oversized Scallop Strip Die
· UCP2140 Heart & Soul Journal Stickers
· UCE2135 Heart & Soul Rub-ons
· UCE2142 Scalloped Polka Dot Washi Tape
· UCE1961 Foam Mounts Strips
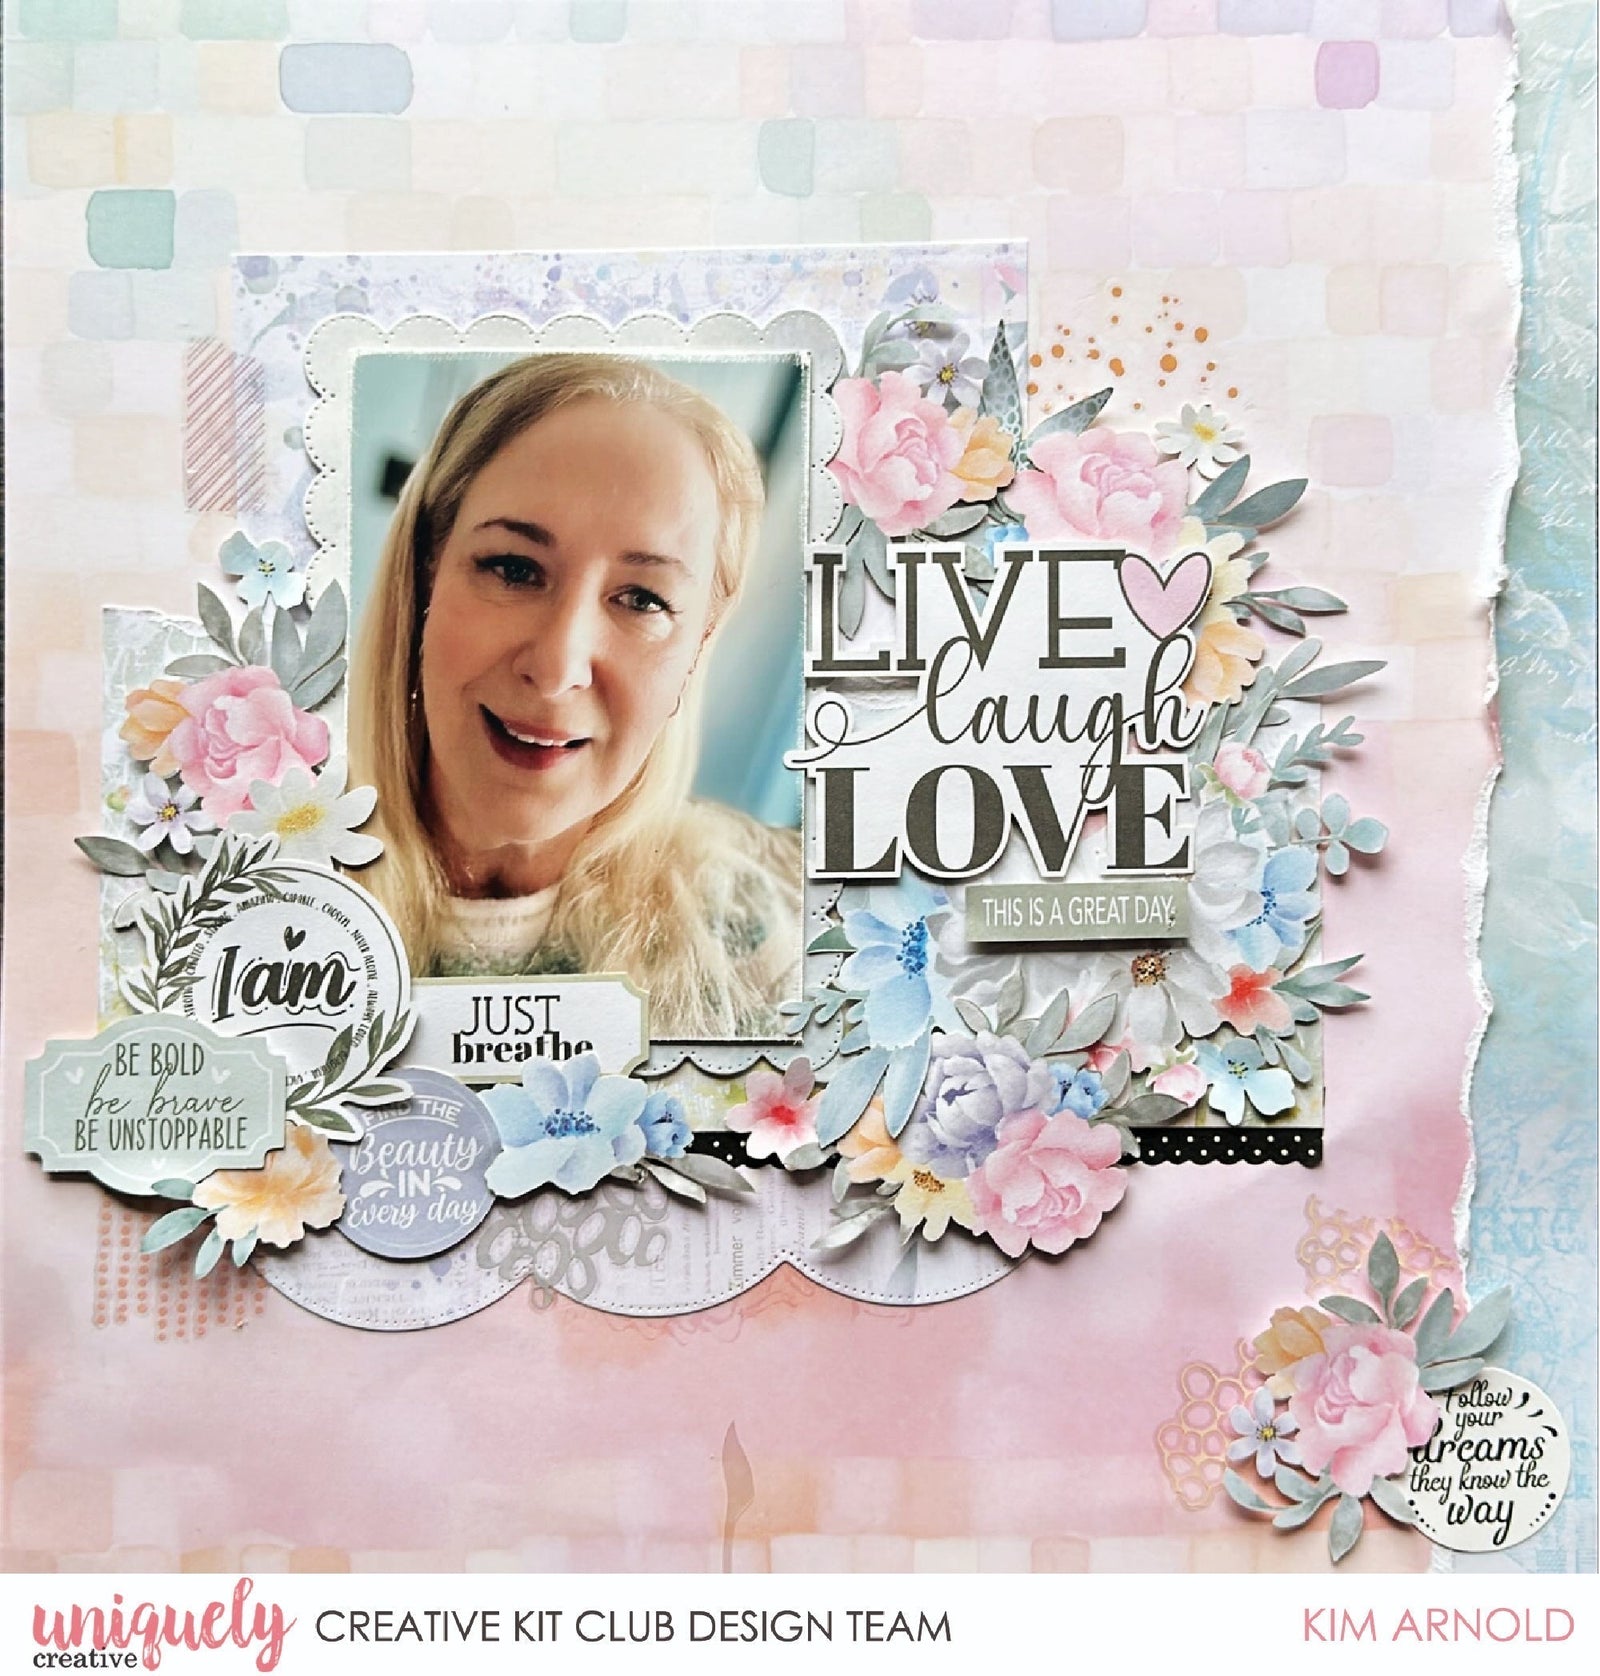
Photo Size: 4x6 inch
Step 1:
Rip two inch strip from right side of Good Day paper. Cut 3 inch strip from Be Kind paper. Attach two pieces together to make a 12x12 inch background – See image 1
Step 2:
Cut a scallop edge piece from Choose Joy paper using the largest Oversized Scallop Nesting Rectangle die – See image 2.
Step 3:
Sand edges of photograph - See image 3
Step 4:
Cut a 6 x 8.5 inch piece of Be Happy and cut bottom edge with the large open scallop die from the Oversized Scallop Strip Die set. Attach to background 2 inches from top and 1.5 inches from left side. Cut a 4x9 inch piece from bottom edge of You Are Enough paper and tear along top edge. Attach over Be Happy paper. Tuck a strip of Scalloped Polka Dot Washi Tape under edge – See image 4.
Step 5:
Attach photo to scallop frame with foam strips. Attach this piece with foam tape over layered Be Happy and You Are Enough papers. Add floral clusters, separate leaves, phrases and title to right and left of photo – See image 5.
Step 6:
Attach floral cluster and sticker to bottom right corner of layout at the torn edge - See image 6
Step 7:
Add coloured rub-ons at the top right and bottom of photo and with the cluster in the bottom right corner of the layout – See image 7.
Laurie Krekemeyer
October 27, 2025
This is gorgeous, but are the die cuts digital and if so how do you cut them.