30 day change of mind returns available
30 day change of mind returns available
Add description, images, menus and links to your mega menu
A column with no settings can be used as a spacer
Link to your collections, sales and even external links
Add up to five columns
Add description, images, menus and links to your mega menu
A column with no settings can be used as a spacer
Link to your collections, sales and even external links
Add up to five columns
Mermaid Slimline Tutorial - Jane Clark
December 02, 2023
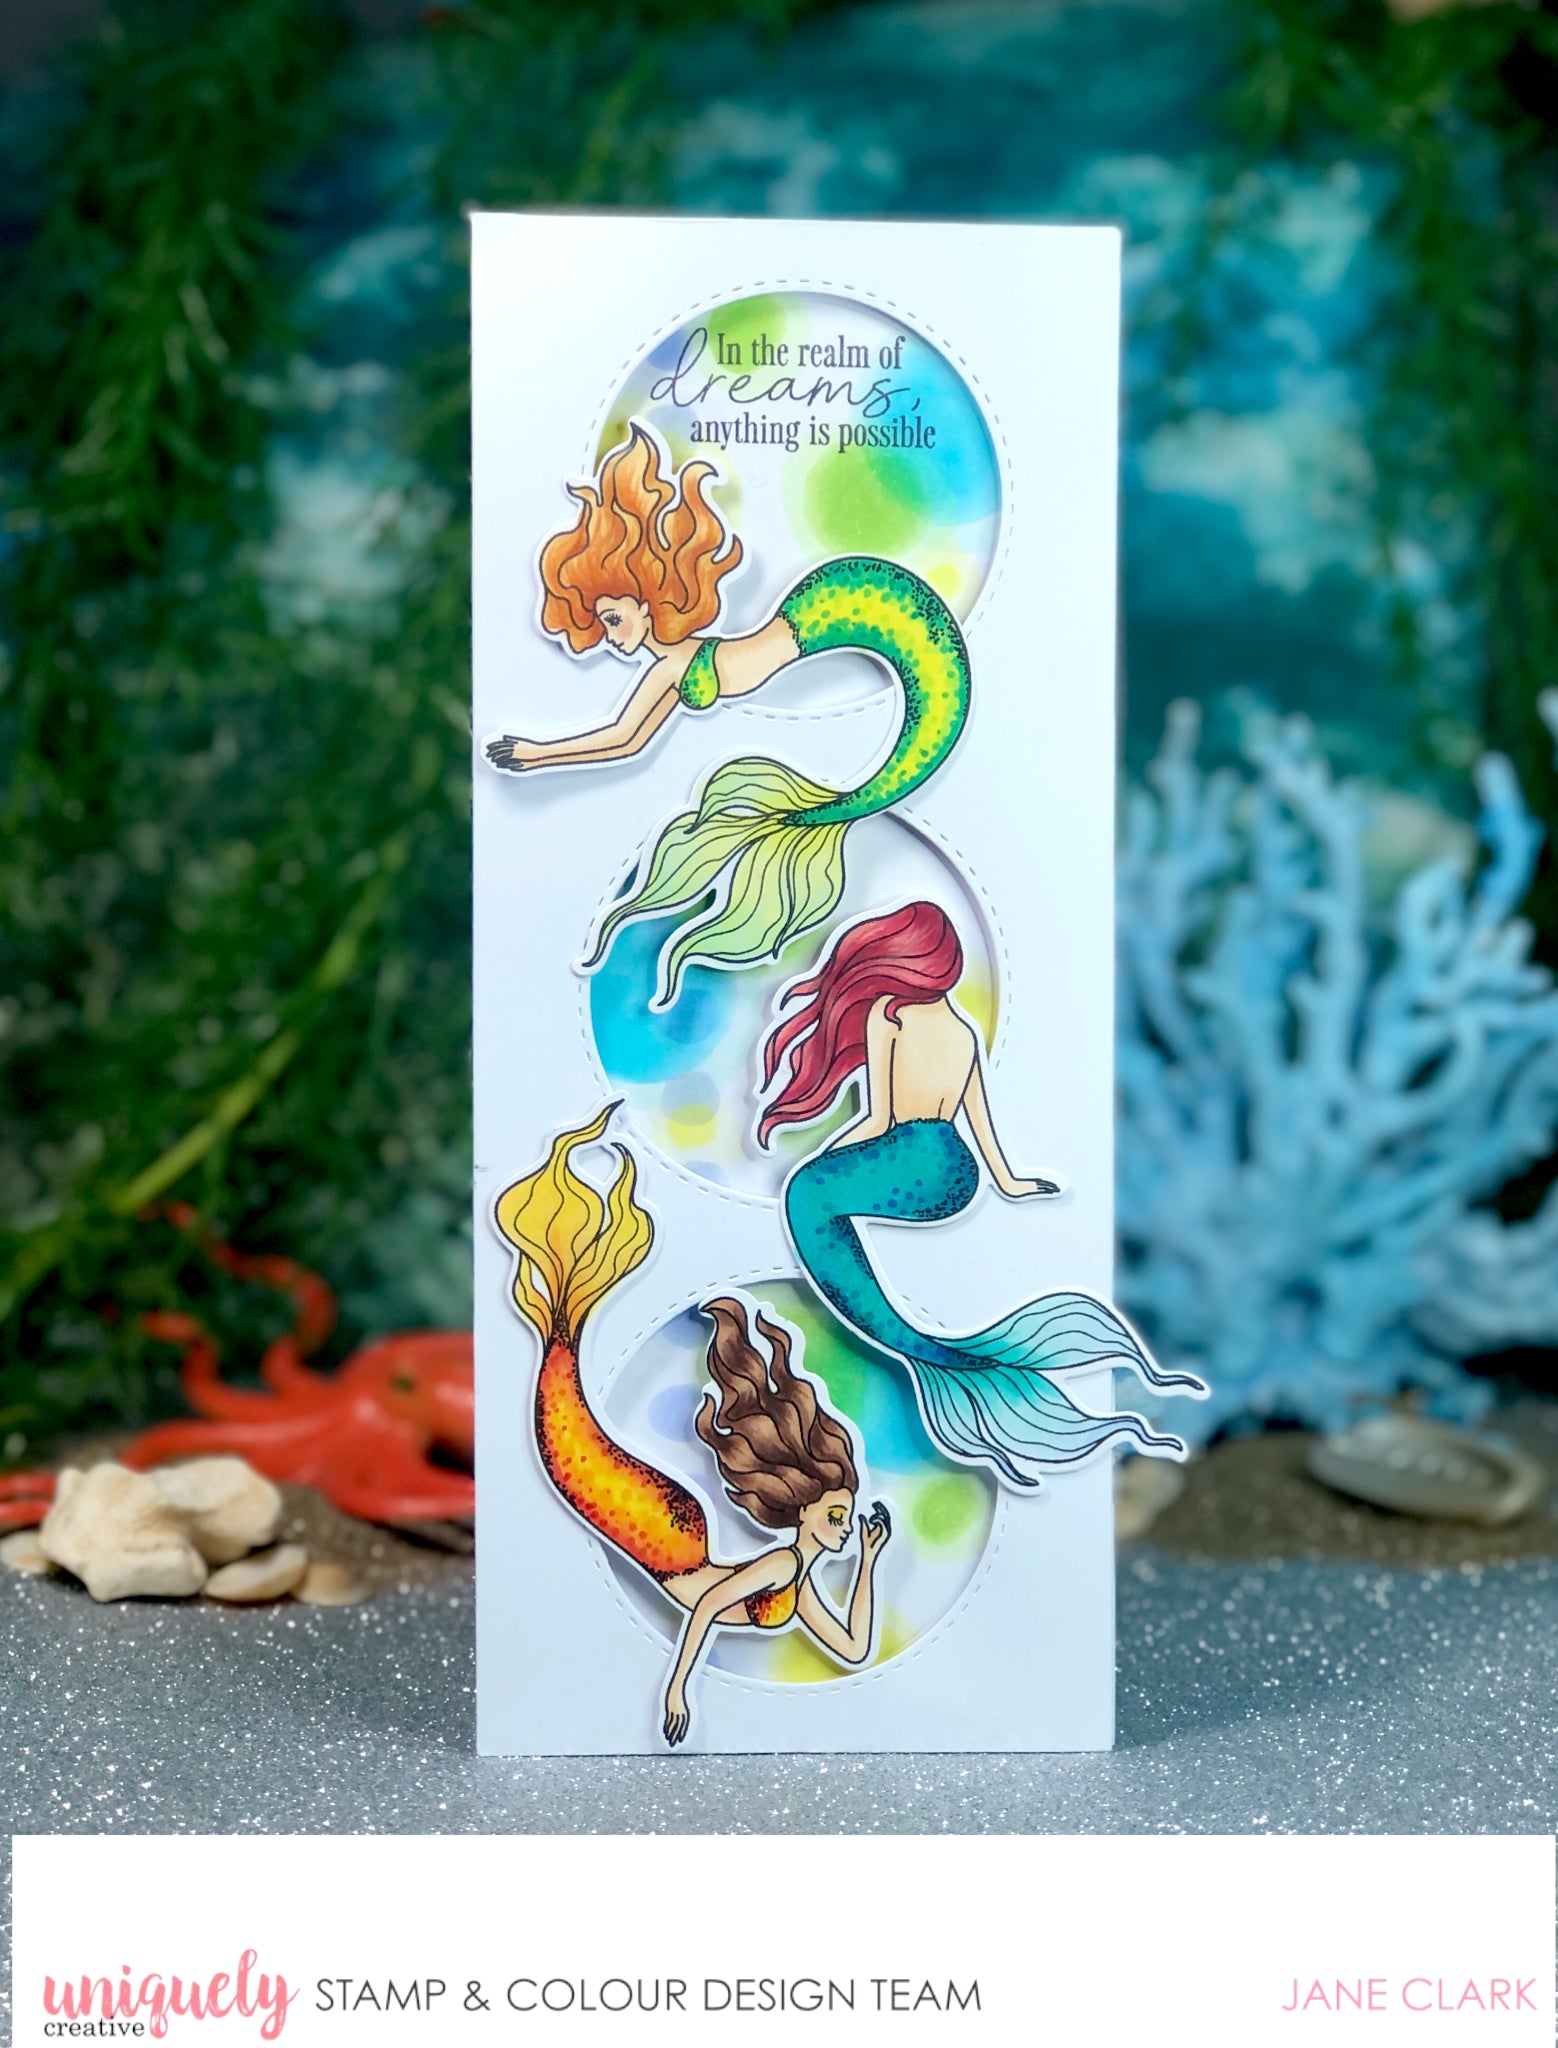

Uniquely Creative Products Used:
- UC1905 Shades of Whimsy Stamp Set
- UCD2114 Shades of Whimsy Fussy Cutting Die
- UCD1967 Slim 3 Circle Window die
- Cards and Envelopes Slimline
- Squares and Strips Foam Mounts
-
Fine Glue Pen
- Smooth White Card
- Memento Tuxedo Black Ink
-
Copic Colours:
Circle Background - YG13, YG1, Y04, Y11, BG01, BG10, B60, B63
Top Mermaid - Y04, YG23, YG25, G17, Y00, G00, E51, E53, E01, YR20, E97, E99
Middle Mermaid - BG45, BG49, BG11, B29, BV31, E5, E53, R81, R83, R85, R89
Bottom Mermaid - Y04, YR16, YR18, R27, Y17, Y15, E51, E53, E57, E59, E49
Instructions:
1. Create different sizes and patterns of circles on the front of a slimline card using the listed Copic markers as shown.

2. Stamp and die-cut the three mermaids, colour them using the listed Copic markers as shown.

3. Die cut a slim 3 circle window from white card and place it over the slimline card front to check the positioning of the coloured circles, add more if needed.

4. Stamp sentiment in the top circle section using black ink.

5. Secure the slim 3 circle window onto the card front using foam mount tape, then add the Mermaids using a combination of glue and foam mount tape.

Leave a comment
Newsletter
Join our mailing list and never miss an update …