MERRY CHRISTMAS CALENDAR CARD TUTORIAL - PAULA SAUNDERS
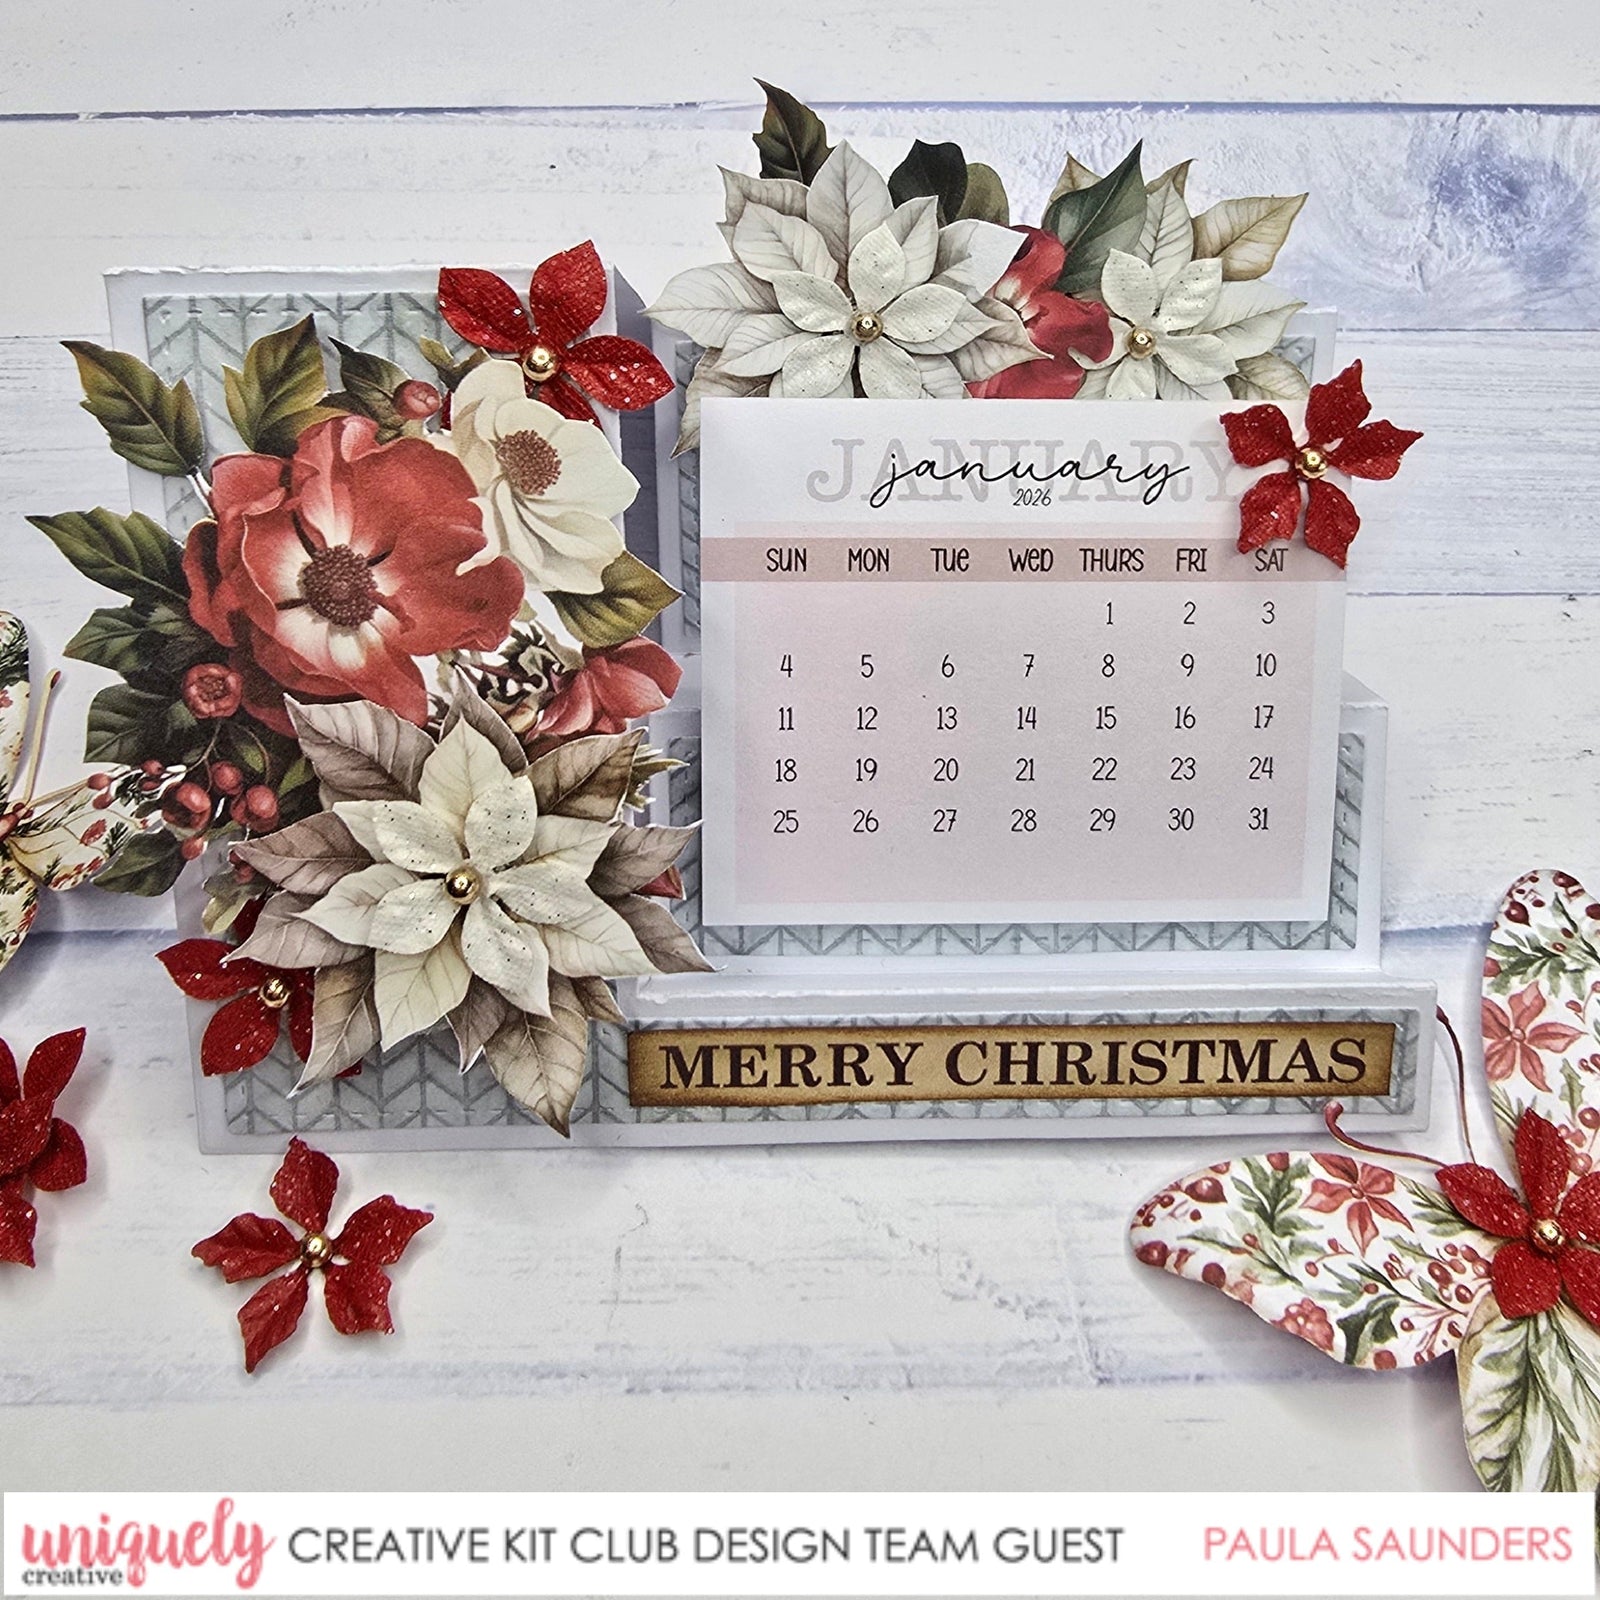

To recreate this fantastic stepper card created by Design Team member Paula Saunders you can follow the steps below:
Uniquely Creative Products Used:
· UCE2130 2026 Calendar Pads
· UCP 2989 Holly in the Hall Paper
· UCP2992 Ready for Santa Paper
· UCP2996 Home For Christmas Creative Cuts
· UCE2121 Flowers
· UCD2203 Side Stepper Card Die
Other Products Used:
· White Cardstock 12x12
· Distress Oxide – Walnut Stain
Card Size: 14.5cm x 10cm
Step 1:
Use the Side Stepper Card Die UCE2203 & cut out in the white cardstock. Find the Holly In The Hall UCP2989 paper & use the Side Stepper Card Die to cut out the blue chevron side of the paper to adhere to the stepper card.
Step 2:
Find the red flower with leaves & the large white poinsettia flower from the Creative Cuts, use foam tape to adhere them together. Adhere a white flower in the center then adhere to the last step of the stepper card.
Step 3:
Find another large white poinsettia & a couple of leaves from the Creative Cuts pack & adhere with foam tape to the left of the flowers.
Step 4:
Adhere one of the calendars to the middle stepper of the card with foam tape.
Step 5:
Find the large bunch of flowers in the Creative Cuts pack & adhere to the long panel on the left with foam tape. Cut out one more large white poinsettia from the Ready For Santa UCP2992 paper & adhere to the long panel. Adhere a white flower to the middle of the poinsettia.
Step 6:
Stick some more flowers to the front of your card. Cut out the MERRY CHRISTMAS from the Ready For Santa UCP2992, ink around the outside with a dark brown ink (Distress Ink – Vintage Photo) & adhere along the bottom of your card.

Sandy Barry
October 25, 2025
Hi Ladies
I have a question about the Merry Christmas Calendar card made by Paula Saunders.
How does the card stand up or does it sit back on an angle?
Thank You