Owl Family Mini Kit Recap

With the release of the new Stamp & Colour Mini Kit fast approaching, we have a special blog post, wrapping another month of our Stamp & Colour Collection.
We hope you enjoy this post of project ideas and inspiration, which were created by our fabulous Stamp & Colour Design Team.
“Love" Card by Natalie Elphinstone

Card Size: Uniquely Creative Square (13.5cm x 13.5cm) (white)
Uniquely Creative Products Used:
UCD1980 Love Frame Die, UCD1977 Scalloped Nesting Square Dies, UCD1976 Stitched Nesting Square Dies, UCE1804 Foam Dots
Other: White and Red Cardstock, Patterned Paper
Congratulations Card - Natalie Elphinstone

Card Size: 6x4” white
Uniquely Creative Products Used:
UC1841 Owl Family Stamp Set, UCD1982 Owl Family Die Set, Cut-A-Part Essentials #6 Die, UCE1772 Uniqolour Markers, UCE1831 Watercolour Card, UCE1804 Foam Dots
Other: Coloured Paper
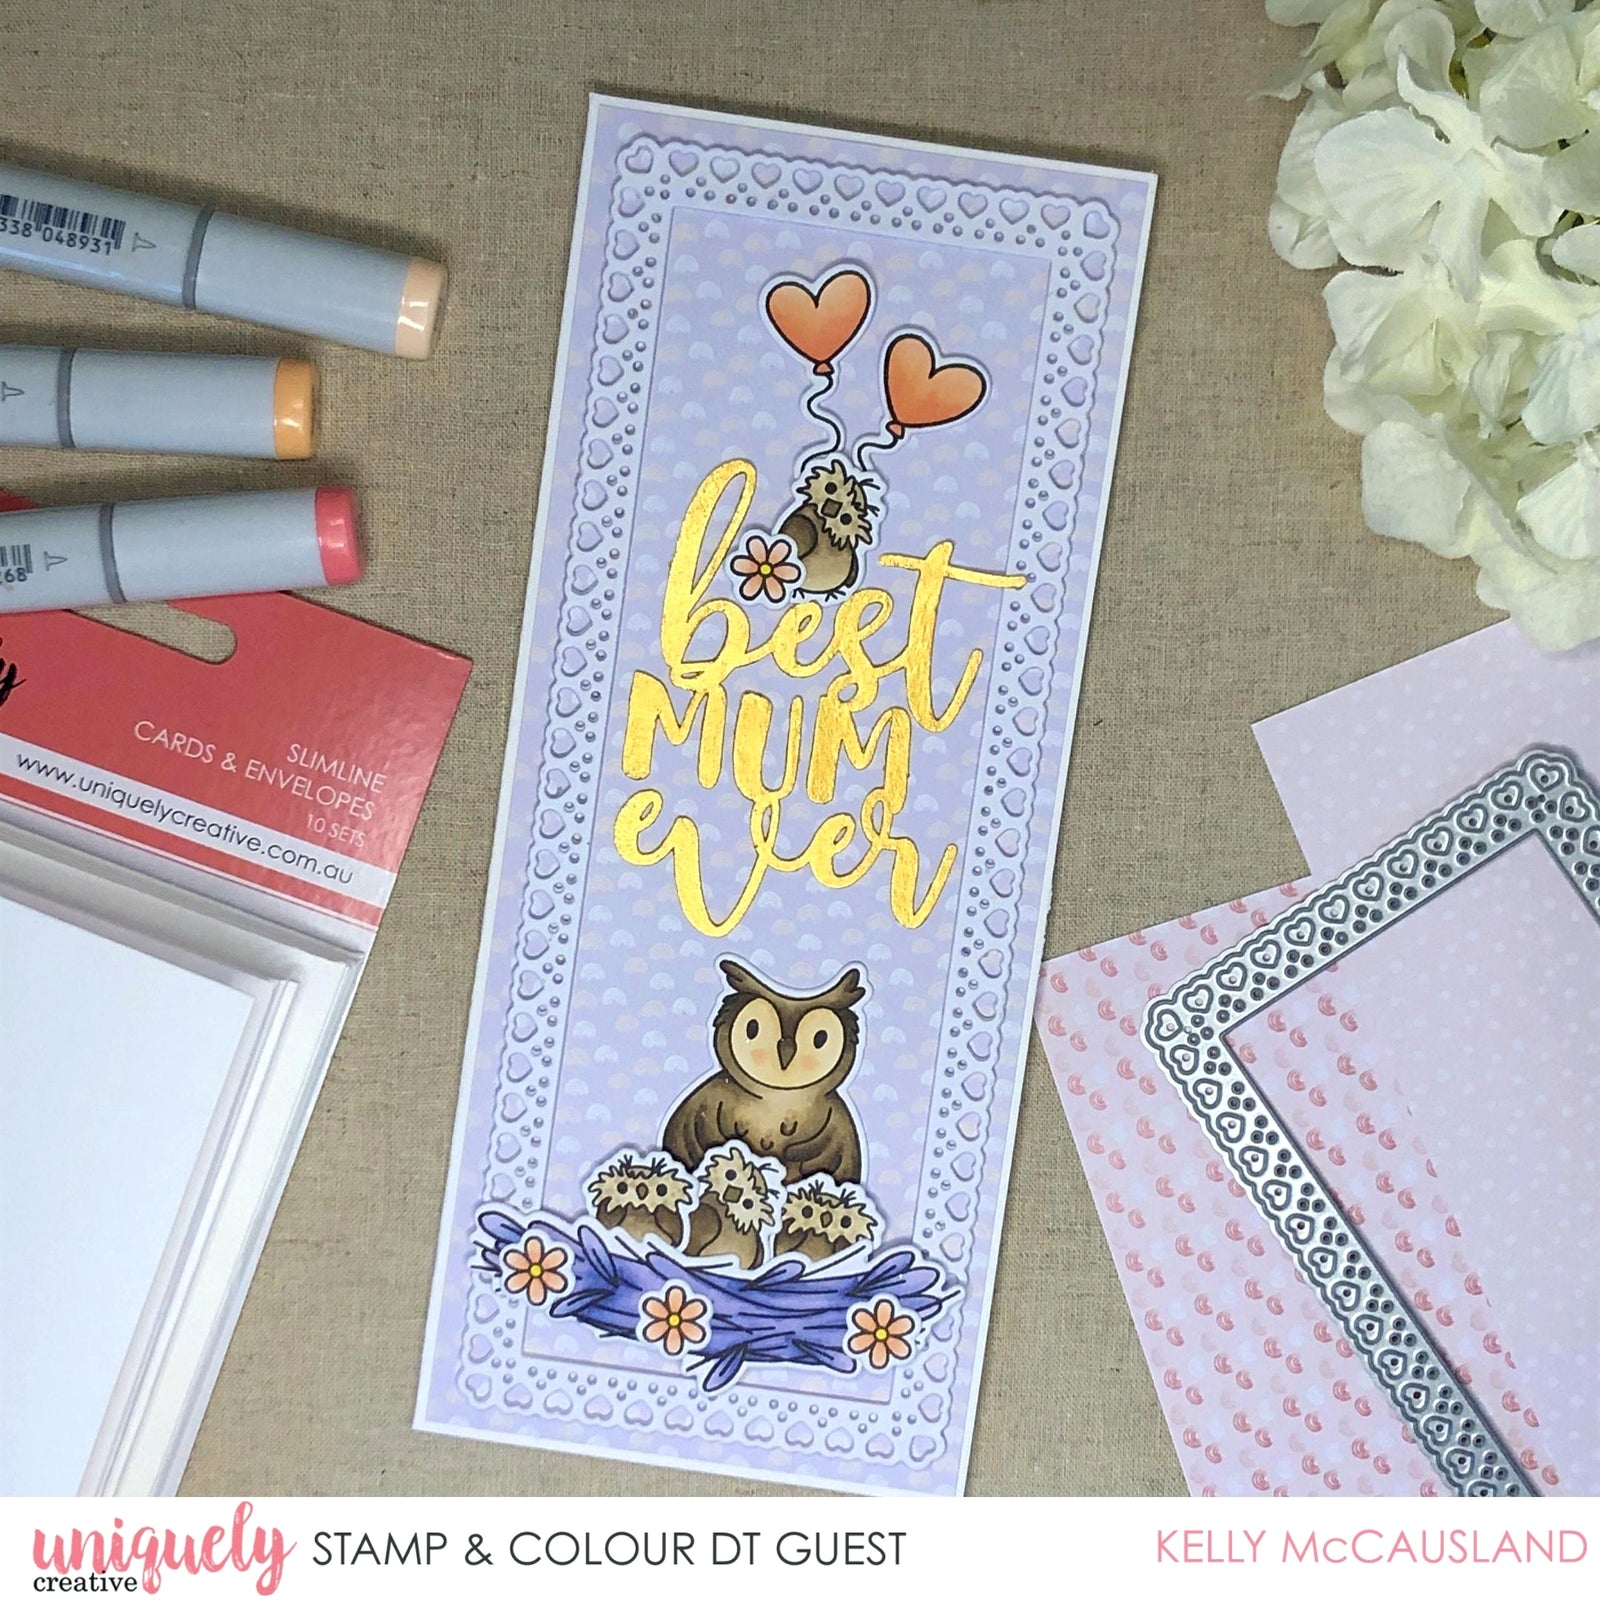
Congratulations Card - Vicki Poulton

Uniquely Creative Products Used:
UC1841 Owl Family Stamps, UCD1982 Owl Family Dies, UCD1980 Love Frame, Pattern Paper (Included In Kit), Black Card, Brown Card, Gold Embossing Powder
Copics:
Mum Owl: E50, E51, E55, E31, E33, E43, E47, Y32
Dad Owl: W0, W2, W5, E71, E74, E77, E79, Y35, Y32, YR65
Baby Owls: W5, W2, W0, E41, E43, Y35, Y32
Nest: E71, E74, E77, E79, G28, G85
Flowers: Y17, Y15
Instructions:
1. Trim down a piece of brown card to measure 3 1/8 x 8 inches. Using the love frame die cut a piece of light brown card and do the same again using black card. Adhere the brown frame to the card base and using a piece of pattern paper trim down to fit the inside window of the card.


2. Next stamp images onto a piece of copic friendly paper and using the colours listed colour the images with your markers. Using the coordinating dies run it through your die cutting machine. Adhere your images onto your card using foam tape.
3. Heat emboss the greeting "congratulations" onto a piece of black card. Add some gold embossing powder and heat set the sentiment with a heat gun.

4. Using the co-ordinating die run this through your die cutting machine and adhered this to the top of your card.
5. Your card is complete.