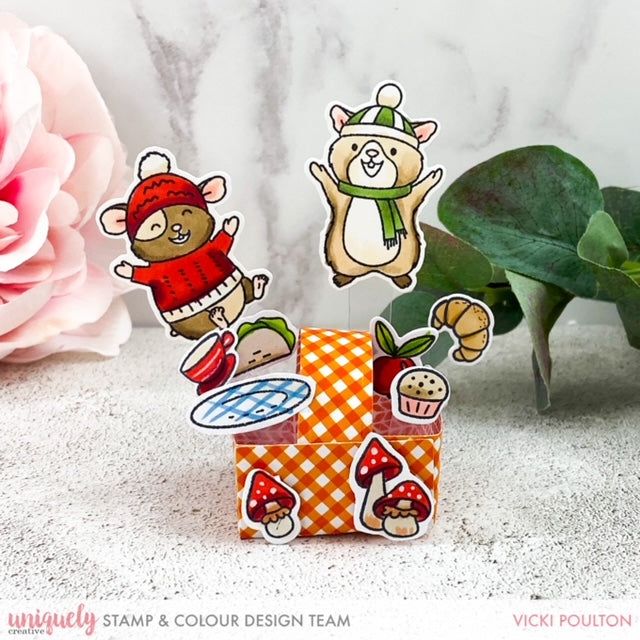
Picnic Basket Tutorial - Vicki Poulton

Uniquely Creative Products Used:
- UCD2045 Autumn Die
- UCD2044 Picnic Basket Die
- Paper included in Kit
Other Products Used:
- Glue
- Scissors
- Die Cutting Machine
- Copic Markers: Reds: R24, R39, R20, R00, Browns: E40, E41, E43, E50, E31, E35, Yellows: Y35, YR23, Y32, Blues: B45, B95, BV25, BV23, Greens: YG03, YG17, G82, G85
Instructions:
1. Using the picnic basket die trim your pattern paper down and run this through your machine.


2. Once your basket is die cut put it together like the above photos. Vicki used PVA glue to adhere my basket together.


3. Stamp and colour your images using copic markers or watercolour pens. Using the coordinating dies die cut your images out.

4. Using a piece of acetate place this at the back of the images using double sided tape. You will also need to add the tape to the bottom of your acetate so that it will stick up in the basket.

5. Keep adding your critters and stamped images to your basket until your happy. Your basket is now complete.
