Play Tutorial - Natalie Elphinstone

Uniquely Creative Products Used:
UC1854 Enjoy The Fun Stamp Set, UCD2026 Enjoy The Fun Die Set, UCL1729 Summer Laser Cut, UCMM1751 Scene Builder Clouds And Grass Stencil, Summer Cut-A-Part Sheet, UCD1958 Essentials Cut-A-Part Die #5, Uniqolour Markers, Watercolour Paper, UCE1803 Foam Squares, UCE1778 Stencil Brushes
Other Products Used:
Sizzix Expand Paste, Catherine Pooler Inks, Ranger Liquid Pearls, White Glitter
Instructions:
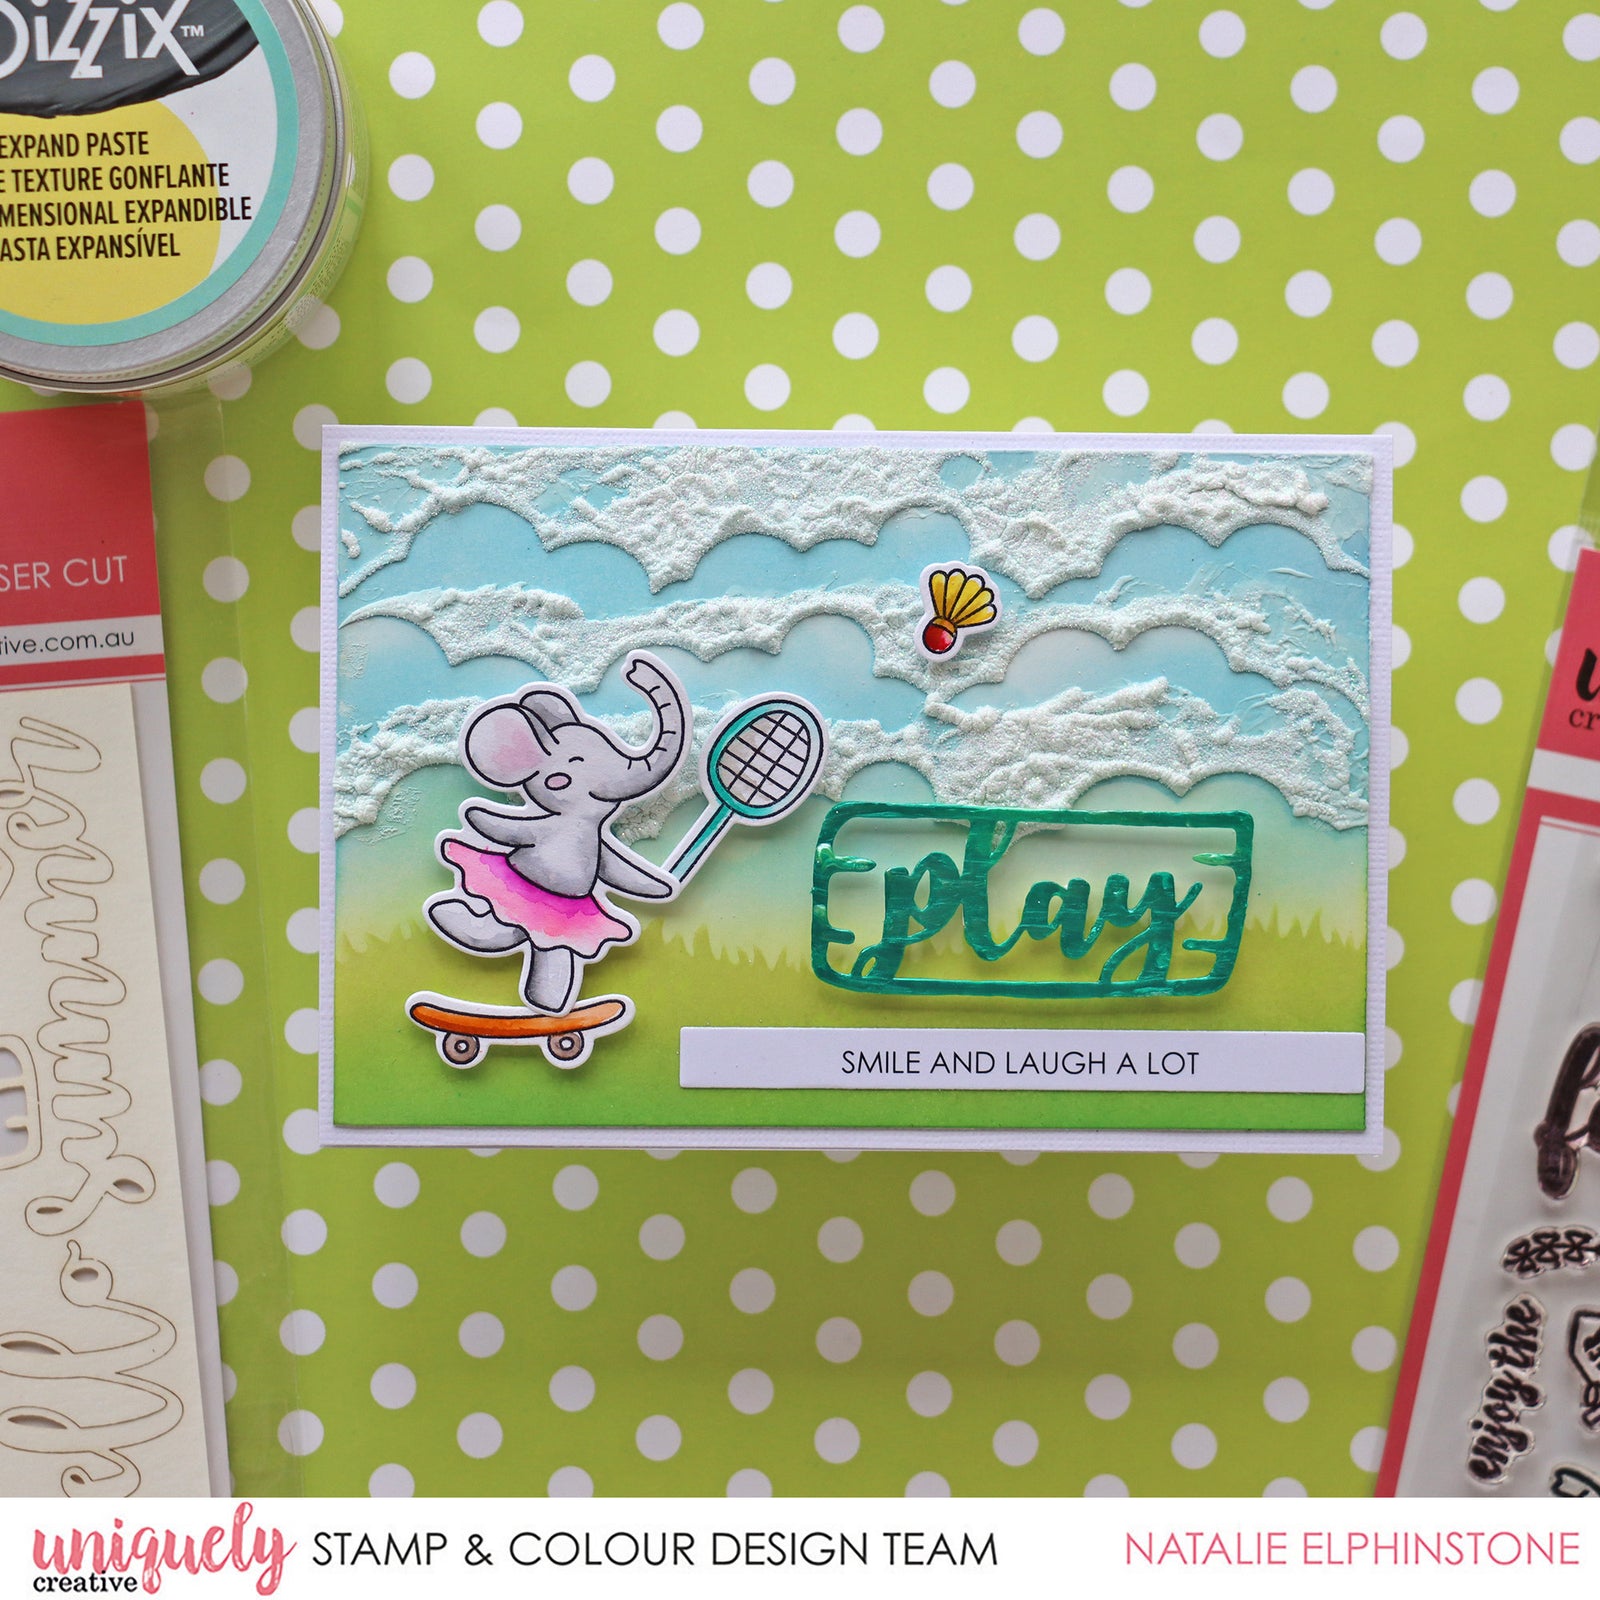
1. Using the scene builder clouds and grass stencil, create your grass border using your blending brush.

2. Stencil a single layer of grass down the bottom, and then multiple layers of clouds working from bottom to top, making sure to move the stencil slightly either left or right with each layer so they didn’t all line up the same. That helps make the clouds look more random.

3. Realigned your cloud stencil in place, this time starting from the top and working your way down. Smudge and dab a bit of Sizzix Expand paste along the edge of each layer. This paste is thick and buttery and dries fairly translucent. Use your heat gun to puff and expand and it will become opaque white – just like clouds! Before the paste dries sprinkle with superfine white glitter which adds a subtle glittery finish.

4. For the sentiment Natalie wanted something that would really stand out against all the background details that looked big and bold. Choose one of the summer laser cut words “Play” and paint it thickly with Ranger Liquid Pearls. Natalie used the plastic surface of an empty foam square sheet to paint on so that the laser cut wouldn’t stick to anything as it dried.

5. Stamp out a few elements from the ‘Enjoy The Sun’ stamp set onto watercolour paper, colour them with Uniqolor Markers and cut them out with the matching dies. Adhere them onto the card with foam tape so they pop out from the background.


