Rain Or Shine Tutorial - Vicki Poulton

Uniquely Creative Products Used:
- UC1864 Winter Stamp Set
- UCD2055 Winter Die Set
-
Paper (Included In The Kit)
- Cut-a-Part Sheet (Included IN The Kit)
- UCD1920 Billabong Die
- Laser Cut (Included in kit)
- UCD1958 Cut-A-Part Essential #5 Die
Other Products Used:
- Scissors
- Trimmer
- White Card Base
- Foam Dots & Adhesives
- Copics: Greys: C4, C6, Whites: E41, E40, Yellows: YR23, Y35, Greens: BG93, BG96, BG32, BG11, Pinks: R20, RV55, RV52, Blues: B00, BG000
Instructions:
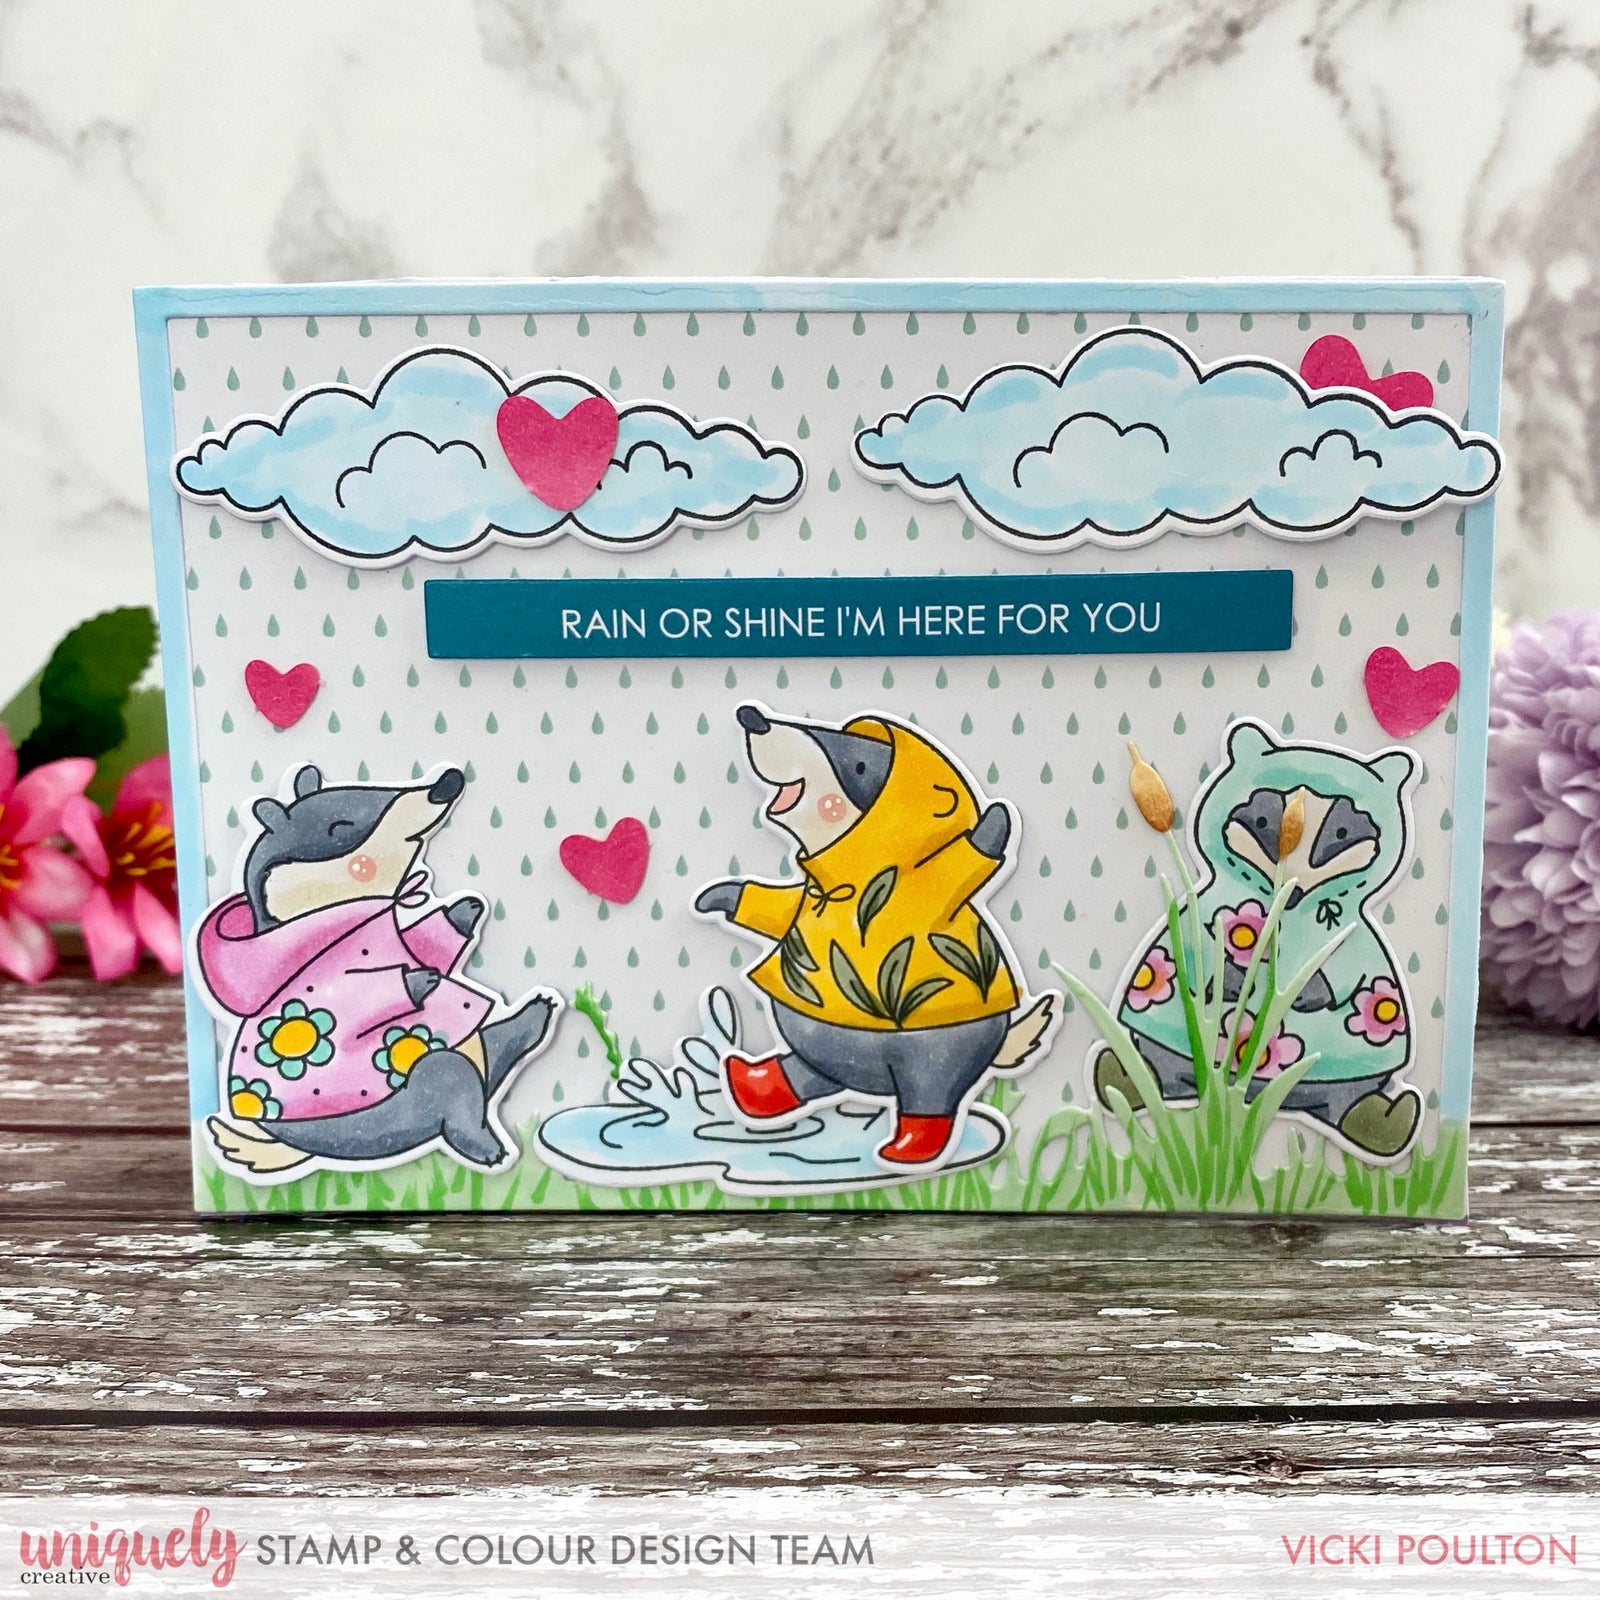
1. Using a white piece of card die cut your Billabong Die.

2. Using your copic markers colour in the bottom of the die green and the sides and top blue.

3. Using a piece of the pattern paper that is included in the kit add PVA glue to the back of your die and adhere this over the piece of pattern paper.

4. Once your glue is dry cut this out.

5. Stamp out your images and using your chosen colouring method colour your stamps in. Using the coordinating dies die cut them out.

6. Start putting your critters on you card to make a scene.

7. Use 3D foam pads to adhere your images.

8. Using the Cut-a-part sheet and coordinating die add you sentiment. Add some hearts from the laser sheet to your card that is fixed down with PVA glue.
