Oh What Fun Tutorial - Lisa Amiet

Uniquely Products Used:
- UCP2443 Joy to the World
- UCCA1773 Christmas Cardstock
- UCE1810 Burlap
- UCE1811 Rectangle Cards
- UCP2453 Creative Cuts
- UCL1749 Wooden Laser Cut
- Cut Apart Sheet
Other Products Used:
- Trimmer
- Scissors
- Double-Sided Tape
- Foam Tape
Instructions:
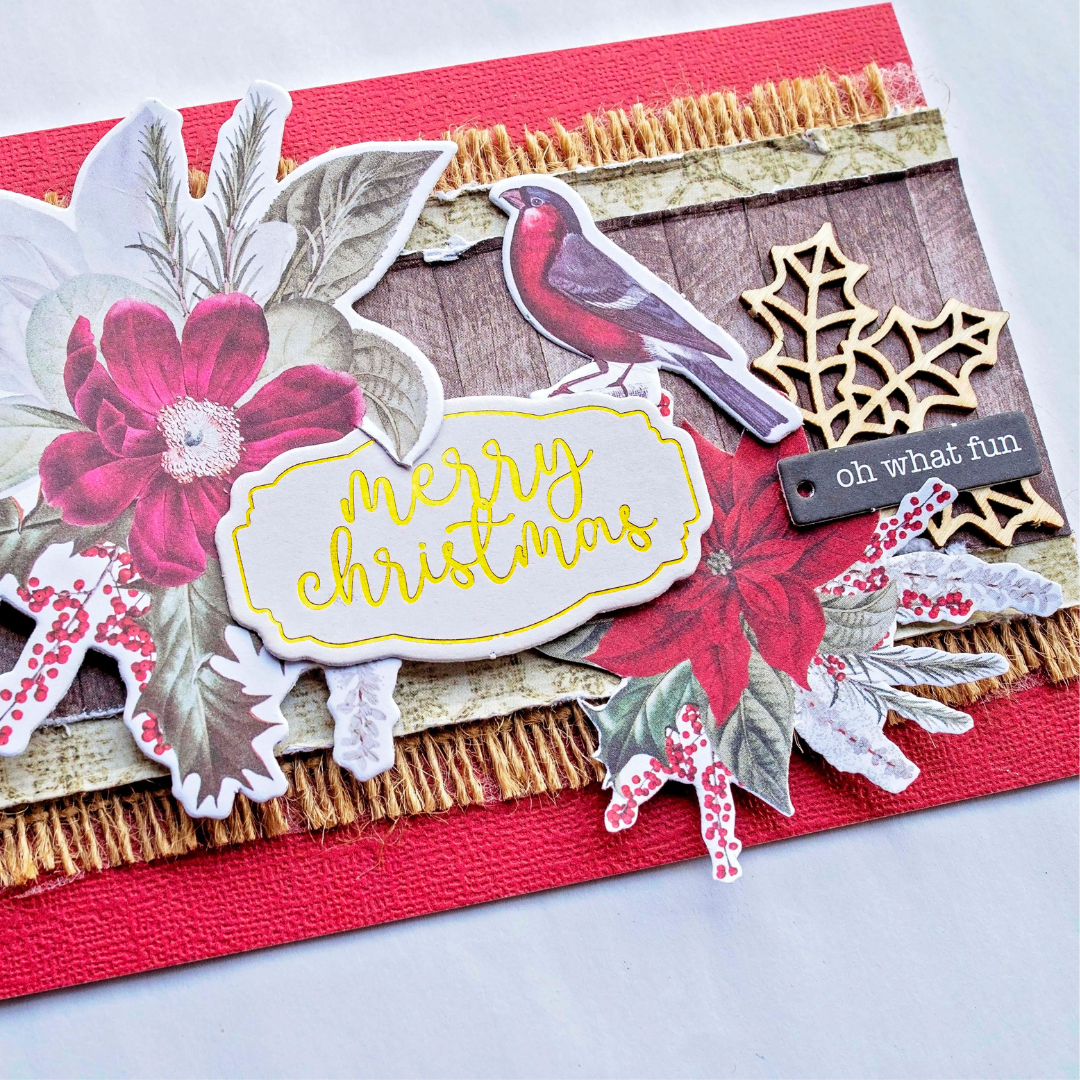
1. Cover the card front with a piece of Christmas cardstock. Cut a 3¼ x 6” piece of burlap, distress edges by pulling some of the threads from each side, keep these as we will use them later, and adhere burlap to middle of card front.

2. Cut a 2 ¾ x 6” piece of Joy to the World paper. Distress top and bottom edges and adhere to the centre of the burlap piece.

3. Cut a 2 x 6” piece of the woodgrain pattern from Joy to the World paper, again distress the top and bottom edges and adhere to the centre of previous piece.

4. Fussy cut floral from the Cut Apart sheet and adhere to the bottom right corner of card, layering with one of the holly Wooden Laser Cut pieces. Make a loop with the offcuts from your burlap and fasten with a twist tie. Adhere this loop to the left side of your card.

5. Adhere floral from the Creative Cuts, adhering over the looped burlap with foam tape for dimension.

6. Adhere sentiment label from the Creative Cuts, layering over and under previous pieces, with foam tape.

7. To finish adhere bird and chosen sentiment from the Creative Cuts.