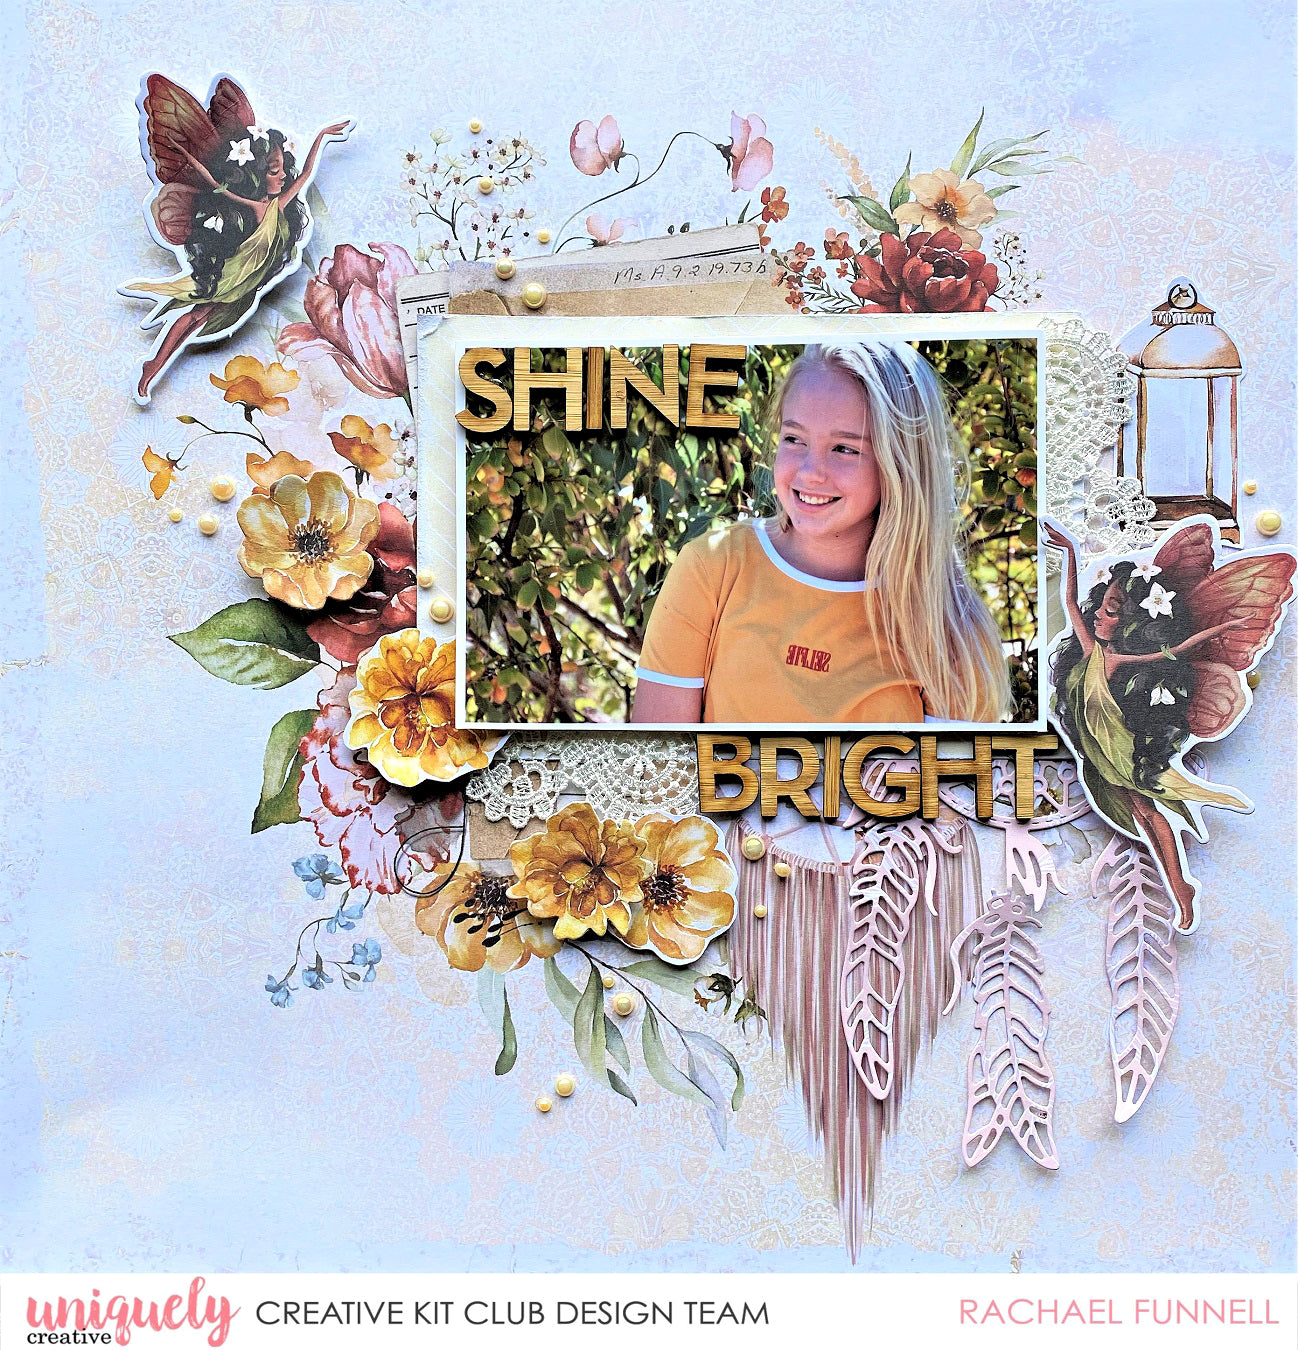
Shine Bright Tutorial - Rachel Funnell

Uniquely Products Used:
- UCP2400 Willow
- UCP2401 Delilah
- UCP2404 Hazel
- UCP2406 Marigold
- UCP2399 Creative Cuts
- UCE1892 Wooden Alphabet
- UCE1903 Lace Paisleys
- UCE1764 Champagne Pearls
- UCD2056 Dreamcatcher Die
Other Products Used:
- Trimmer
- Foam Mounts
- Sanding Block
- Scissors
- Adhesive Tape
- Glue
- Die Cutting Machine
Instructions:
1. Use a piece of the Willow paper, as the base of your layout and remove the branding strip.
2. Die cut out a Dreamcatcher from the reverse side of the Hazel paper & adhere only the center of this dreamcatcher to the right side of the dreamcatcher image on the Willow paper, leaving the feathers of the Dreamcatcher free of adhesive.

3. Cut a 4”x6” piece from the reverse side of the Delilah paper, sand all four edges with the sanding block, and adhere your photo to this piece using foam mounts & then adhere with adhesive tape or glue to your center of the page.
4. Adhere one Paisley Lace to the right side and in between your paper layer & photo and another to the bottom slightly to the of your photo.

5. Adhere using some foam mounts two of the fairies, one at the top left & the other to the right of the photo & bend the wings for an added dimension. Then adhere the two yellow flowers from the Creative cuts again with foam mounts.
6. Fussy cut out two of the yellow flowers and a lamp from the Marigold paper & adhere the flower using foam mounts & glue for the lamp.

7. Using the Wooden Alphabets add your title and adhere your title adhere using glue. NOTE: If you don’t have the room on your photo to place part of your title, then you could place it at the top left of the photo.

8. Add a few of the Champagne pearls to finish.