7 Simple and Easy Craft Activities For Preschoolers

Get Started With Some Fun and Simple Preschool Craft Activities
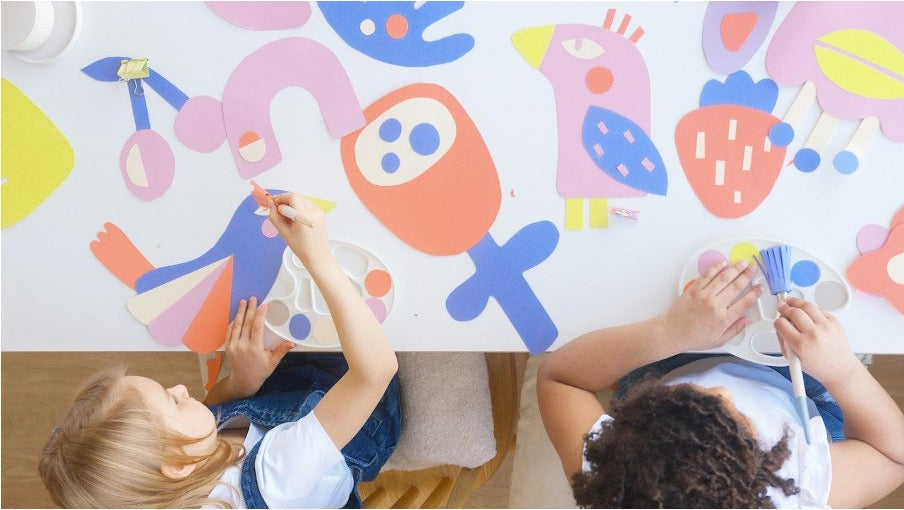
Preschoolers love taking part in craft activities and why wouldn’t they. It’s fun, exciting and often a little messy! Little do they know that by participating in craft activities they are developing their fine motor skills, improving their hand-eye coordination, exploring self-expression and so much more. Crafting is a great way to have quality time with your child in a relaxed and creative environment.
7 Of Our Favourite Preschool Art and Craft Activities
Read on as we discover 7 simple preschool craft activities to explore with your child. These activities are suitable for ages 3 and over, with adult supervision.
1. Finger Painting

Finger painting is a great introduction to craft for young children. It encourages creativity, teaches colours and provides sensory stimulation.
Equipment needed:
- Non-toxic finger paints – acrylic paint works well as it is water-soluble, making it easy to clean off little hands
- Old clothes or paint smock as this will get messy!
- A large sheet of paper, cardboard or even a canvas
- A plastic drop sheet to cover your work surface
Step 1: Cover your work surface with the drop sheet.
Step 2: Place the paper or cardboard onto the work surface.
Step 3: Ensure that your child has their old clothes or paint smock on.
Step 4: You can either pour some paint directly onto the paper or your child can dip their fingers into a paint pot.
Step 5: The fun begins as they get creative painting their masterpiece.
2. Collage

Creating a paper collage is a lot of fun and is great for developing fine motor skills and awareness of texture and colour.
Equipment needed:
- Old magazines or catalogues to cut pictures from
- Scraps of paper, cardstock, ribbon, twine, leaves, feathers
- Child-safe scissors
- Non-toxic glue
- A container to collect your cuttings in
- A sheet of cardboard or a scrapbook to create the collage in
Step 1: Give your child some magazines to look through and cut pictures out of.
Step 2: Encourage them to place the cut out pictures into the container.
Step 3: Once they have cut out their pictures, they can put glue onto the back of the picture and stick it onto the cardboard or scrapbook.
Step 4: Encourage them to keep sticking their pictures and adding in other items such as ribbon, leaves etc as they go.
Step 5: Leave their work to dry and then display it somewhere for all to see.
Step 6: Depending upon the age of your child, you might want to set a theme for the collage. This could be a colour such as pink or blue so that they concentrate their search for pictures containing those colours. The theme could also be animals or food. Encourage them to cut out pictures and use embellishments to fit the theme.
3. Paper Crowns

Making paper crowns is an activity that could be part of a dress-up day with your little prince or princess.
Equipment needed:
- Construction paper
- Child-safe scissors
- Non-toxic glue
- Lead pencil
- Sticky tape
- Embellishments to decorate your crown such as pearls, rhinestones, stars or stickers
Step 1: Draw a zig-zag line down the middle of your construction paper.
Step 2: Carefully get your child to cut along the line.
Step 3: Use sticky tape to stick these two pieces together at one end.
Step 4: Hold the crown up to your child’s head to check for sizing. If it’s too big, you can trim it down to size at the ends. If it is too small, you can add an extra bit of card in.
Step 5: Once you have established that you have the correct sizing, lay the crown down flat on your work surface and let your child enjoy decorating it with a little bling! It is easier for them to decorate the crown when it’s flat.
Step 6: When it has been decorated, tape the remaining ends together to create the circular crown.
Step 7: Now it’s time for them to complete their regal outfit!
4. Paper Masks

Paper masks are great for encouraging your child to engage in imaginary play. They can take on the persona of the mask and enjoy playtime acting.
Equipment needed:
- Cardboard in various colours
- Child-safe scissors
- Non-toxic glue
- Sticky tape
- Lead pencil
- Pencils or crayons
- Elastic, straw or pipe cleaner
Step 1: Ask your child what kind of mask they want to make. Popular themes with preschoolers are often animals or monsters!
Step 2: Once the subject of the mask is decided, your child can draw the details onto the cardboard such as eyes, nose, mouth, teeth, ears etc. If you need inspiration, you can search for a template online.
Step 3: With the positioning of the eyes, make sure that they match up to your child’s eyes so that they will be able to see when cut out.
Step 4: Cut out the eyes and any other details that need to be cut out.
Step 5: Use other colours of cardboard to create features such as a nose or ears and glue them onto the base.
Step 6: Your child can use pencils or crayons to add more details as required.
Step 7: The mask can either have elastic attached by making a small hole on either side and attaching elastic so it can be worn over the head. Alternatively, it can have a straw or pipe cleaner attached to the inside of the mask using sticky tape on one side so that the child can hold the mask in place in front of their face.
5. Paper Rainbow

This is a great opportunity for your child to learn the colours of the rainbow and tearing paper actually improves their hand strength and hand-eye coordination.
Equipment needed:
- Sheets of construction paper in the colours of the rainbow
- Sheet of cardboard for the base
- Non-toxic glue
- Lead pencil
Step 1: Have your child draw arch shapes on the base sheet of cardboard to represent the rainbow. They will need to draw arches of descending size according to how many colours they plan to use.
Step 2: Your child can now start tearing pieces of paper in the first colour and laying them randomly in the corresponding arch space. Continue this until they are happy with the amount of colour that they have.
Step 3: Now it’s time to glue all of these pieces down.
Step 4: Continue the process with each of the colours until the rainbow is complete
6. Paper Plate Craft

Paper plate craft is easy to do and inexpensive. Have your child create different paper plate decorations for different celebrations and holidays such as Christmas, Easter, Halloween, Mother’s Day or Father’s Day.
Equipment needed:
- Paper plate
- Christmas cardstock
- Chantilly lace cardstock
- Non-toxic glue
- Googly eyes
- Small red pom pom
- Cotton balls
Step 1: Lay the paper plate down on the work surface.
Step 2: Trace a circle onto the Chantilly Lace cardstock to represent Santa’s face, ensuring that it is approximately 3-4cm smaller than the paper plate.
Step 3: Have your child carefully cut out the circle and glue it onto the centre of the plate.
Step 4: Draw a triangle onto the Christmas cardstock to represent Santa’s hat. You can also download free printable face features to use.
Step 5: Have your child carefully cut out the triangle and glue it onto the top portion of the face.
Step 6: Your child can now stick on Santa’s googly eyes and little red nose.
Step 7: Have your child grab some cotton balls and gently pull them so that they expand in size. These can now be glued down to represent Santa’s beard and a pom pom on Santa’s hat.
Step 8: Now you have a wonderful Christmas craft decoration that would look wonderful displayed on the front door for the festive season.
7. Cards

Everyone loves to give and receive a handmade card so your preschooler will love this activity. It will teach them about planning and organisation as you help them to think through the construction of the card. It can also teach them about showing appreciation to others by gifting them something as simple as a card.
The great thing about using a card making kit is that it generally contains all of the bits and pieces that you need, you just need to supply glue and scissors.
Equipment needed:
- Card making kit – the one shown here is the Uniquely Creative Oh What Fun Card Making Kit
- Non-toxic glue
- Child-safe scissors
Step 1: Have your child open up the card making kit and take a look at all of the fun pieces included.
Step 2: The Uniquely Creative themed card making kits include an instruction booklet which ranks the cards according to level of difficulty. The easy level is perfect for young kiddos.
Step 3: Select one of the easy level cards from the instruction booklet and gather all the pieces required for that card.
Step 4: Follow the instructions according to the booklet — easy peasy.
Step 5: Voila, your child’s card is complete and now you can help them to write a message for the intended recipient.
Craft Activities For 3 Year Olds: Perfect For Younger Preschoolers
Below we have listed some simple and easy preschool craft projects which are perfect for younger children around age 3. These activities are not too time-consuming and not too complicated. They will see the results of their efforts quickly which will give them a sense of satisfaction upon completion.
Try these easy and fun craft ideas with your child:
- Bunting or garland – have your child cut triangles out of sheets of patterned paper, punch two holes in each triangle and thread through ribbon. This could also be done with heart shapes as a Valentine’s Day decoration or egg shapes as an Easter craft.
- DIY binoculars – a fun and easy activity that teaches repurposing! Take two empty toilet paper rolls and bind them together with string or tape to create a pair of binoculars.
- Suncatchers – create a quick and easy suncatcher by having your child tear up small pieces of tissue paper in various colours. When they are done tearing, they can stick the tissue paper onto the sticky side of a square of clear contact paper. Cover the design with a second piece of contact paper and place it in a window where the sun will catch all of the colours
- Handprint crafts – Googling ‘handprint kids crafts’ will bring you many creative ways to use your kid's handprints in an art project. From flowers to giraffes the ideas are numerous and varied.
- Paper plate jellyfish - a quick and easy activity. Cut a paper plate in half. Have your child colour or paint the plate. Add glue to the cut edge of the plate and then your child can glue ribbons of varying colours and lengths all the way across the plate. Add a pair of googly eyes to the jellyfish and attach a ribbon to hang it.
Benefits of Drawing For Preschoolers On Their Crafting Journey
Drawing is often one of the first crafting activities that a child participates in. From as early as they can hold a pencil or crayon, they enjoy making their mark on paper and sometimes walls!
Drawing is also one of the first ways that young children express their creativity. As the child grows, these drawings begin to resemble people and places and become more complex.
Through drawing, a child develops their creativity. They are thinking, planning and imagining which are valuable concepts in craft.
The benefits of giving your child the opportunity to draw include:
- Improving their fine motor skills
- Improving their hand-eye coordination
- Allowing self-expression
- Enabling them to communicate feelings
- Allowing experimentation
Why Is Art and Crafts Important For Preschoolers?
Other than being a whole lot of fun, craft activities are very important in the development of preschoolers. Listed below are some of the benefits:
- Familiarises them with colours and shapes
- Develops fine motor skills
- Improves hand-eye coordination
- Increases attention span
- Increases patience
- Allows self-expression
- Introduces them to concepts of planning
- Allows them to use their imagination
- Gives them a sense of achievement upon completion
The types of art and craft activities that we can do with our young children are unlimited. They can be fun and messy, and a great opportunity for them to strengthen muscles, build skills and embrace their creativity. So, why not choose an activity from the list and get crafty today!