Stamping Techniques: Tips and Tricks for Enthusiastic Crafters

Stamping is a fantastic creative outlet and a versatile craft that can be applied to your scrapbooking, card making and paper crafting. However, if you’re a beginner it can be daunting to know where to start. We have created this guide full of stamping tips and tricks to help you on your journey.
What is Stamping?
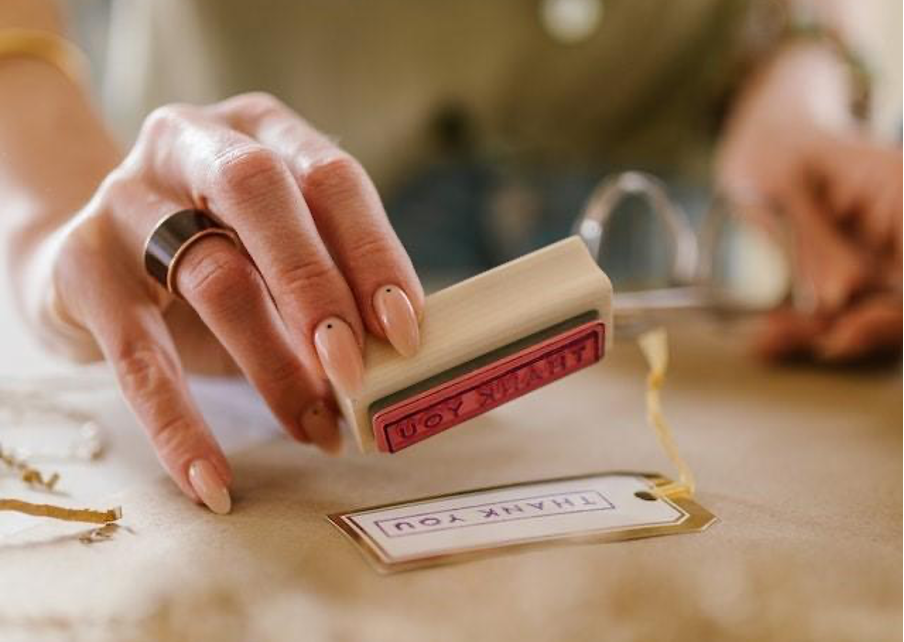
Stamping is essentially done by applying ink or pigment to a stamp and then pressing it onto a surface, allowing the design to be transferred to that surface.To get started you will need:
- A stamp
- Paper or cardstock
- Ink or pigment
- Paper towel or wipes
- Stamping platforms
Stamping platforms such as the MISTI or Tim Holtz Stamp Press are fantastic to use for precision stamping, stamp layering, stamp masking etc. However, this is optional for beginners.
Popular Stamping Techniques
When you have mastered the basics of stamping, there are many more stamping techniques for cards and papercrafts that you can explore. Take your stamped images to a whole new level!
Here are three of our favourite stamping techniques. You’ll need a couple more supplies for these techniques, but it’s totally worth it.
Embossing
This technique involves adding an embossing powder to the stamped image to create a special effect.
Follow these steps to emboss:
- Select a piece of paper to stamp onto. In the beginning, it is advisable to practice on scrap paper.
- Choose the stamp you wish to use.
- Ink your stamp with an embossing ink such as Versamark Ink.
- Stamp your image onto your paper.
- Cover the stamped image with embossing powder and ensure that it has adhered to all parts of your stamped image, be sure to remove any excess. Tip – you can pour off the excess and add it back to your jar of embossing powder for future use.
- Using your embossing/heat gun carefully aim the heat at your image.
- Once you can see the embossing powder melting move to another part of the image. You do not want to overheat the powder.
- Keep heat embossing, focusing on all of the areas of the image until melted.
- And now you have an embossed image!

Copic Markers
Copic Markers are a Japanese brand of alcohol ink maker loved by artists, designers, illustrators and crafters. They are high-quality markers with a smooth application and a broad range of colours to choose from. They have a chisel nib at one end and a brush or bullet tip at the other.
You can use these makers for colouring your image once it has been stamped. The steps for this technique are as follows:
- Select a piece of cardstock to stamp onto that is compatible with alcohol makers such as Copic Blending Card.
- Choose the stamp you wish to use.
- Ink your stamp with an ink compatible with alcohol markers such as Memento Ink.
- Stamp your image onto your cardstock.
- Ensure that your ink is dry before you start colouring.
- To begin colouring, work in small sections with the lightest colour first.
- To add shading, work in small sections again, this time with the darker shade.
- Go over this darker colour again with your lighter colour and it will pull the colour out and blend the shades. Repeat this process until you achieve your desired look.
- And now you have a beautifully coloured image!

Stamp Masking
The masking technique involves covering or ‘masking’ images that have been stamped, or part thereof, before stamping another image. Once you remove the masking paper you will see that you have created the illusion of depth on your card.
As this technique is a bit more involved, we have created a Stamp Masking Video Tutorial on YouTube that will show you step-by-step how to use this technique.

The Different Types of Stamps
There are so many different types of stamps available. Rubber, photopolymer and acrylic stamps are some of the most popular on the market. Learn how to use them and all about their unique qualities.
How to Use Rubber Stamps
Ensure that your stamp is clean and dry. Ink your stamp by dabbing the stamp pad onto the stamp then press it firmly onto the surface you wish to stamp onto.
Rubber stamps have the following qualities:
- wood mounted
- red rubber
- great quality
- fine detail
How to Use Photopolymer Stamps
To use Photopolymer stamps you simply peel your photopolymer stamp off the acetate sheet that it comes on, wipe it to remove any coatings from the manufacturing process, then dry and press onto an acrylic block.
Photopolymer stamps have the following qualities:
- clear
- firm
- great quality
- fine detail
- stain easily (and that’s ok)
- crisp clear images perfect to colour cute images
- work well with a stamp press machine
How to Use Acrylic Stamps
To use an Acrylic stamp, you need to remove it from the packaging and press onto an acrylic block. Coat the stamp evenly with ink, ensuring that no ink has gotten onto the acrylic block.
Acrylic stamps have the following qualities:
- clear
- soft
- delicate
- jelly-like
- cheaper option
- great for mixed media backgrounds
Stamping Inks Explained
Different types of ink pads and pigments will give you different results depending upon the techniques used. Here’s a list of the most popular stamp inks and their qualities.
Distress Ink
- Water-reactive
- Great for techniques
- Great for blending
Dye Ink
- Water-based
- Dyes the paper
- Absorbs into paper
- Thinner ink
- Transparent
- Fast drying
- Firmer ink pad
- Muted look on darker paper
Pigment Ink:
- Fade-resistant
- Water-resistant
- Sits on top of paper
- Opaque
- Dries slowly
- Soft spongy ink pad
- Great for heat embossing
- Better brighter results on darker paper
Chalk Ink:
- Similar qualities to a pigment ink
- Chalky
- Sits on top of paper
Memento Ink:
- Great for alcohol markers
- Great for Copic Markers etc
Archival Ink:
- Great for colouring with water-based mediums (distress inks, watercolour paints, watercolour pencils, acrylic paints etc)
- Permanent
Staz-on:
- Permanent ink that stamps on most surfaces
Versamark Ink:
- Sticky clear ink for heat embossing
How to Re-Ink Stamp Pads
If you notice after a while that your stamp pad seems dry, you can actually re-ink or refill many stamp pads. You will know when it’s time to re-ink as your stamped images will not be coming out as crisp as they usually do. Refills generally come in a small bottle and you select the same shade as your ink pad.
When it’s time to refill your stamp pad, you will want to follow these steps:
- Protect your work surface by putting down some newspaper or similar.
- Open the ink refill and turn it upside down above your stamp pad.
- You want to re-ink your pad in a systematic way to ensure that you get complete ink coverage. Start at one end and work methodically to the other end and back again if necessary.
- Start off lightly, you can always go back and add more ink.
- Apply gentle pressure to the ink bottle to ensure that you get a steady flow of ink.
- Do not be tempted to use your freshly inked stamp pad straight away, instead let it sit for up to half an hour before use.
What Paper to use for Stamping
A good quality smooth cardstock will give you the best results for simple stamping. Thicker paper is better than your average 80gsm copy paper as it is more durable and can tolerate various mediums such as inks and water. Uniquely Creative stocks a range of quality cardstock that is suitable for stamping.
If you plan on colouring the stamped images, then you will need suitable paper and ink for your colouring medium. Find out about the different paper sizes and GSM measurements.
If using water-based products, choose a good quality watercolour paper, cotton watercolour card such as that sold by Uniquely Creative is perfect for use with watercolours, or if using alcohol-based markers use a paper which doesn’t bleed such as Copic Blending Card.
How to Care for Your Stamps
Your stamps are a great investment and they will last a very long time if you take proper care of them.
To get longevity out of your stamps follow these steps:
- After use, stamp onto a scrap of paper to remove any remaining ink.
- Gently wipe your stamp with a baby wipe, cloth, or damp paper towel.
- Do not apply too much moisture and ensure that your stamp is dry before storing.
If you are looking for stamps to get you started with this craft, or if you are looking to add to your existing collection, then Uniquely Creative has a great range of acrylic stamps and photopolymer stamps available.
Related Questions
How do you stamp perfectly?
To ensure that your stamped image is perfect, make sure that you fully ink the stamp so that you have good even coverage. Once the stamp is inked, hold the stamp carefully and press it straight down onto your project. Apply even pressure but do not press too hard and do not rock the stamp.
What are the different methods for stamping?
There are many different methods of stamping. Three common methods include embossing, Copic Markers and stamp masking
Is stamping an art technique?
Stamps themselves are just a crafting tool, but the way that they are used can result in artistic creation, especially when mixed media techniques are combined with stamping.
What is a photopolymer stamp?
A photopolymer stamp is made of transparent plastic. They are high-quality stamps that give a crisp, clean image transfer. These stamps are heavier and thicker than acrylic stamps. You can use photopolymer stamps with an acrylic block, a stamping block, or a stamping platform
What is an acrylic stamp?
An acrylic stamp is used in crafting. It has a soft gel-like feel to it. To use it, you peel it off the packaging and stick it to an acrylic stamping block. As it is clear, it is easier to position on your project.
What is a rubber stamp?
A rubber stamp refers to an image or pattern that is carved, engraved or moulded into rubber. Generally, the rubber is then mounted onto a wooden block and is used in crafting to transfer the image or pattern onto the crafting project with the use of ink or pigments.
Wendy
April 01, 2023
the best tool I purchased for stamping was a stamping platform…no more uneven pressure or missed inking