Summer Holiday Tutorial - Julie Schinkel

Uniquely Creative Products Used:
UCP2301 Summer Cocktails, UCP2304 Garden Party, UCP2307 Citrus Blooms Fussy Cuts, UCP2311 Creative Cuts, UCE1727 Laser Cut, UCD2028 Summer Icons Dies
Other Products Used:
UNIQOLOUR Markers (Light & Dark Yellow), Trimmer, Scissors, Adhesive Tape, Glue Blue Pen (or colour of choice/black), Glossy Accents, White Cardstock (for die cut)
Instructions:
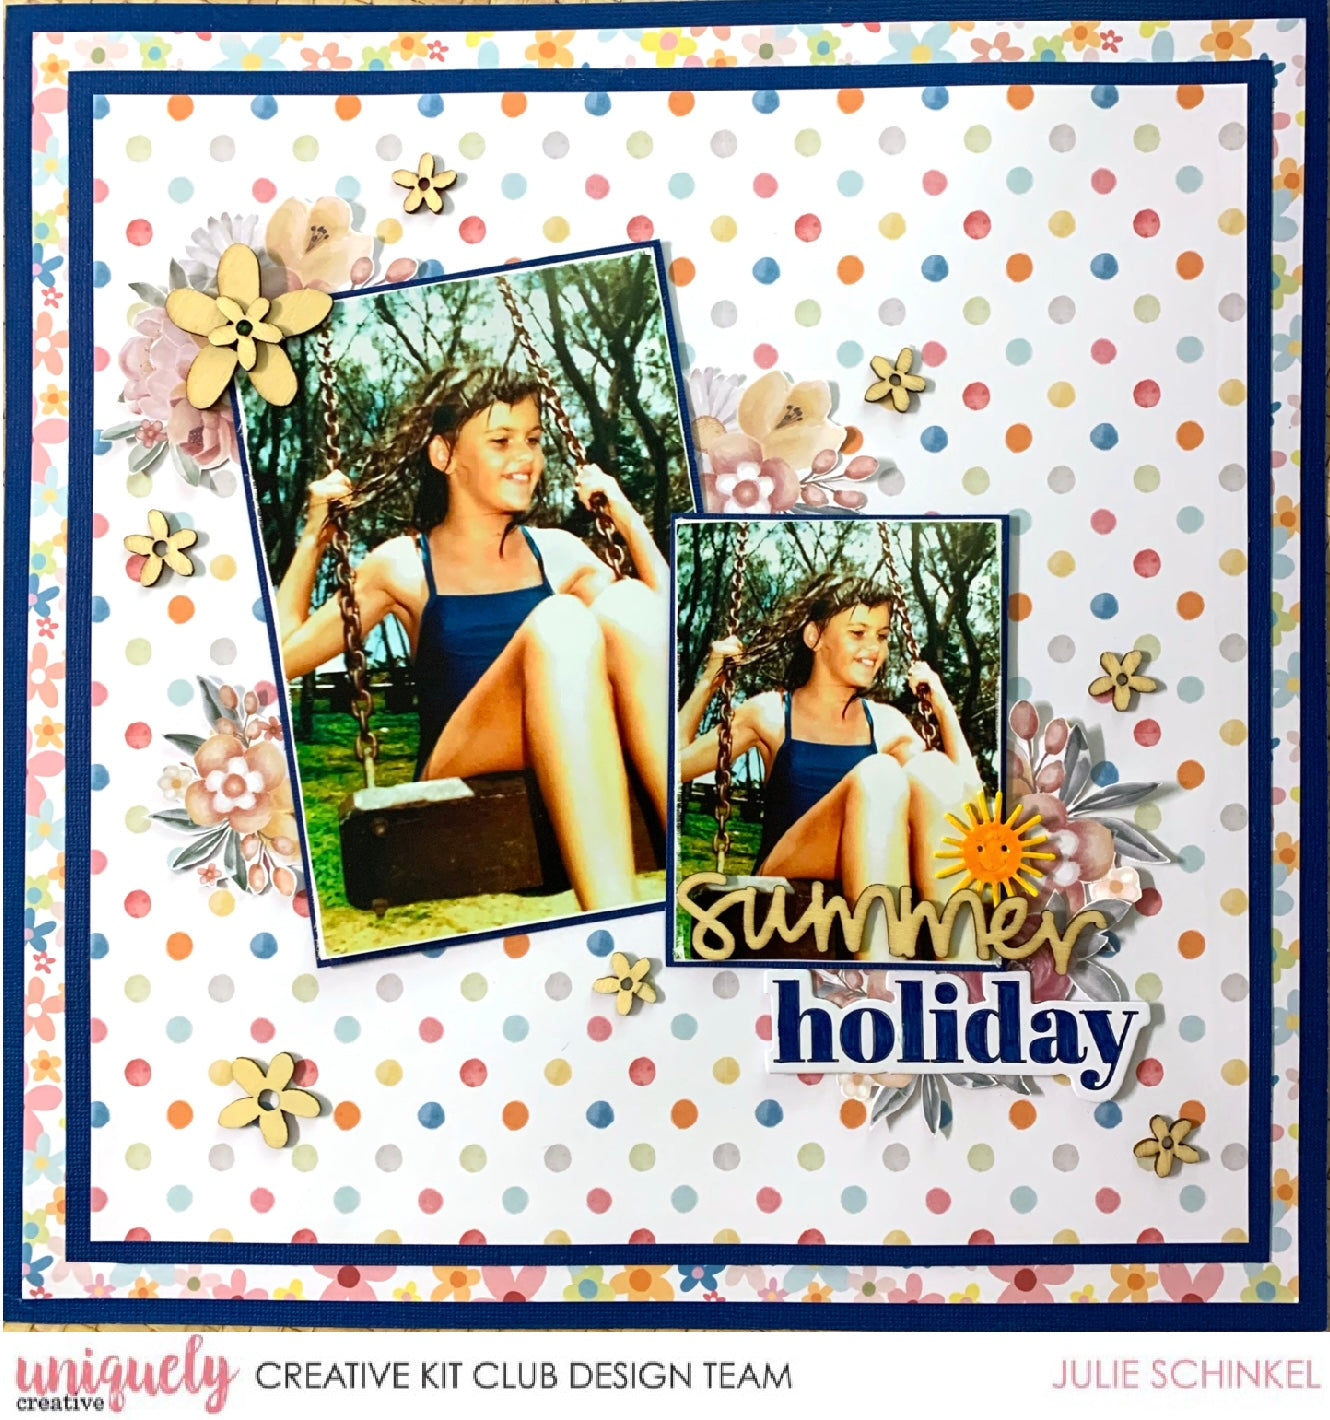
1. Cut a 1" frame from some coloured cardstock of your choice. Julie has used dark blue to match her swimsuit as that’s the colour that pops in the photos.
2. Trim a piece of the Garden Party paper down to 11.5” x 11.5” then cut a 1" frame from that piece.
3. Cut another 1" frame from the same coloured cardstock - you should be able to use the centre piece cut out earlier.
4. Trim a piece of the Summer Cocktails paper down to 10.5” x 10.5”. Adhere all pieces together to form the layout base.

5. Distress the edges of your photos using a sanding block, then mat onto some of the cardstock colour of choice. Adhere to the middle of the layout base, overlapping as shown.

6. Fussy cut some of the floral elements from the Citrus Blooms Fussy Cut paper and die cut the sun from white cardstock using the Summer Icons die set.

7. Adhere the fussy cut pieces as shown.

8. Recolour the word “holiday” from the Creative Cuts using a fine tip marker. Depending on what colour cardstock you have used, recolouring the word to match may not work over the original light blue colour. If this is the case, use black to recolour the word
9. Colour the little sun die cut using light and dark yellow Uni-Colour marker (or similar). Colour the centre with the darker yellow blending out to the lighter yellow on the sun rays. Coat with Glossy Accents, set aside to dry then adhere to the layout.

10. Adhere the word “summer” and flowers from the Summer Holiday Laser Cut
